Followers

Friday 24 June 2022

Blue And Green

Hello everyone, I hope that you are keeping well. I have a couple of projects to share with you today, showcasing stamps that we brought to you on last month's TV shows on Create and Craft.

My first card uses a variety of stamp sets, but the hero of the card is the lovely dragonfly collage from the Fragile Wings stamp set. I decided to stamp this image on a coloured background, a deep teal colour, for a change. We often use black, kraft, grey, etc., but I wanted to reflect the wonderful dragonfly colours in the card background. I used Versafine Clair Nocturne to stamp the image, and Koh-I-Noor pencils to colour the image. I used white pencil first to create a base to add the rest of the colours, and to give a real sense of light to the image.

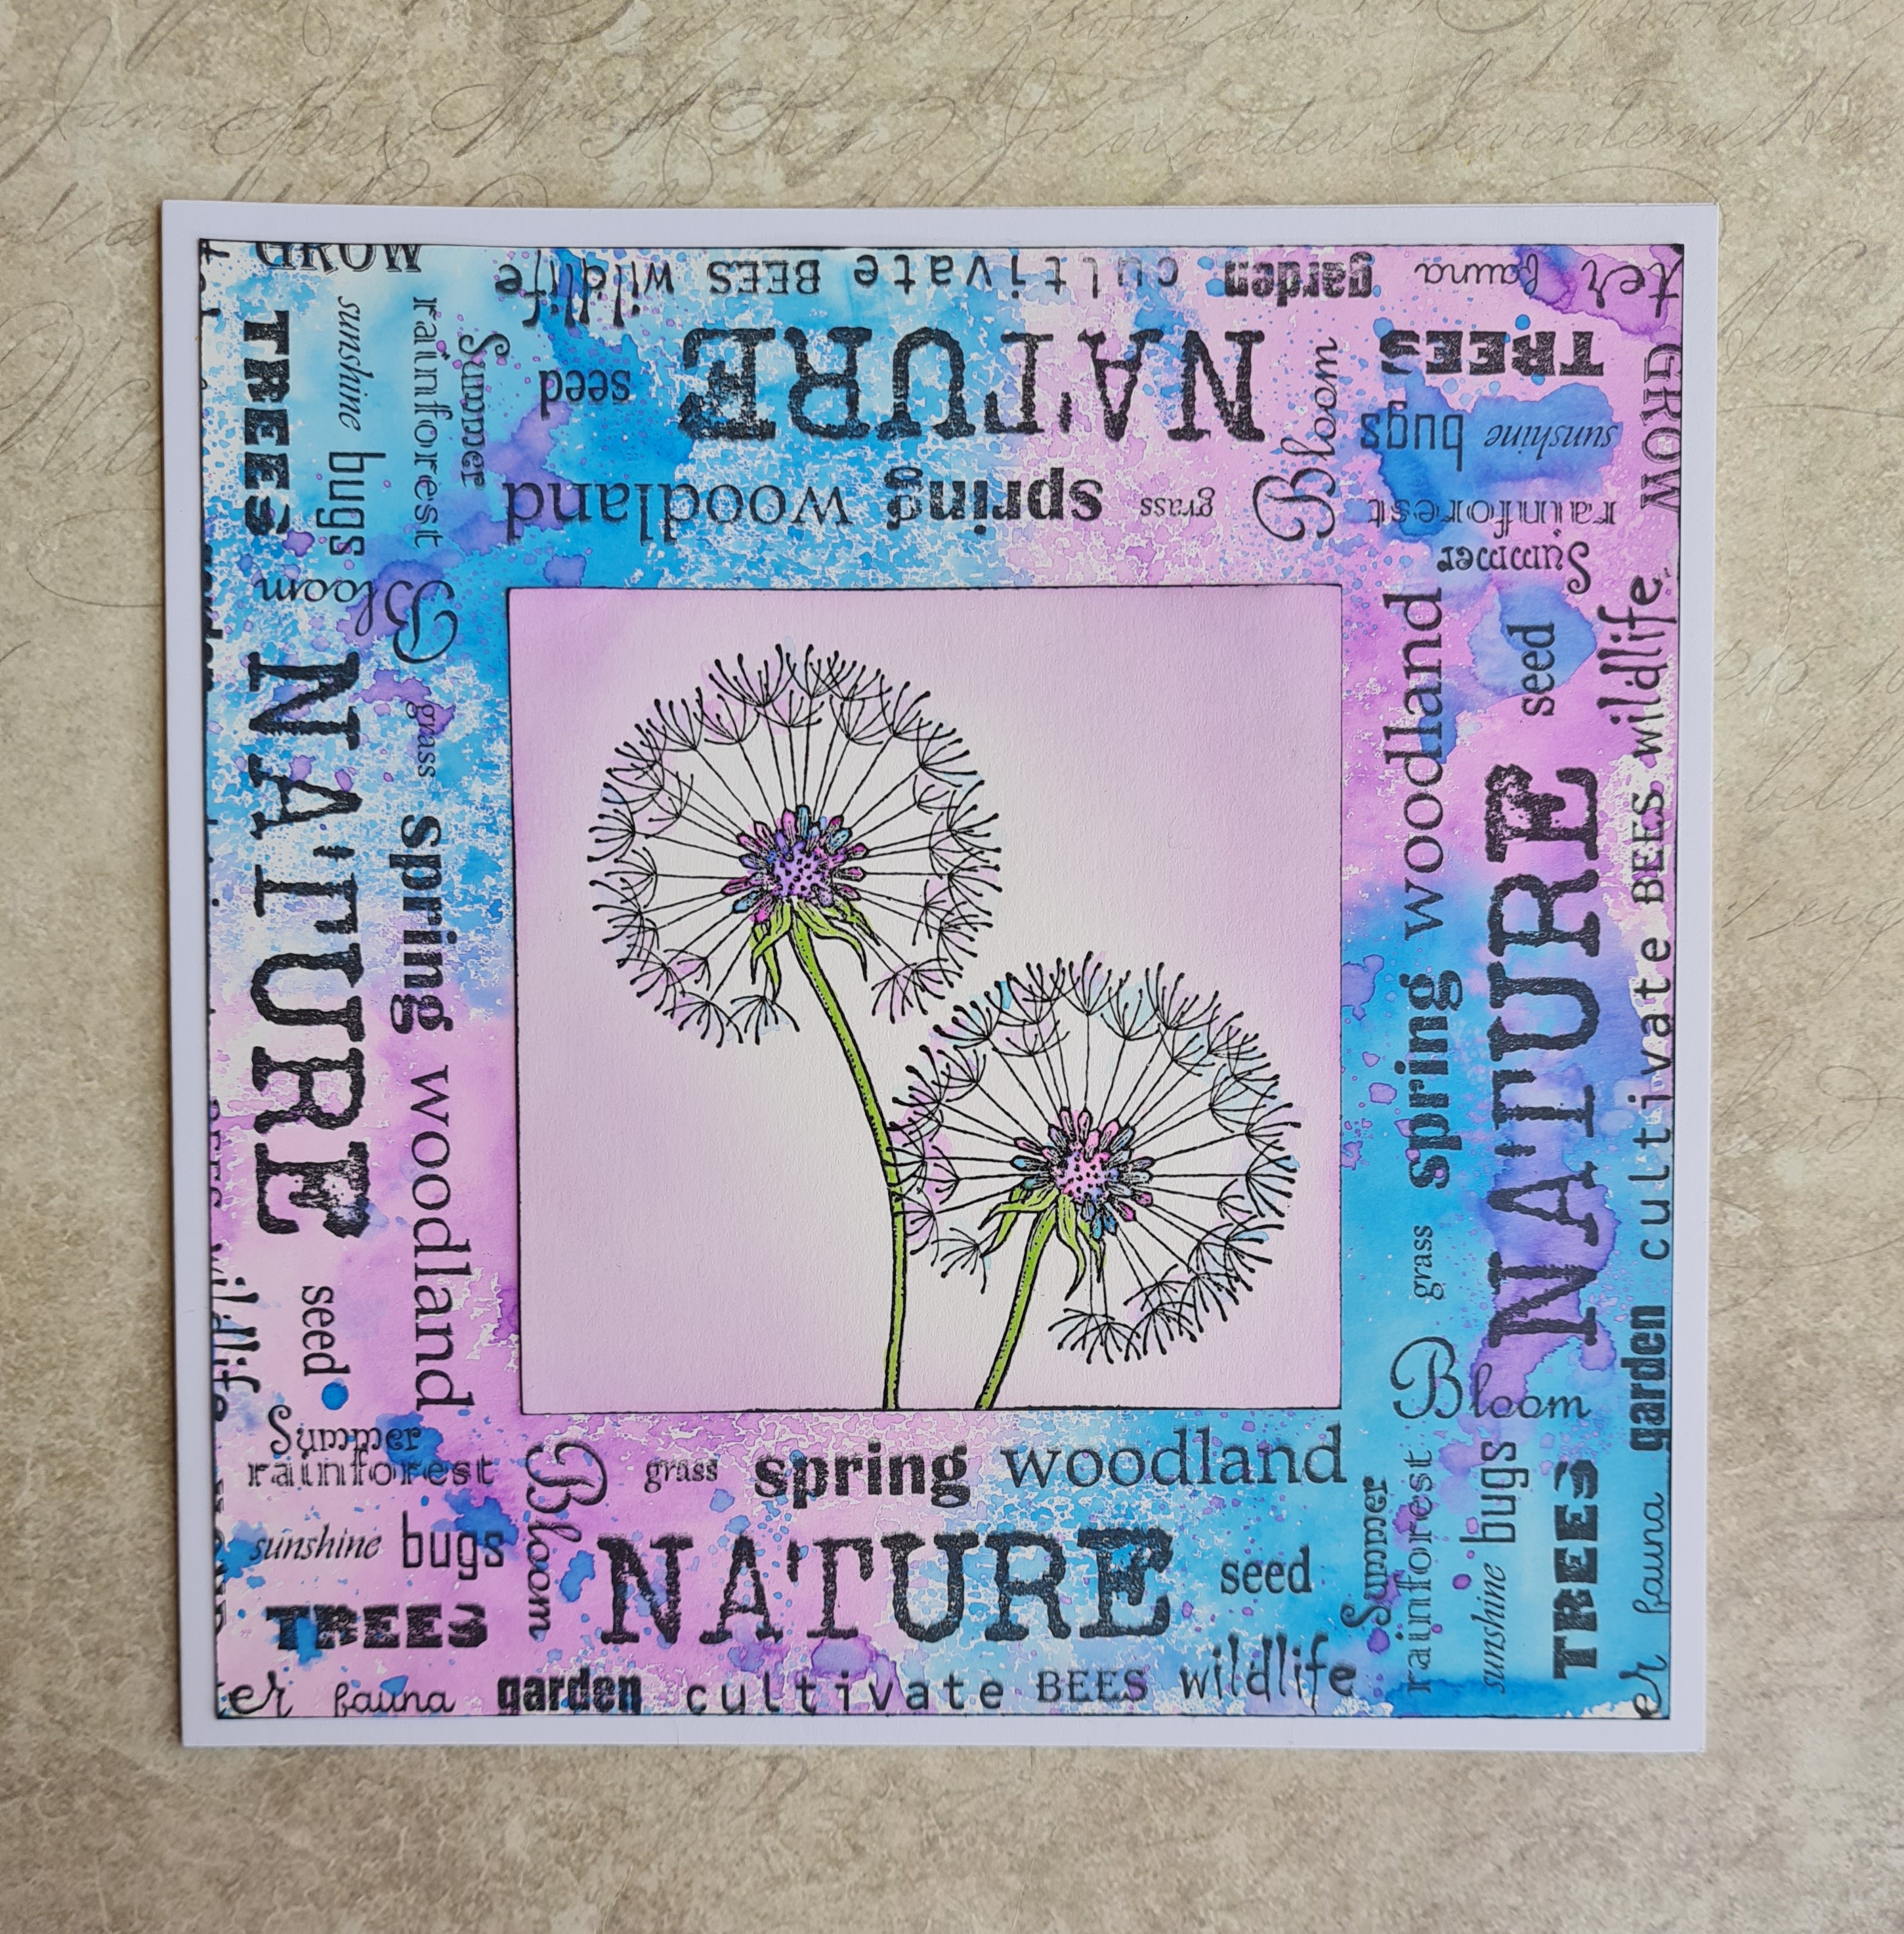
I created a background using green and blue Distress Ink, and then added stamps from Just Useful and Ace Card, using blue, green and black ink. I matted both layers using black card.

To create my second card, I coloured some Drawing Cartridge using tea, a favourite technique of mine. It's a really quick way of adding colour to a background and creates a vintage feel to a project. I stamped the playing card from Ace Card randomly over the background, and added a touch of turquoise around the edges using a watercolour pen, brush and water. I stamped the large image onto another piece of the rawing Cartridge and coloured the image in the same way using turquoise, green and brown watercolour pens. I edged the layers with the same dark brown ink that I had stamped all of the images with.

I chose to use a piece of scrap corrugated packaging as a mount; I dry brushed the edges with paint to match my colour scheme. Always keep that packaging, you never know when it will come in handy!


I had great fun creating these cards. I hope that they have inspired you. Thanks for stopping by, take care, xx


Sunday 12 June 2022

Creating a Journal Page and Some Added Extras!

Hello everyone, I hope that you are keeping well. I have a project or two to share with you today showcasing stamps from last month's TV shows on Create and Craft. 

My first project is a two page journal spread, created in a large journal, almost A4 size. It is an American size, so not exactly the same measurement. I like to experiment in a journal, as I can often get ideas for cards and other projects when I am messing about creating journal pages. If I do not like what I create, I can just turn the page, and start again, there is no judgement, my journal is just a place to try out ideas.

I started both sides of the journal spread by inking up the large blank stamp from Slim Word Strip 1 with Distress Oxide, and spritzing it lightly with water. I pressed the stamp down the edge of each page. I chose a lovely moss green. I also stamped the stamp again onto a piece of scrap Drawing Cartridge for later.

Once the edges were dry, I stamped a couple of the word strips over the coloured edges using Versafine Clair Nocturne. I chose random stamps from Making More Marks, and Not More Flowers! using a combination of black orange and green ink to create a background over the pages. I stamped the lovely dandelion clock into the centre of the large circle on both pages, and added some of the olive gree ink within the circle to highlight the flower.


I also added some colour to the flower using Zig Clean Colour watercolour pens, a brush and some water. Finally, I masked up the strip word stamps, and inked up two of the large words on the stamps, before stamping them onto a piece of the spare Drawing Cartridge that I had coloured previously. I cut them out and scrunched these for a bit of added texture before adhering them to the page. 

I did not add any background colour to the page, the stamps themselves were enough I felt, but you could add more colour if you wish, I like the white space, it gives the stamps room to breathe.

Also available on the show were some fabulous embellishments. The first were some really useful acrylic rings, that could be coloured and stamped over. I created a card using the pretty echinacea style flower, which I stamped onto a Distress Ink background. I coloured this with watercolour pens as before, for a soft finish. I added a sentiment from the same stamp set, and then I coloured both pieces of acrylic with alcohol ink. Once they were dry, I stamped the large ring with script from Ace Card, and the little circle with a bee from Honey Bee. These embellishments are just so useful for highlighting a key area of your project, but light enough not to add to your postage costs.

Finally, we had a new sheet of shapes from Tando in three different shapes and two different sizes. These word pebbles are very versatile and can be painted, coloured, textured to create all sorts of effects. I have three samples here to show you just how effective they can be. The first example has had Drawing Cartridge added over the top, and I have added a word from one of the strip stamps, plus the little bee from the Honey Bee stamp set once again.   

The second has another word from one of the strip stamps and the Large Crackle Background over a simple painted background. 

Finally, I added coloured texture paste to  the last pebble and stamped the word strip directly into the paste. Once the paste was dry, I added some black paint, which I rubbed away after a moment or two.


I hope that you have enjoyed my projects, and will be inspired to try some of these ideas out for yourselves. Thanks for stopping by, take care, xx


Wednesday 1 June 2022

In The Frame

Hello everyone, I hope that you are all keeping well. I have some projects to share with you today showcasing stamps that were featured on last month's TV shows on Create and Craft. Each of the projects were created in a very similar way, just using a different focal stamp and colours.

I started my first two projects by creating a wrinkle free distress background - adding Distress Inks to my craft mat and spritzing them with water, before placing a piece of Drawing Cartridge over the top to pick up the colour. I dried the background, and patted the Drawing Cartridge onto the craft mat again, to get a second layer of color and dried the background again.

I selected one of the long word strips from the Slim Word Strip 1 stamp set, and stamped it around the edge of the background to create a frame. I started partway in on the first side, and that allowed me to follow around each side in the same way until I had finished. 

I chose the Dandelion Clock image from Not More Flowers! which I stamped twice and embossed with clear embossing powder. I coloured the image with Zig Clean Colour watercolour pens, and then edged the background with Distress Ink. I ran a black inkpad around both layers of card before I attached them to the card blank. This saves using black card as a matting layer.

I chose a subtle yellow/green background for my second card, and the pretty large daisy or gerbera image. I used the same strip stamp, but simply varied the section that I chose to stamp.

The last background was completed by blending Distress Ink over the background with blending brushes and then spritzing the background with water. The effect is a bit softer, but definitely takes longer! I used the pretty echinacea style flower, colouring it to match the background.

I really enjoyed creating these cards, and hope that I have inspired you to try something similar. Thank you for stopping by, take care, xx


Related Posts Plugin for WordPress, Blogger...