Followers

Wednesday 25 January 2023

Sharing Some Tips With You

Hello everyone, I hope that you are keeping well, I have a final few projects to share with you from this month's TV shows today.

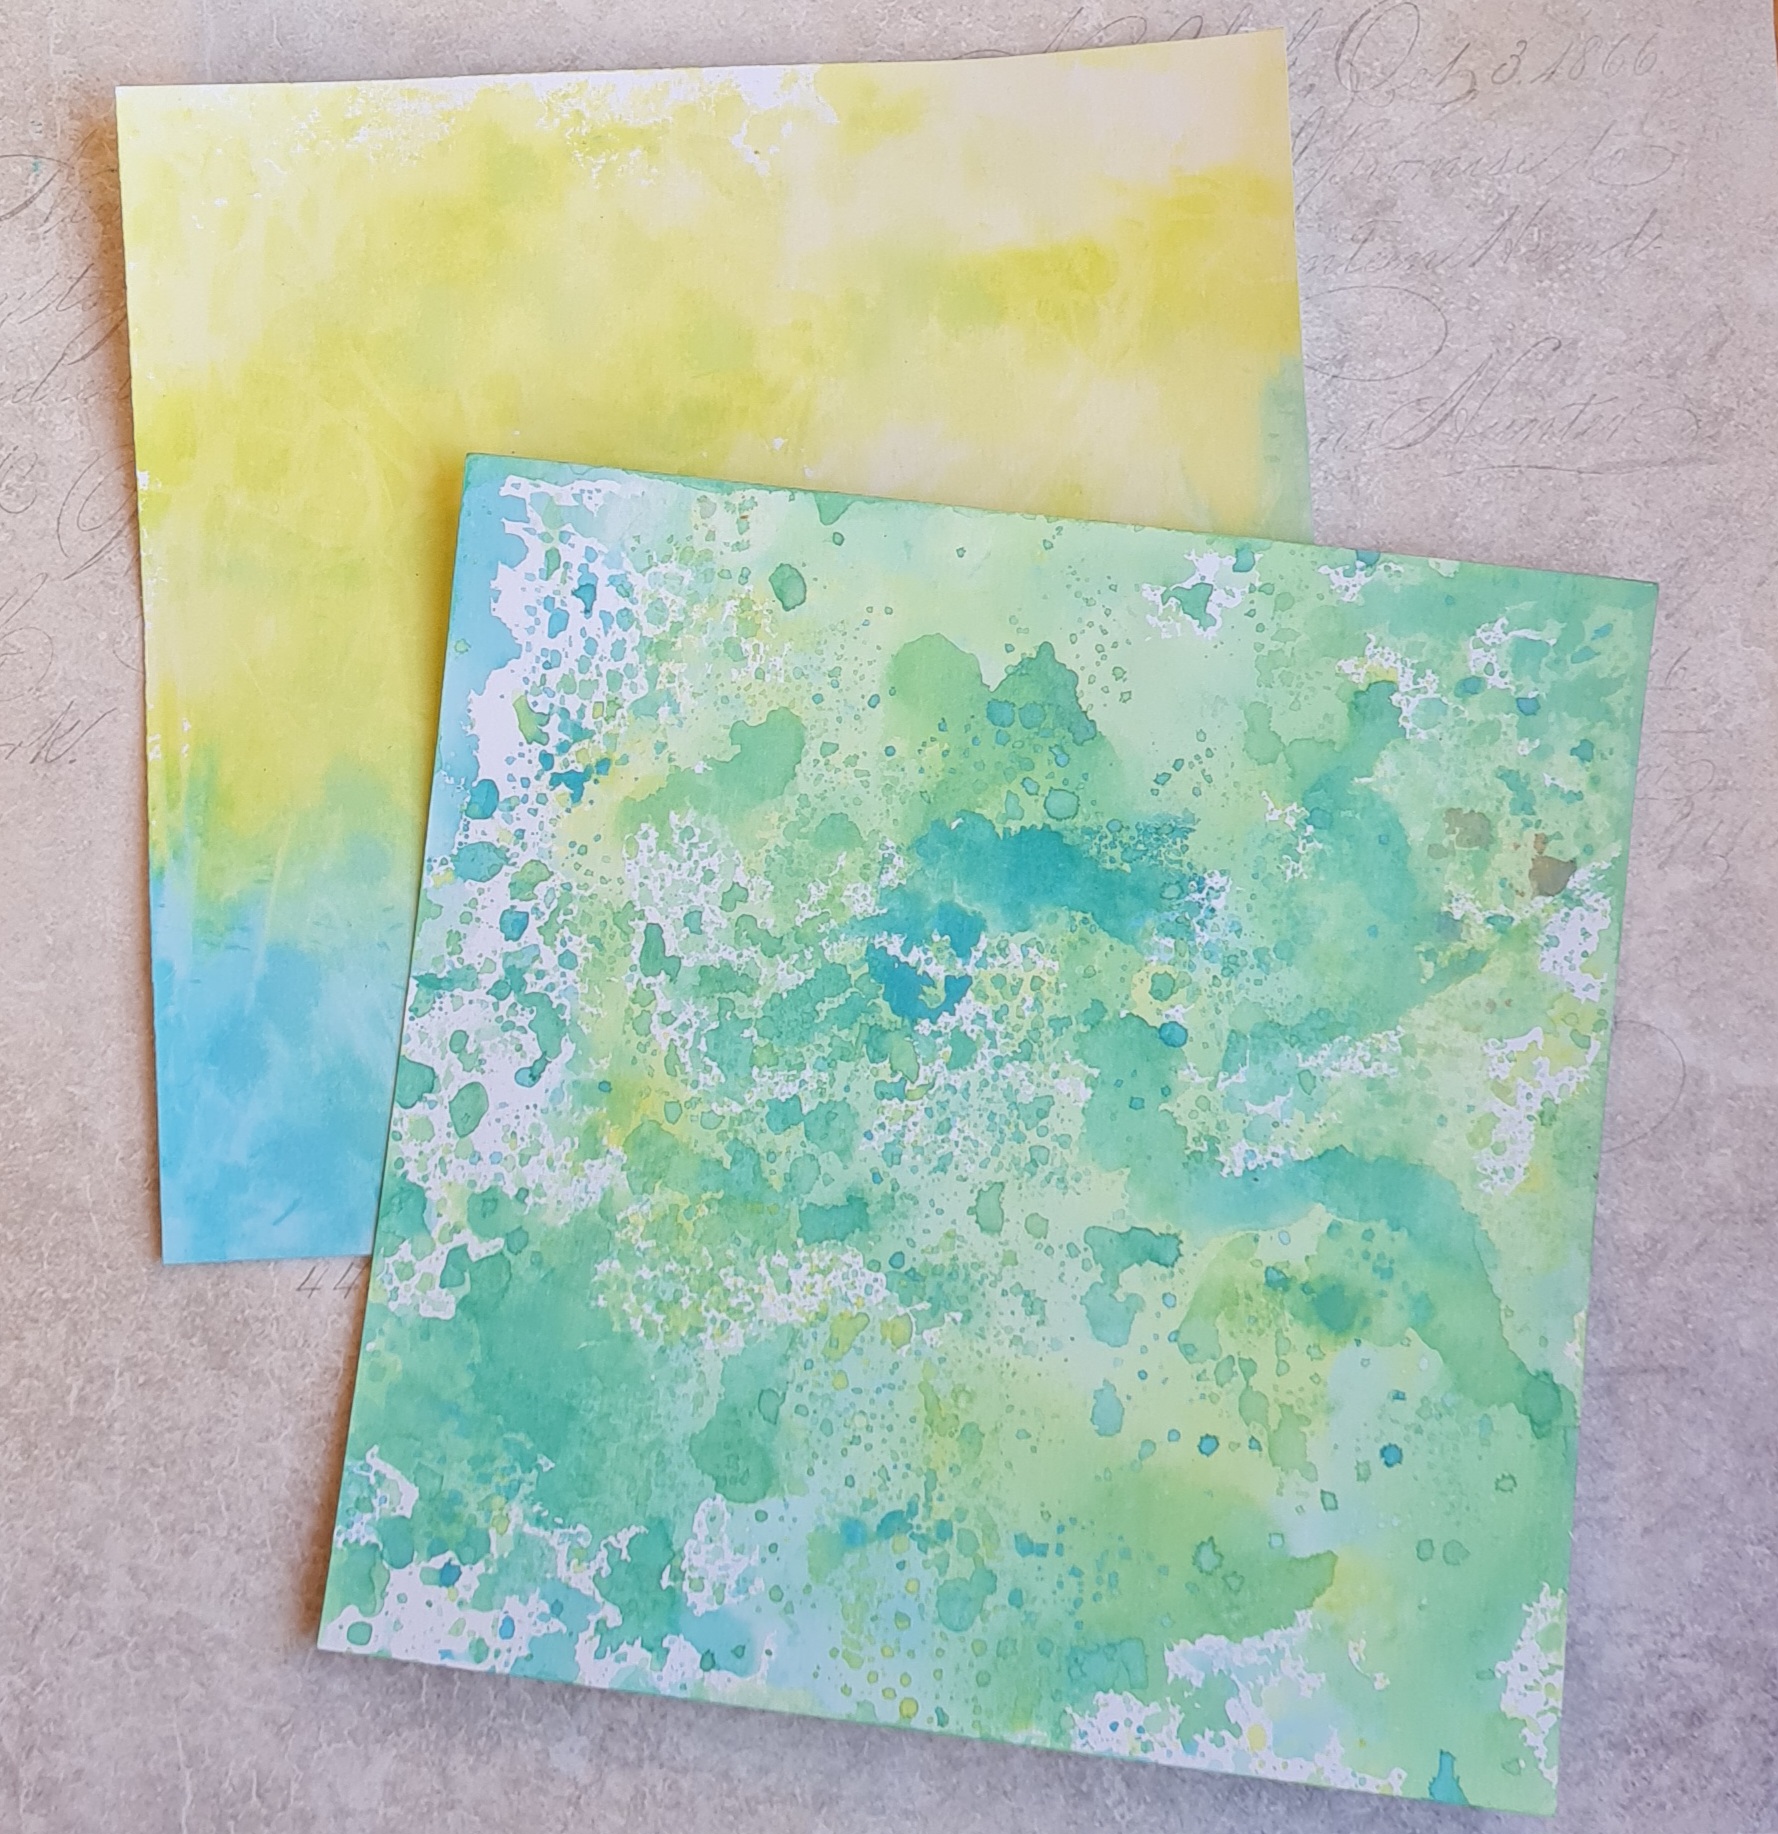
To create my first project, I smooshed some Distress Oxide onto a craft mat. I used Twisted Citron and Broken China, which I spritzed with water. I placed a piece of Drawing Catridge over the top, and then turned it over, and presseded a piece of scrunched up cling film to the surface, before leaving the card to dry. I used another piece of Drawing Cartridge to mop up the left over ink on the craft mat, and I will use that background for another project.


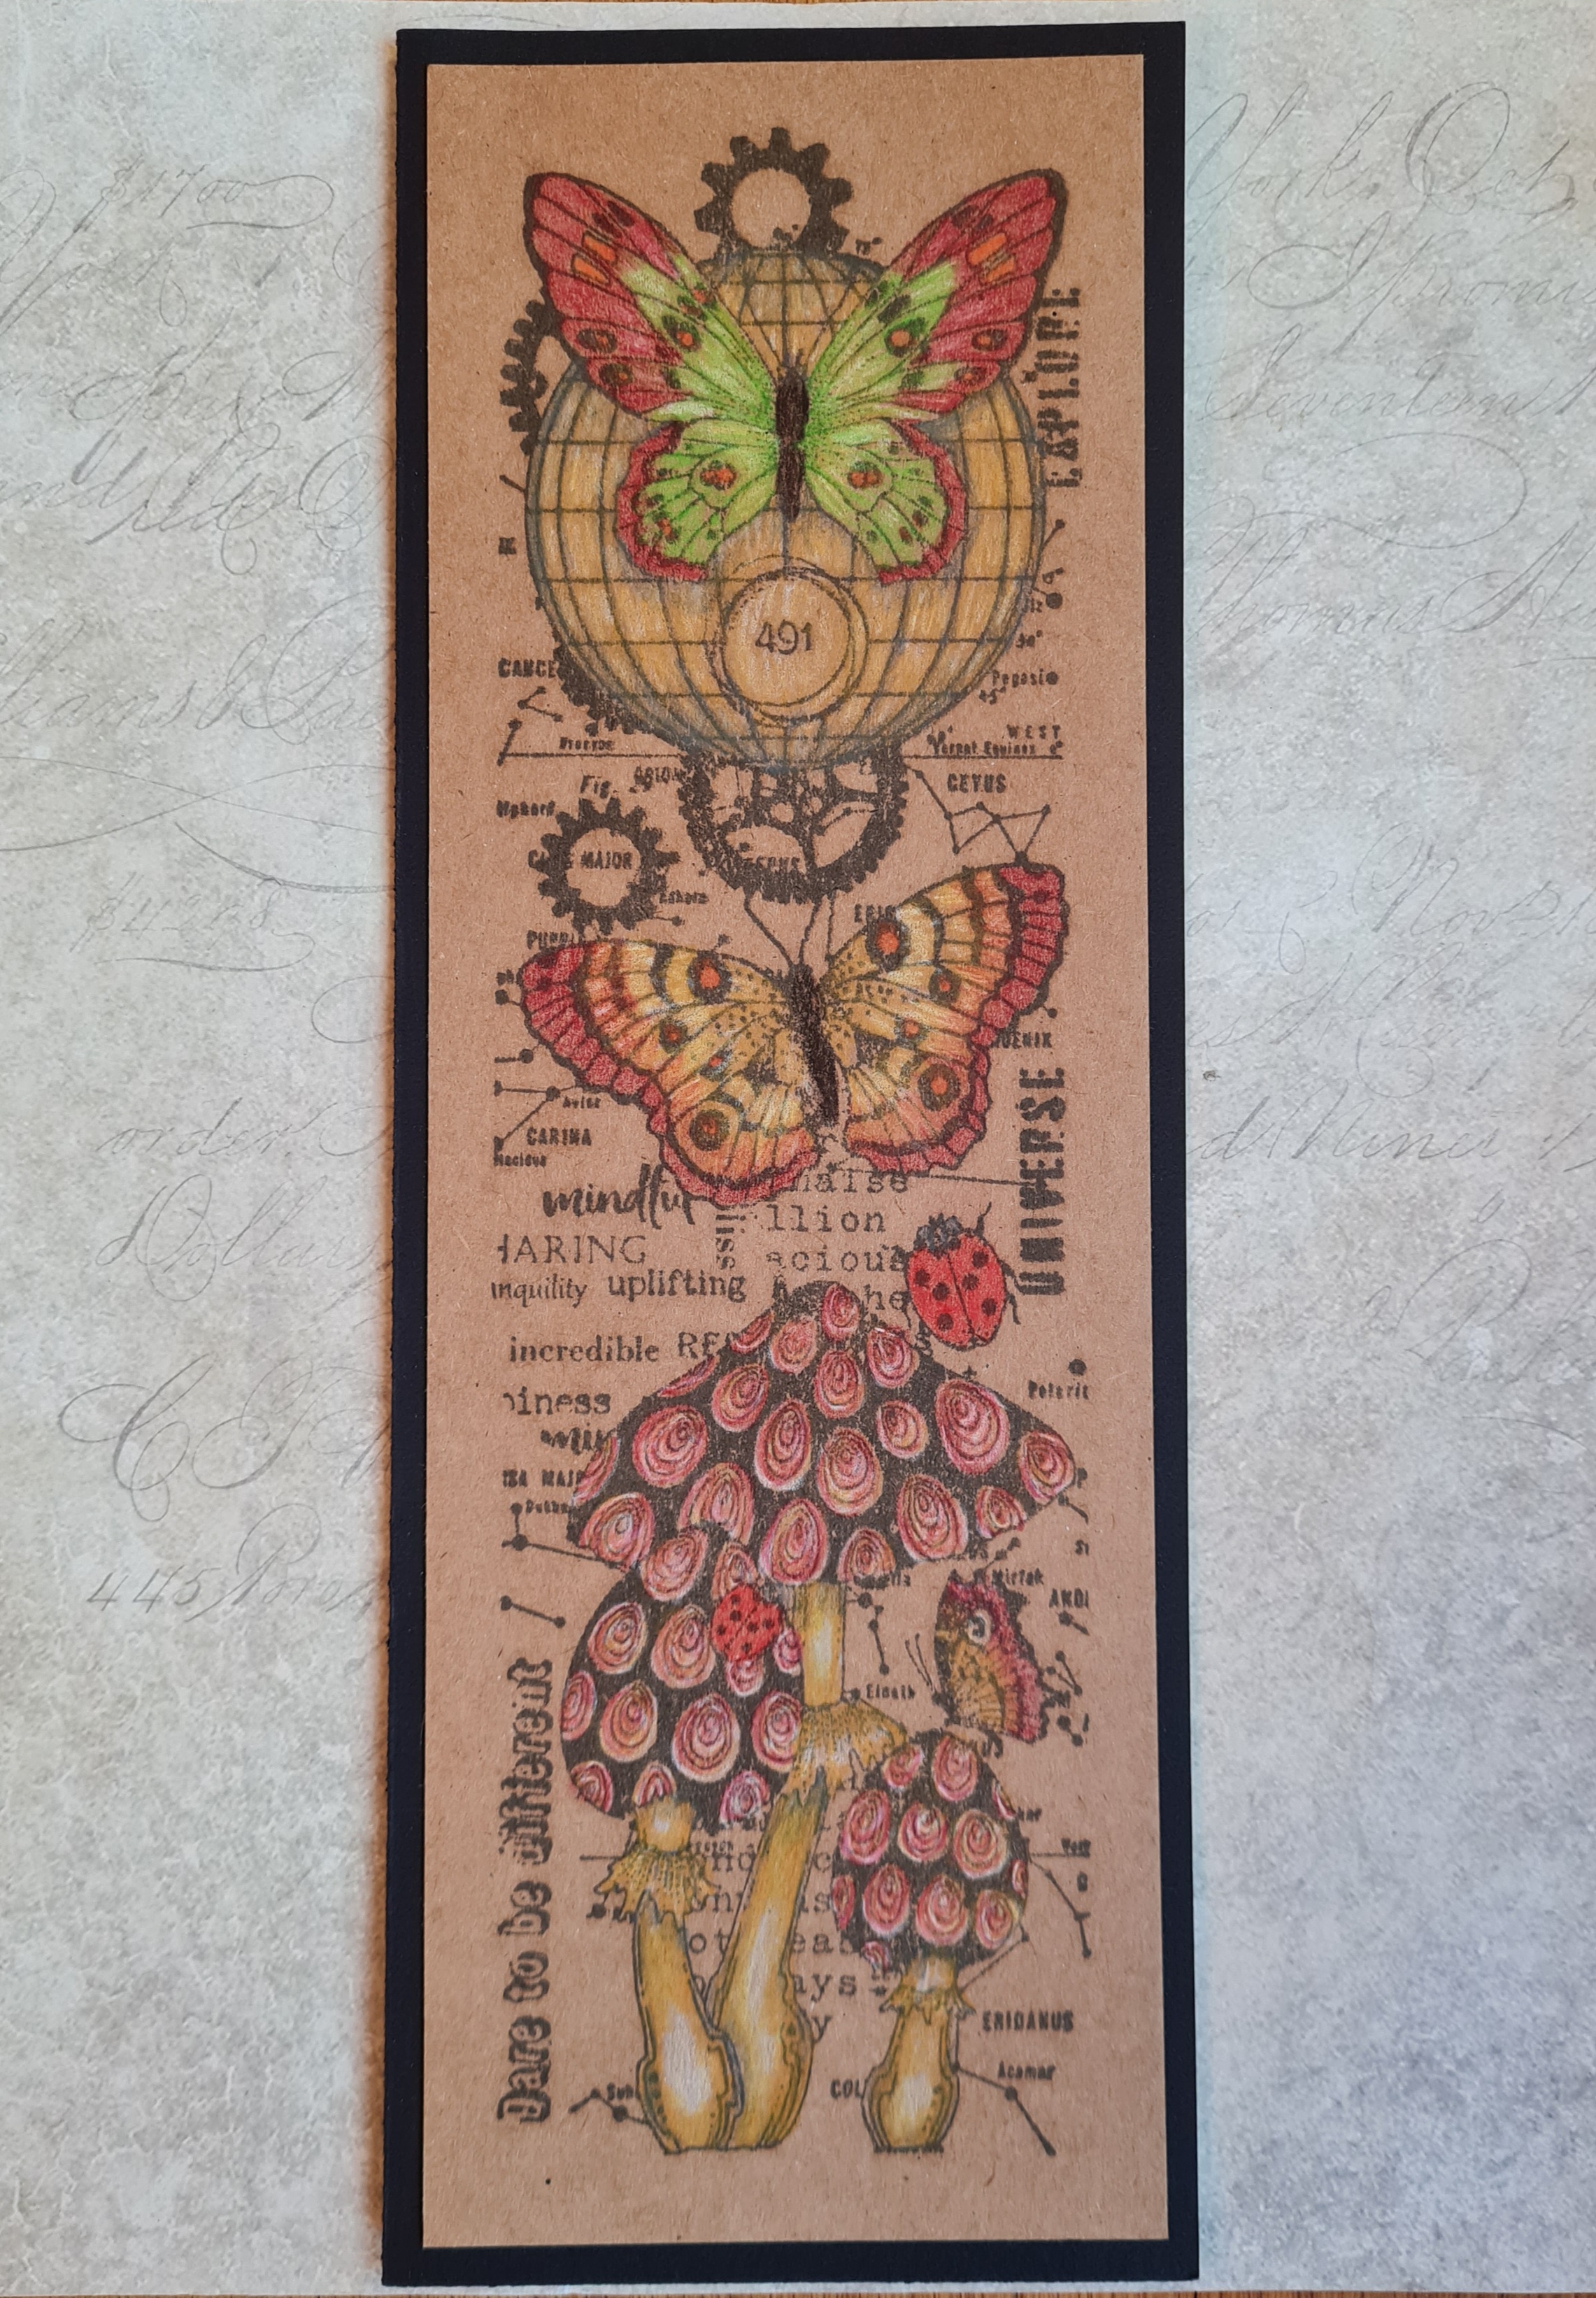
I used the Universal Butterfly stamp to stamp just the bottom portion of the stamp three times onto some patterned paper, using co-ordinating colours of ink. I chose an olive green, a deep pink and a claret. I cut the todstools out for later. Once the background was dry, I used the same three ink colours to stamp a foliage image from Silhouette Grasses along the bottom half of the page. I used first and second generation stamping to create some depth to the design. I added a couple of dragonflies from Just Butterflies to the 'sky' area of the background, and also a sentiment from Technical Butterfly, I coloured elements of the toadstools with coloured pancils, and stuck the images to the background. On some of the toadstools, I covered up the ladybirds, I moved the smaller toadstools around to make the colour groupings more random, and I added the butterfly to a toadstool over another ladybird. I did not want all three toadstool groupings to look identical, but more individual. I also varied the height of the middle group. Once the images were glued down, I added some shading at the base of the images with a grey pencil to ground them.

My second demonstration on this show was a very quick card using the Mini Slim Words. I used a gelli plate and Distress Ink to add some colour to a piece of Smooth Stamping Card. I chose Squeezed Lemonade as my base colour. I then inked up the heart strip with Kitsch Lemonade Distress Ink and stamped over the background until I had covered all of the yellow. I moverd the strip along slightly each time to make the pattern slightly random.

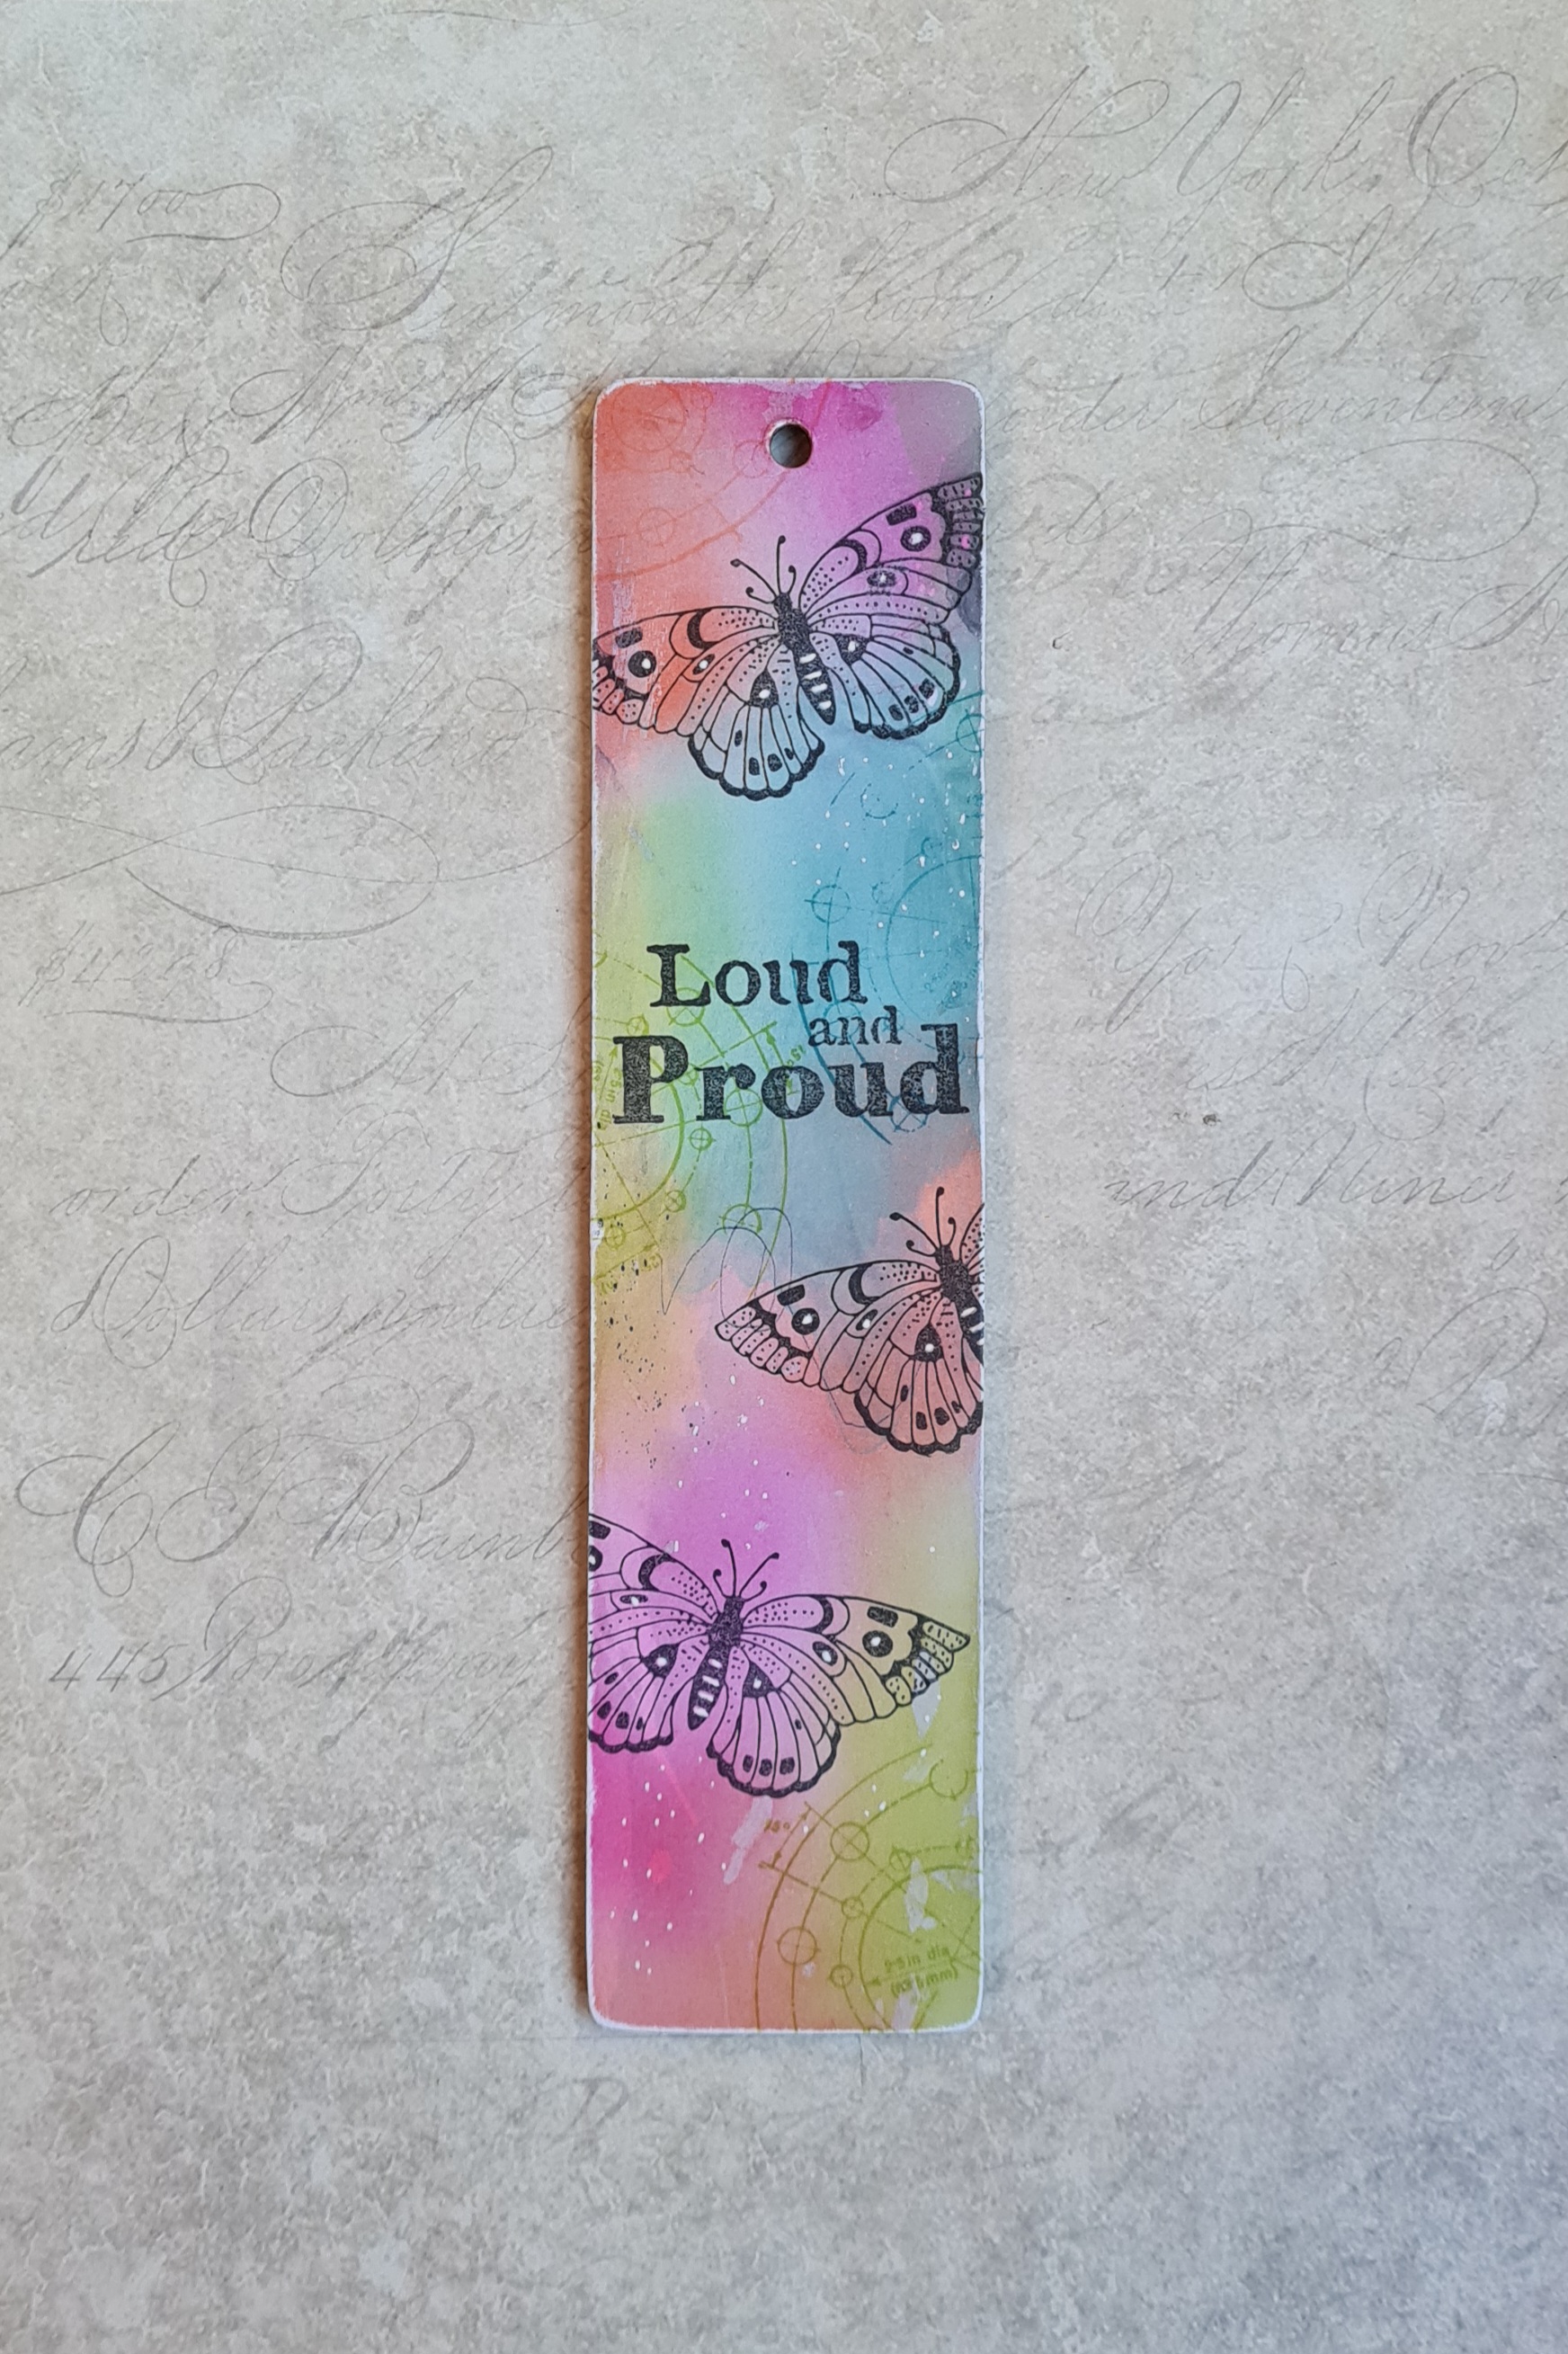
I took the Love word strip and created a frame, you have seen me do this before with the larger word strips. I simply started stamping slightly along one side, and then turned the background and butted up to the edge of the stamping each time. I found that I need to miss some of the words off as the strip was slightly too wide for this size of background. If you are not sure how something will work out, you can always practise on some copy paper first.

Finally, I added a sentiment from Loud and Proud in the centre. You can make lots of variations on this card design, and vary the colours. It would make a great batch card idea for Christmas too.


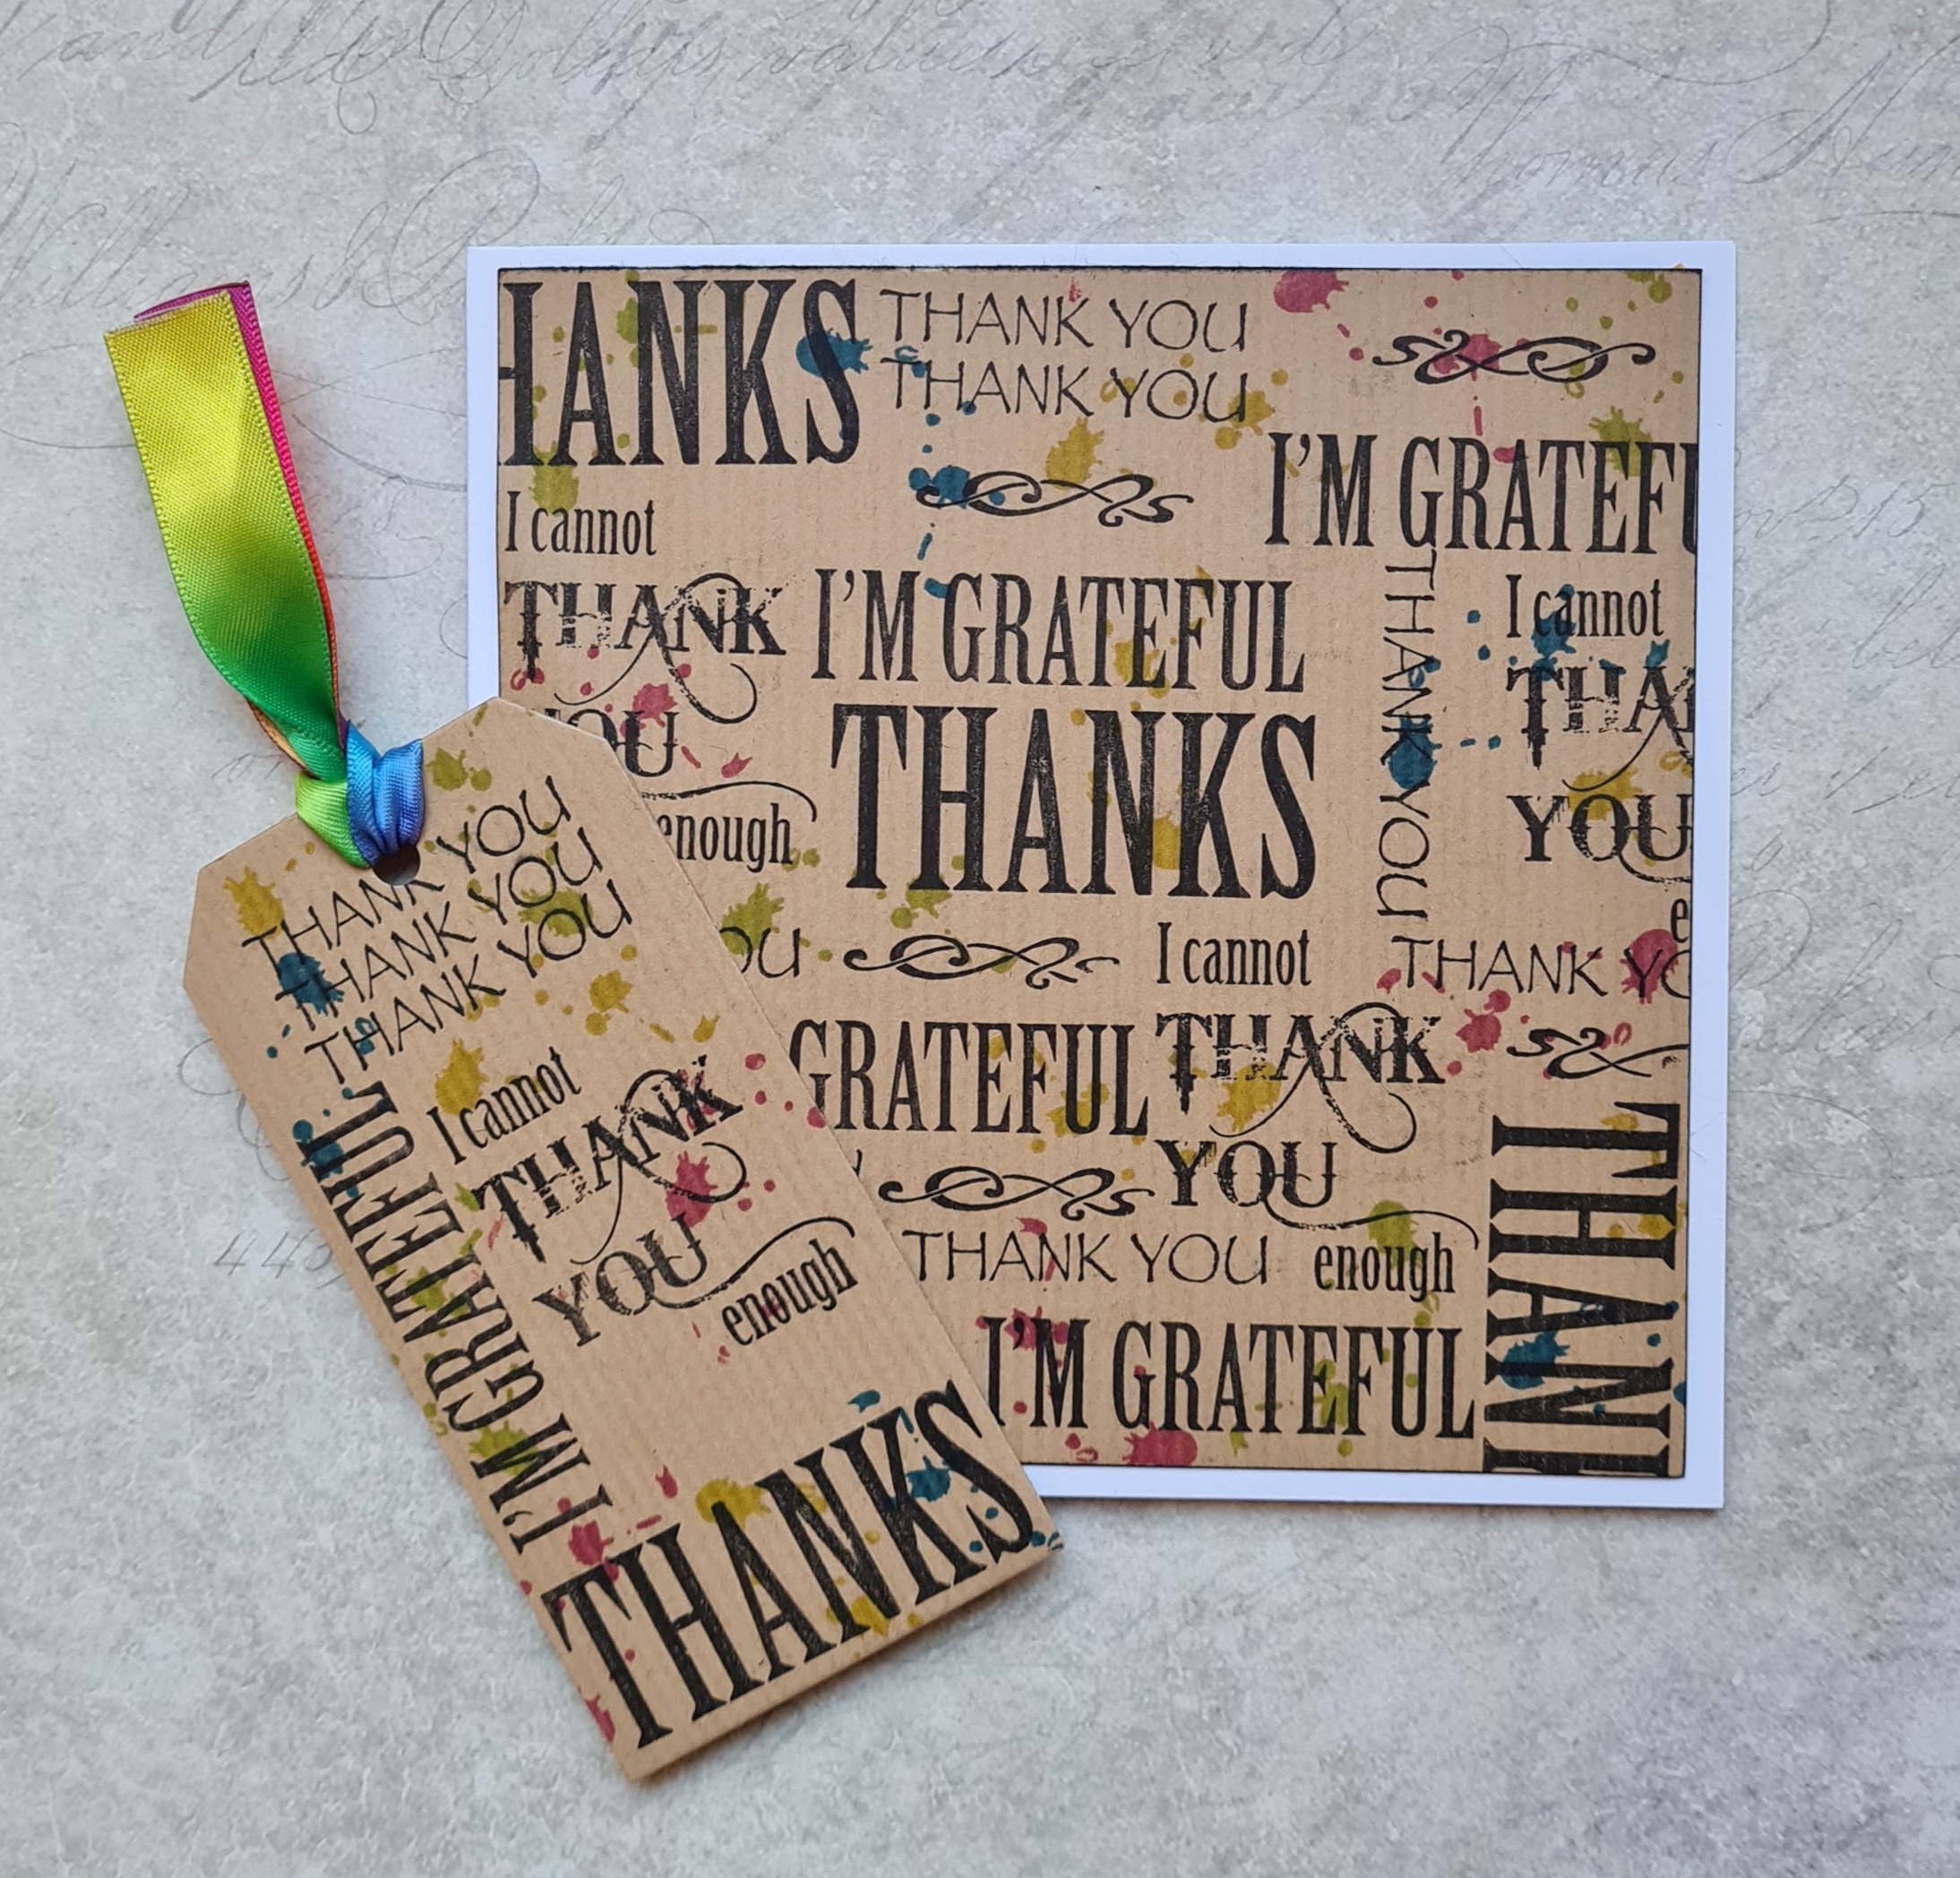
I mentioned practising on copy paper, well I was preparing for the TV shows and we also had A Year of Stamping Issue 1 - January on the show. I wanted to try out an idea and used copy paper, as I quite often do to see if it workedokay. My copy paper sample looked so good that I made it up into a card. I would normally have repeated the project on smooth stamping card, but I wanted to show you my finished copy paper project.

I used a stamping platform to stamp the image, which I then coloured with Pan Pastels. I stamped the image again, to ensure a nice crisp finish, as sometimes Pan Pastels can make your image look rather cloudy. I have used a piece of background paper cut to size. It was teal and brown as you can see, but one side was rather plain where it had been trimmed. I added some colour with Distress Ink, and tghe stamped a splatter stamp from the Timeless stamp set to add some detail. The paper looks more complete now. I edged the background paper with a black inkpad so that it matches the main image.


I hope that you have enjoyed my projects and that my tips will be useful. Thanks so much for stopping by, your vists are always appreciated. Take care xx


Monday 23 January 2023

Gifted Blankets

Hello everyone, I hope that you are keeping well. In a change from my usual posts, I have a couple of crocheted projects to share with you today. These are both recently gifted items that I have made for special females in my life. 

The first blanket is the Fields of Gold blanket, designed by Jane Crowfoot. I have had the kit for ages, and knew that I wanted to crochet the blanket for my Mother-in-Law. Her favourite flowers are sunflowers, and mine are poppies, so this blanket seemed  the perfect gift for her, as it is made up of both motifs. She was extremely ill last year, and we nearly lost her, it seemed a very fitting time to create this blanket. I started to crochet the blanket in my spare time, something of which I have very little, and I took the blanket on holiday with me to Mexico in November, so that I could get it finished in time to give to her for Christmas. I spent lots of relaxing time on the beach crocheting away, and managed to get the blanket put together, and only had the ends to sew in when I got home. It was hot work sometimes, as the temperature was 29 degrees some days!


My second blanket was crocheted for my lovely Daughter Megan. She works so hard, and truly deserves something handmade. When she opened the blanket, she was really touched, and said that it would make her feel like she was getting a hug from me every time she used it.

I chose to make a beautiful blanket called Colours of The Sky Throw designed by Jane Czaja, using Sirdar Jewelspun Aran. The yarn is variegated, and every square is different. The dark squares are placed around the outside, and the lighter squares are placed inside. I love this blanket, and have started one for myself, it is so soft and cosy.

Thanks for stopping by, take care xx


Wednesday 18 January 2023

More Anniversary Butterflies

Hello everyone, I hope that you are keeping well. I have more projects to share with you today from this month's TV shows, showcasing the brand new stamps that we featured on the shows.

My first project is two cards really, but I used the long Universal Butterfly stamp, and wanted to show the stamp in its entirety, but also how you can stamp just a part of the image to still create a great little card too. I used some kraft card and dark brown Versafine Clair ink for the stamping. I coloured both images with pencils, and used some black card to create the card bases. 


For my second TV demonstration in this show, I used an MDF bokmark, which I covered with a piece of designer paper that Lesley had designed for the TV shows. I used matte medium to attach the paper, and sanded the edges once the glue was dry. I added some extra colour to the paper with Distress Ink and blending brushes. I used Ripe Persimmon, Picked Raspberry, Twisted Citron, and Salty Ocean. I added some stamping using the Vacuum Flange image from the Technical Butterfly stamp set. I used Versafine Clair in toning colours; orange, teal and green. Finally, I stamped a butterfly from the same stamp set several times, and a sentiment from Loud and Proud in black ink. I added white accents to the butterflies, and some white dots with a white gelli roll pen.

I hope that you enjoyed my projects, I will be back with more samples to share with you later in the month. Thanks so much for stopping by, your visits are always appreciated xx


Tuesday 10 January 2023

Happy New Year to You All

Hello everyone, I hope that you are all keeping well. It's been a while since my last blog post, so firstly I would like to wish you all a very Happy New Year. 2023 looks set to be a very busy year for us on the personal front as our Daughter is getting married. We have lots of planning to look forward to, and no doubt the months will fly by as we head towards the big day.

I have lots to share with you today, as I did not manage to post last month. I will add a few projects from last month's TV shows, as well as some from the shows that we did just last week. I hope that you managed to watch the shows, we were very busy. The shows were our 6th Anniversary shows with the TV studios, it's amazing to think that we have been affiliated with the Company for that long. They have gone through a few name changes in that time, but we have enjoyed a good working relationship with them throughout the changes. I have been with Chocolate Baroque for a lot longer than six years, as those of you who know me will be aware. I have been on the Design Team for about twelve and a half years now, and Design Team Leader for eight and a half years. Goodness, I had to check, as I couldn't believe that it had been so long! 

Unfortunately Lesley was rather unwell last week, and so I needed to do a few more demos than I would do normally. I really enjoyed working with the beautiful stamps and so I had created lots of projects. I was ready to help out and show how to use the stamps in lots of different ways. My first project was created using some Drawing Cartridge, and stamps from the Technical Butterfly stamp set. I stamped and embossed the vacuum flange image using white embossing powder and Versamark over the background, and added Blueprint Sketch Distress Ink over the top. On a piece of scrap card, I stamped and embossed some of the butterflies, using Versafine Clair Nocturne and clear embossing powder, then coloured them in using a variety of Distress Inks and a blending brush. I cut them out and attached them to the background. I used a little strip of card and stamped the sentiment, brushing a bit of Distress Ink around the edge. 


The TV demo sample was a smaller version of my finished card, simply for speed.


 My second demo on the show was a journal page. I used stamps from some of our older stamp sets; Timeless, Make Your Mark, and Floral Parapernalia Elements. I also added colour to the background with a circle stencil and our own Chocolate Baroque Mask - Kaleidoscope of Butterflies. I used Distress Ink and blending brushes for the stencils, and Versafine Clair in toning colours for the stamps. I chose some stamps from Technical Butterfly to add to the page and then added the fabulous Friendship strip from the Mini Slim Words stamp along the edge. I added some coloured pencil accents to the images, sticking to a limited colour palette of blue, pink, yellow and green. 


 I only added the word strip partway along each page, but as I showed on my TV demo, you can easily join the word strip to stamp all the way along the page. I felt it was well balanced having it just along part of the side in my design, but it is really up to you how you use it.


As Lesley and I mentioned in the shows, we discussed the design of these stamps over a cuppa in the Green Room after one of the shows, we often do our brainstorming that way. We live so far apart, and we only meet up at the studios nowadays. Hopefully this year will see a few more new stamps in the pipeline, including some designs that I have had mulling over for a while now....

Anyway, here are one or two projects from last month's shows that I did not get a chance to share with you before. 

The first card is a remake of an old design, but I added some words from Words of Inspiration to the background. I used two of the little trees from Fantasy Woodland to make the flower.

I created an inky background for my next card by adding Distress Ink to an acrylic block and spritzing it with water. I placed it onto textured card. I have added stamps from Essence of Nature and Baroque Meadow, using Versafine Clair Inks.

These next two cards were very quick and simple to make. I simply took a piece of white or kraft card, and added the splatter stamp from the Timeless stamp set, using coloured Versafine Clair ink. I then added words from Words of Gratitude over the top. I created a matching tag for a gift.

This was another quick card, using a piece of brown kraft paper for the background, to which I added Brushos and spritzed them with water. I stamped a sentiment from Essence of Nature all over the top, to make the background look like a book page. I coloured some Drawing Cartridge with the same Brushos, and stamped two more images from the Essence of Nature stamp set. I used clear embossing powder over the top.
I reworked an old design once again for this card, using the Patchwork Landscape stamp set. I stamped several of the images onto some Drawing Cartridge upon which I had already created a wrinkle free Distress background, and used a fine liner pen to add lines to create more hills and attach the images to each other. I used a circle mask to add more Distress Ink, to give the appearance of a sun. Using the fine liner pen, I added some birds freehand. I coloured the scene using pencils, choosing a palette of five colours, plus the slightly darker versions for shading.
I created an alternative colour option which is more masculine in grey and terracotta tones. You could use kraft card and add white accents too, or create a black, red and white version. There are so many possibilities, why not create a monochrome version in blues, or greens?

I hope that you have enjoyed my projects. I will be back later in the month to share more of this month's demos with you. Thanks so much for stopping by, your visits are always appreciated.

Take care, xx


Related Posts Plugin for WordPress, Blogger...