Followers

Showing posts with label Fifteen Minute Cards. Show all posts

Thursday, 8 September 2022

Leafy Bokeh Card

Hello everyone, I hope that you are keeping well. It's time for another monthly Fifteen Minute Card spot, and this month, I'm in a leafy mood. I have chosen to use the beautiful leaves from the From Nature 2 stamp set to create a quick Christmas card.

I stamped and embossed the leaves using a silver glittery embossing powder, and added a few snowflakes using white embossing powder. Keeping my background very speedy, I added shading with green and blue Distress Inks. I added some white circles with a stencil and Brilliance Ink for a bokeh effect. Finally, I added a sentiment from the Pears and Baubles stamp set. I love the font on this sentiment.

If you get the chance to make a quick card in Fifteen Minutes or less, then head over to the Chocolate Baroque Facebook Group where I have created an album for this month. You can pop your cards or other projects in there. We would love to see what you have made. Thanks for stopping by, 

Take care xx


Wednesday, 17 August 2022

Launching Fifteen Minute Cards Again!

Hello everyone, I hope that you are keeping well. I am sharing a few projects to launch an old favourite on the Chocolate Baroque Facebook Group and also on Instagram today. I used to run the Chocolate Baroque Colour Challenge Blog, and a regular monthly feature was the Fifteen Minute Card feature. Myself and the Design Team used to create cards in fifteen minutes or less using stamps from Chocolate Baroque. We used up scraps from our stash, or made clean and simple cards, any style of card was achievable really, but this style of card was great for batch cards, craft fairs, Christmas cards, Wedding Invitations, etc. If you needed a card in a hurry, or wanted to make a quick card or two for your collection, being able to make a card in fifteen minutes is such a good idea. It's great for beginners too, as you do not need to make anything complicated, and can try out lots of ideas quickly.

I am sharing lots of familiar ideas in this post, and I will be creating a post once a month, roughly around the middle of the month. I won't post on exactly the same day, life gets in the way; holidays, and other commitments, but I will always share what I have made, and let you know where you can post your projects if you would like to create along with me and the Chocolate Baroque family. I hope that you will enjoy yourselves, just playing with your stamps and materials for fun. After all, hopefully we can all spare fifteen mintes every now and then!

For my first two cards, I created backgrounds using an acrylic block. I added Distress Ink to the block for my card, and spritzed it with water. I placed the block onto a square piece of Drawing Cartridge, pressing down all over the block. I peeled the block away and left the background to dry. (I created several backgrounds all at the same time while I was doing this background, and so I timed myself for four cards in an hour). I could have dried the background of with a heat gun, but it would have faded the background colours a bit.

Once the background was dry, I stamped the tree from Fantasy Woodland onto the background. I added foliage from Silhouette Grasses along the bottom, and a sentiment from the From Nature 2 stamp set randomly over the background. I coloured the tree with Koh-I-Noor pencils, just using two colours for the fruit, and two colours for the leaves. It was really quick, and took me just a couple of minutes. I trimmed the panel and edged it with green ink before attaching to to a piece of linen card.

For the second card, I used Distress Oxides on the acrylic block, creating a background as before. I chose a selection of stamps from the Silhouette Grasses stamp set, and using Versafine Clair Ink, I created a meadow scene. I added a sentiment from Words to Dazzle and Sparkle.

My third card was stamped directly onto a card blank, and was so quick to make. I used a circular gelli plate, and added Distress Ink to the plate before 'stamping' this onto the card blank. I stamped two dragonflies from The Phenomenal Butterfly Elements stamp set onto the card, and masked them, before adding a couple of script rings from the same stamp set. I masked these as well, and then added a couple more stamps to complete the collage effect. I removed the masks and coloured in the dragonflies and script rings with pencils. The coloured circles are from the Floral Paraphernalia Elements stamp set.


My final card was created by using a piece of patterned paper. Lots of the work is already done for you when using patterned papers, but you can add so much detail over the top. We all have bits and pieces lurking in our stash, don't we? I stamped the beautiful dandelion clock from Not More Flowers! and added elements from Making More Marks, all using Archival Ink.


I hope you have enjoyed my selection of cards this month, and that you will join in making a few quick cards yourself. Head over to the Chocolate Baroque Facebook Group, where I have created an album, look for Media at the top of the page and search for the August 2022 Fifteen Minute Cards Album. Alternatively, head over to Instagram, and upload your cards with the hashtag #chocolatebaroquefifteenminutecards

Take care, and thanks so much for stopping by,


xx


Thursday, 16 May 2019

Large Trees

Hello everyone, I have two projects appearing on the Design Team Blog today in the Fifteen Minute blog post. This is a monthly feature made up of quick cards and projects, each taking no more than fifteen minutes to complete.

My first card was made using a scrap of background from my stash, which had originally been created by inking around some leaves from my garden, using Ripe Persimmon Distress Ink on yellow card. I stamped the large tree from Trees a Crowd onto a piece of watercolour paper using Black Archival Ink, then carefully sprinkled red, green and orange Brushos just where I wanted them. I spritzed the Brushos with water. I used some green Brusho and a waterbrush to 'ground' the tree. I inked around the panel with Ripe Persimmon Distress Ink. I added a sentiment strip to complete the card, inking around it as before.

My second project is a large tag, I added background colour by covering a large acrylic tag with Distress Ink and spritzing it with water before swiping it across the tag. I used the same tree image as before and added a smaller tree image from the same stamp set stamped using green ink in first and second generation stamping to create the foliage. Again, I used some extra Distress Ink to 'ground' the tree, as I do not want the tree to be floating in mid air. A sentiment, ribbon, and hand drawn birds completed the tag.

Do check out the Design Team blog to see what my Team mates have been up to with their Fifteen Minute creations. Thanks for stopping by, xx

Monday, 15 April 2019

Fifteen Minute Cards


Hello everyone,  today sees the monthly Fifteen Minute Cards blog post over on the Chocoloate Baroque Design Team blog. I have created two projects for the post, the first card was created by stamping and embossing the heart image randomly over a piece of scrapbook paper using a teal embossing powder. I used the same colour for the sentiment on a smaller strip of the paper. I edged both pieces of the paper with Teal ink, allowing them to dry before assembling the card.


For my second card, I stamped the broken heart using red Memento ink onto a white card blank. I then stamped the heart again onto a mini gelli plate before then using the gelli plate as a stamp and stamping the image from the gelli plate beside my first stamped image on the card blank to complete the heart. I added the sentiment using black ink, then flicked some watered down red Distress Ink over the card to create splatters.

Do hop over to the Design Team blog to check out the projects that my team mates have created.

Thanks for stopping by, xx

Saturday, 16 February 2019

Butterfly Tag

Hello everyone, over on the Chocolate Baroque Design Team blog today, we are sharing our monthly Fifteen Minute blog post, a bumper feature which aims to give lots of tips and ideas for creating quick cards and projects in fifteen minutes or less. I have a project within the blog post, a tag, and am sharing it here as well.

I have made a quick tag, which could be added to a gift, used as a bookmark, or added to a card. I have used a scrap piece of background from my stash to make the tag, which was coloured with blue and purple Distress Inks, (a favourite colour combination), and water, then sprinkled with salt and left to dry.  I stamped and embossed the butterfly border from the Butterfly Perfumery stamp set over the top and coloured it with Inktense pencils and a waterbrush. I chose two sets of contrasting colours for the butterflies, both of which worked well with the background. I added a sentiment, which had been stamped onto a piece of scrap card that I had coloured with the same colours of Distress Ink. I distressed the edges and inked them with Seedless Preserves Distress Ink. I distressed and inked the edges of the tag, and added a complementary ribbon through a hole that I had punched at the top.


The butterfly border is straight, but on my tag, I was going for a more curvy effect, it has worked quite well. I will be back soon with more projects to share with you. Thanks for stopping by, xx


Tuesday, 15 January 2019

Speedy Anniversary Card

Hello everyone I have a quick card to share with you today, which forms part of our larger monthly Fifteen Minute blog post on the Chocolate Baroque Design Team blog.
 
I have used a Brusho background from my stash, created with red, yellow and orange Brushos, plus a bit of Gold Sprinkle It for added shimmer. I then added a mixture of images from Sing Your Song, Wise Owl, and Let Your Heart Sing, simply using Versafine Onyx Black ink. I added a sentiment to create a quick and easy Anniversary card.


Do head over to the Design Team blog to see what my Team mates have created. Thanks for stopping by, xx


Saturday, 15 December 2018

Flower Meadow

Hello everyone, it is time for the Fifteen Minute blog post over on the Design Team Blog today. I am sharing a card from that blog post here as well.


Lots of our projects feature Lesley's beautiful designer papers this month, and this card from myself uses one of the patterned papers from the collection. I have stamped foliage from the Wild Meadow stamp set using a variety of Versafine Clair inks, and then stamped the Floral Grunge flower onto the background, using a deep teal colour. I stamped the flower head onto one of the plain papers, and decoupaged it onto the main background. I also added a small butterfly paper pieced from a scrap of the same paper. The sentiment comes from the Be Kind stamp plate. I edged the paper with ink before adding it to a white card blank.

These papers are perfect for creating quick cards, whether you use the patterned, or the plain versions, they take surface stamping so well.

Do hop over to the Design Team blog and check out what my team mates have made. Thanks for stopping by, xx


Thursday, 15 November 2018

Quick Masked Cards

Hello everyone, today on the Chocolate Baroque Design Team blog, we are sharing our bumper Fifteen Minute blog post; a post full of quick and inspirational projects designed to show how a card can be made in fifteen minutes or less. I have two cards featured in the blog post and am sharing them here as well.

I have used the same layout for both cards, but varied the colours and stamps. I masked the top and bottom of a white card blank, using strips of masking tissue, before adding Distress Ink. I stamped the foliage, and then stamped the butterflies onto sparkly acetate. I added coloured vellum behind the acetate, and adhered the butterflies to the card. A sentiment completes each card.

The first card is a remake of an old favourite, simply changing the sentiment. I chose warm colours, red, orange and yellow, adding water splatters for added interest:

The second card is in cool tones, greens, lilac and blues. The water splatters look fab on this one, they are always random. The vellum works really well behind the sparkly acetate and is a very quick way of creating these butterflies.
Do hop over to the Design Team blog to see what my Team Mates have made today.

Thanks for stopping by, xx

Tuesday, 16 October 2018

Speedy Cards

Hello everyone, it is time for the monthly Fifteen Minute blog post over on the Chocolate Baroque Design Team Blog. I am sharing two cards from the bigger blog post with you today.

The first card was created by stamping the Auricula Script image onto Kraft card using Versamark and white embossing powder. I coloured the image using Koh-i-Noor paints. I added some shading around the edge of the kraft card with Seedless Preserves Distress Ink. I made a toning background using Seedless Preserves and Fossilized Amber Distress Inks on drawing cartridge. I matted the background onto plum and kraft card, and added some coordinating ribbon.

For my second card, I stamped the same image onto a piece of drawing cartridge, using Plum Archival Ink, and coloured it with Inktense pencils. I painted Stickles onto the flowers and leaves with a thin brush. This does not take very long to dry. I stamped an image from the Floral Edges stamp set onto a piece of Crafty Individuals paper, using the same ink as before, to create a border. I edged the drawing cartridge and patterned paper with the plum ink, then matted everything onto purple and green card.

Do hop over to the Design Team blog to see what my Team mates have been creating. Thanks for stopping by, xx

Saturday, 15 September 2018

CAS Paisley Flower

Hello everyone, over on the Design Team Blog today, we are sharing our monthly Fifteen Minute blog post; a compilation of cards and projects from the Design Team that aim to inspire and show how cards can be created in fifteen minutes or less. You can either start with a blank piece of card, or rummage through your scraps to find ready made backgrounds, scrapbook papers, etc., as a starting point, and then using stamps and inks, etc., make some really quick cards. These once a month blog posts are a step away from a lot of our other blog posts, which show more time-consuming projects.

I have created a CAS style card, which featured on last month's TV shows on Hochanda. I stamped and embossed an image from the Nature's Paisleys stamp set several times onto coloured vellum, using Versamark and gold embossing powder. I cut the images out to form 'petals'. I chose one of the other images from the stamp set, and after loosely laying the petals onto a card blank, decided where I wanted to stamp the image, to create leafy sprays. I stamped the image using green Memento ink, and then adhered the petals to the card. I added a blingy centre to complete the flower, and stamped a sentiment from the Paisley Elephant stamp set to complete the card, using the same green ink as before.

Do check out the post on the Design Team blog to see what the rest of my Team mates have been creating. Thanks for stopping by, xx


Wednesday, 15 August 2018

Quick Christmas Cards


Hello everyone, today sees the monthly Fifteen Minutes blog post over on the Design Team blog. This blog post features quick and easy cards created in fifteen minutes or less by members of the Design Team. The monthly feature is aimed at sharing time saving ideas suitable for beginner crafters, or for those who are looking for ideas suitable for batch making, maybe craft fairs, weddings, or something like Christmas cards. This month, we are focusing mainly on Christmas cards, as we have used stamps featured on last month's TV shows on Hochanda. I have created some quick and easy batch cards for you. The first four are all based on the same layout, using images from the Winter Edges stamp set and using sentiments from the Let's Get Festive stamp set. I took the photo below on a very sunny day, it felt very strange making Christmas cards when it was so warm!

I wanted to create some cards using left over pieces of card that would often be too small for other projects, and that is how this design came about. The look is very CAS in style, and really quick to create. The stamps I have used can be combined in lots of different combinations and colour options, creating a unique feel to the cards that I am giving, even if they are quite similar to each other.

I trimmed some offcuts of scrap card, scrapbook paper, and left over coloured pieces of paper from previous projects, all lurking in my stash box, so that they would fit to one side of a 7" x 7" card blank, leaving room for a sentiment.  The first two cards are exactly the same layout, just different colour options:


You could add white highlights to the kraft card option, giving it a Scandinavian feel. The second background is a gelli plate background, using bubble wrap to create the pattern.

My next card is stamp onto a Brusho background, with Stickles for highlights. I have used a Teal coloured Versafine ink for the stamping, which looks great against the background. I used some of the little individual images placed on an acrylic block together, to quickly build up the background. The sentiment was perfect for this card.

Finally, white embossing onto some scrapbook paper. Again, I used several of the individual snowflakes together on a block to stamp quickly with Versamark, adding the white embossing powder as I went along:

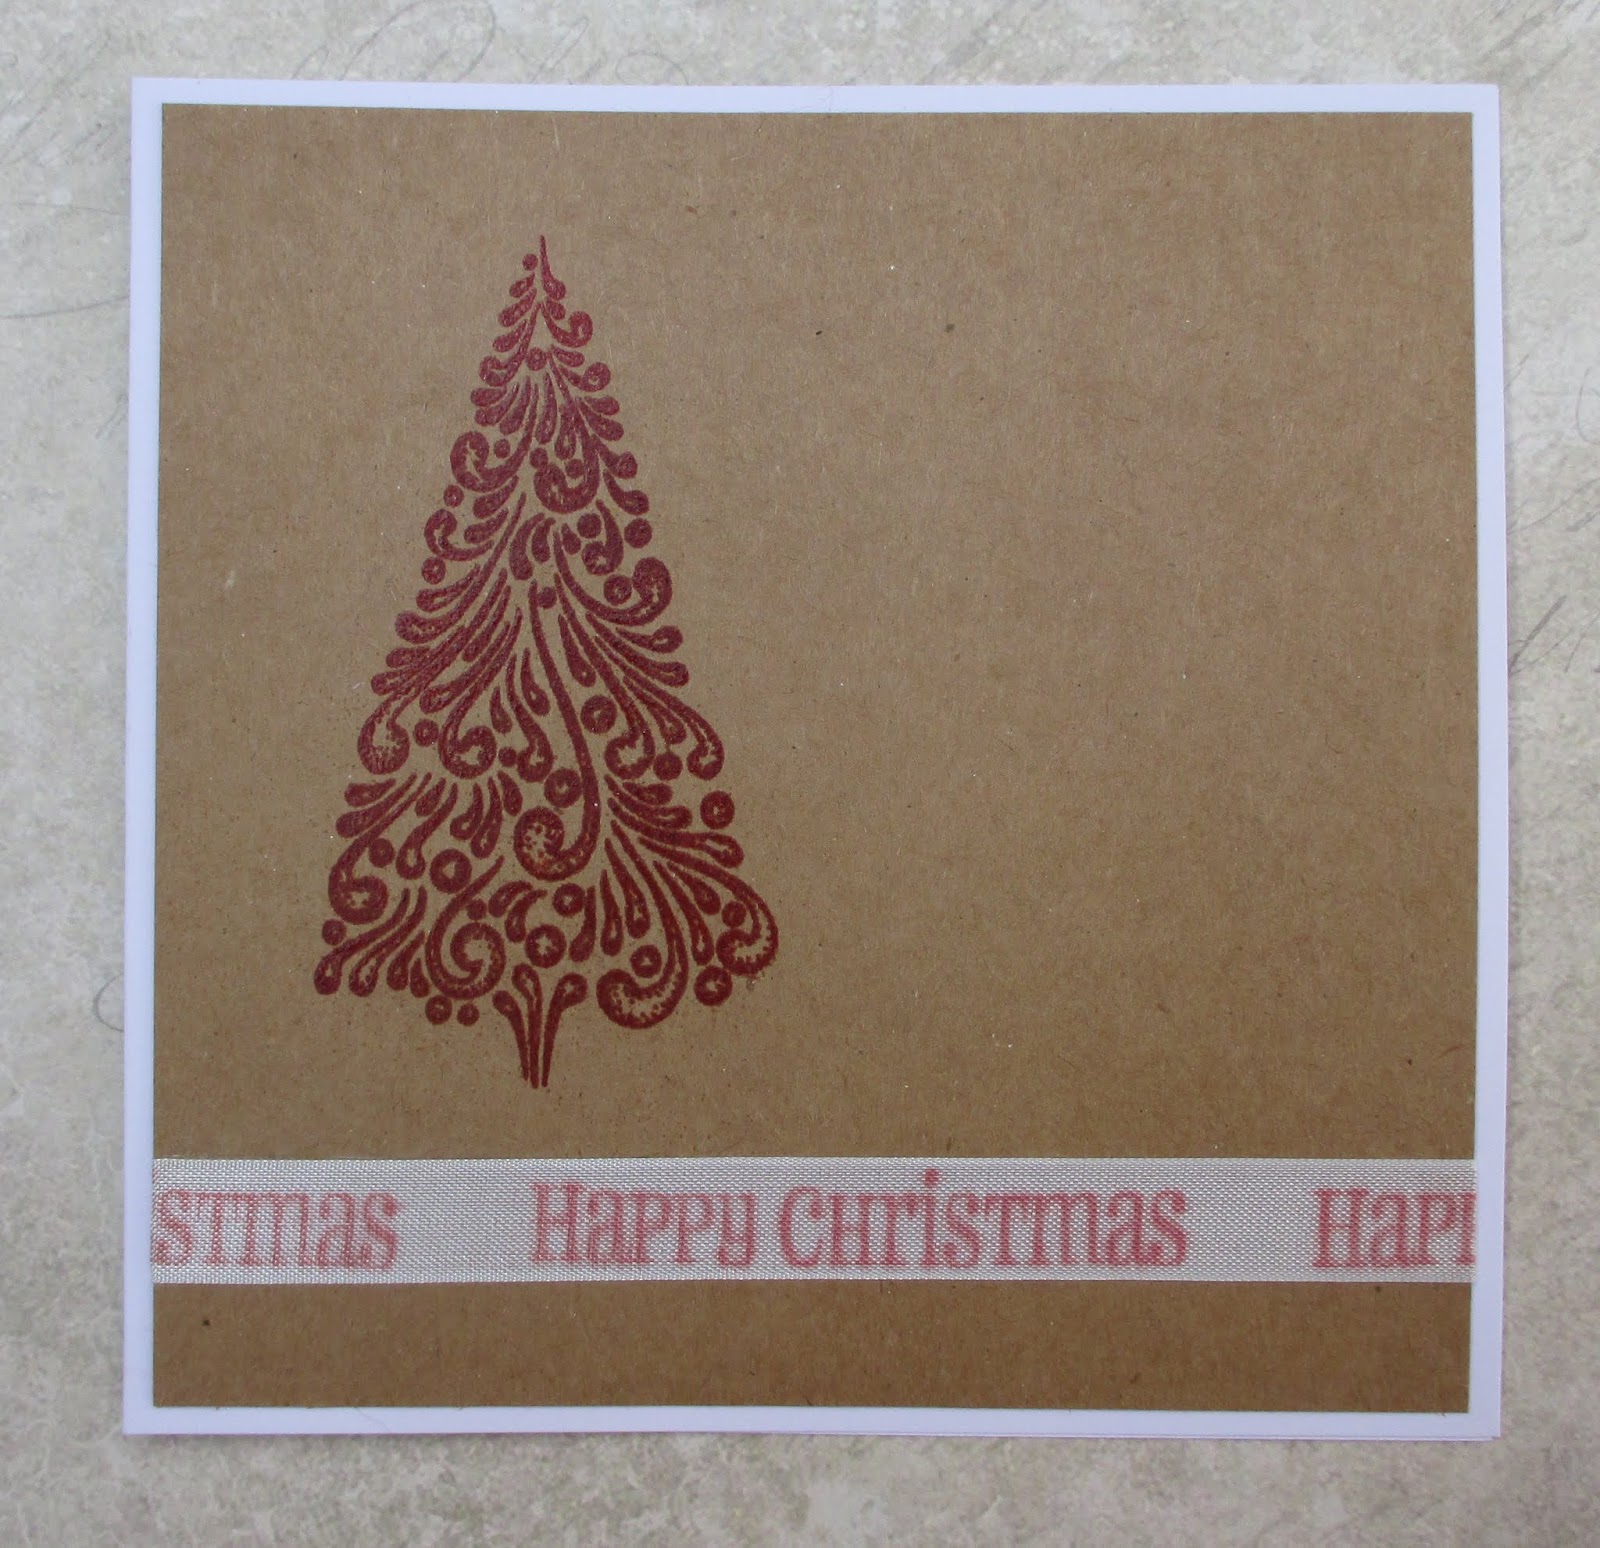
A smaller, simple card with stamping onto ribbon, and clear embossing over red stamping for the tree, you could add a few red gems in the corners if you do not like too much space on the card, or decorate the tree itself.

Do pop over to the Design Team blog to see what my Team mates have created. Thanks for stopping by, xx

Saturday, 16 June 2018

A Speedy Butterfly!

Hello everyone, it is time for the monthly epic Fifteen Minute blog post over on the Chocolate Baroque Design Team Blog. I am sharing my contribution to this month's post, as well as writing the post, of course!

I have made a butterfly themed card, using some of the feather stamps featured on last month's TV shows on Hochanda, and this idea just popped into my head as a suitable idea for a quick card.

I have created a background using a piece of drawing cartridge, adding lots of water, and brushing Dr P H Martins watercolour inks over the top. These inks come in a range of glorious colours, and I chose two of my favourites for this project. I sprinkled sea salt over the ink while it was wet and dried the background with a heat gun. (If I was not up against a fifteen minute deadline, I would have left the background to dry naturally). Once the background was dry, I brushed the salt away, and I stamped a leaf from the Tangled Garden stamp set, which I then masked, before stamping a large and a small feather twice. I drew some antennae using a fine liner pen, and added a touch of colour to the butterfly that I had created using Seedless Preserves Distress Ink. I blended the same colour of Distress Ink around the edge of the background. I added the main sentiment from the I Shall be Your Wings stamp set. A tiny bit of stickles glue was brushed over the wings to finish.

Do pop over to the Design Team blog to check out the projects made by my team mates, they have made some fabulous inspiration in under fifteen minutes.

Thanks for stopping by, xx

Tuesday, 15 May 2018

Two Quick Cards

Hello everyone, it's time for the monthly Fifteen Minute blog post over on the Chocolate Baroque Design Team blog.  I have two cards featuring in the post, and would like to share them with you.

The first card uses some of the incredibly versatile Drawing Cartridge available from the website. I have coloured the background with Distress Oxide Inks, which I spread over a craft mat and spritzed with water. I placed the drawing cartridge over the ink, and patted it down to pick up the colour. I dried the paper, and then patted it onto the mat again to pick up some of the left over droplets of ink for another layer of colour. I then stamped a variety of foliage stamps over the top using Versafine Clair inks in first and second and third generation stamping, to create lots of depth. I have added two bees, and given their wings some sparkle with Stickles glue. A great sentiment finishes off the card. I used black Versafine for the bees and the sentiment. The stamps are from the Essence of Nature, Honey Bee, Fragrant Honeysuckle, and The Rose Tree stamp sets.

To create my second card, I used some of the fabulous Textured Art card, which has a linen like texture to the surface. I added some Decoart Media Tinting Medium, which I had coloured with Ultramarine and Turquoise Brushos to the surface, almost dry brushing the colour over the background. I stamped the words from the Essence of Nature stamp set all over the large background using Jet Black Archival Ink. I then stamped the tree panel onto a smaller piece of card, and mounted both pieces onto black card. The finish created by the medium and Brushos is chalky, which I could not have achieved with the Brushos by themselves. It is a technique that I will definitely use again.

Do hop over to the Design Team blog to see the cards that my Team mates have contributed to the post. They have come up with some great ideas, as always. Thanks for stopping by, xx

Thursday, 15 February 2018

Have you got Fifteen Minutes?

Hello everyone, it's time for our monthly Fifteen Minute blog post over on the Chocolate Baroque Design Team blog.  The post endeavours to share quick and easy ideas for creating cards and projects that can be completed in fifteen minutes or less. These projects are great for new stampers who could be put off by more complicated projects that look too difficult for them to attempt. The projects may also be useful for people looking for batch card ideas for Christmas cards, wedding invitations, or craft fair stalls, etc. There is no limit to how many cards you can make with Chocolate Baroque stamps, so these ideas are perfect for multiple projects.


I have made three quick cards for you, showcasing the lovely new stamps and colouring pages that were featured on the January Hochanda TV shows. You might have caught a quick demo that I did with a couple of these cards on those very busy shows. If you blinked, you might have missed it though! For my first card, I created a gelli print background using a round gelli plate, I used Distress Inks in blue and green shades, brayering the colour onto the gelli plate. I pressed a piece of bubble wrap onto the plate before taking a print with a white card blank. I really like the pattern that the bubble wrap creates, and it tied in with the bird image, which has lots of hand drawn circles incorporated into the image. I then stamped the Bird of Joy, minus the word cloud onto the background. I added one of the words from the Floral Delight image, by masking everything else off before I inked the word, using low tack masking tape. I removed the tape, and then stamped the word. I have actually cut my words away from my images, because it makes it easier to use the words separately from the images, but by using the masking tape to cover the other areas up, you do not need to do this. I coloured the image and added some coordinating pearls to finish.

To create my second card,  I stamped the Medici Flower onto some pretty Crafty Individuals patterned paper, and coloured the image with the woodless pencils. I then matted the background onto black card:


For my last card, I created an acrylic block background, simply adding colour to an acrylic block with Distress inkpads, spritzing the block with water, and swiping it over the background. I added a piece of colouring page, trimmed from a completed page. I have lots of the page left over to create plenty more cards like this. I then simply added a sentiment to finish the card.

Once you have coloured several of your colouring pages, it is great to be able to turn them into other projects, Cutting them down into tags, cards or adding them to mixed media projects means that they will be appreciated, rather than stuck in a folder somewhere. You might remember the card and tag that I made using the earlier set of colouring pages that Sue designed. You can see them in this blog post.

The Design Team have created some lovely projects on the Design Team blog for this month's Fifteen Minute post, do check out  what they have been up to by visiting the blog. Thanks for stopping by, xx

Thursday, 16 November 2017

A Wheelie Quick Card!!!

I am sharing a card today as part of the Fifteen Minute blog post which is airing on the Design Team Blog. Regular followers will know that this blog post features cards and projects made in fifteen minutes or less, and we aim to show that you can create designs that are both stylish and have that wow factor, but do not need to spend hours to achieve the end result.

My card was made as a Birthday card for my lovely Husband, who celebrated his Birthday a couple of weeks ago. He likes plain and simple cards, and even though his Birthday falls on a particular day, he definitely does not want anything Hallowe'en related! He is a cycling enthusiast, and so I felt that this design would fit the bill perfectly.

I started my card by cutting a strip of smooth cartridge paper, and masking off the central area with a piece of masking tissue. I stamped the front wheel of the penny farthing from the Steampunkery stamp set in various colours across the top and bottom of the background. I simply used masking tape to cover up the rest of the stamp before I inked the stamp, and removed the tape before I stamped it each time. Once I had stamped the wheels, I removed the msking tissue, and stamped the sentiment from the Birthday Words stamp set across the middle, using black ink. To finish, I simply added the background to a large black card blank.

Do head over to the Design Team blog to see what my Team Mates have created in the post today, it is a jam-packed post, and you will definitely be inspired! Thanks for stopping by, xx

Tuesday, 15 August 2017

Butterfly Wreath

Hello everyone, I am sharing a card that I have created as part of the monthly Fifteen MInute blog post over on the Design Team blog today. This card was made as a Birthday card for a special friend, but it doubled up as a quick card for this blog post as well.


I created a wreath by using the leafy sprays from the Take It or Leaf It stamp set. I stamped the images around a pencil drawn circle, using first and second generation stamping, and Memento Pistachio ink. Once the ink was dry, I rubbed out the pencil line. I then die cut several butterflies from book paper which had been stuck onto card, which I found  in my box of scraps. The dies are a set from Crealies, and are a firm favourite of mine. I inked around the edges of the butterflies with Abandoned Coral Distress Ink and stuck them around the circle.This is not a colour that I use much, but it goes so well with the Pistachio. Finally I added a sentiment from the Birthday Words stamp set.

After looking at several options, I decided that kraft suited this card best, and so I matted the background onto a large kraft card blank.

Pop over to the Design Team Blog to see the rest of the creations in this month's Fifteen Minute blog post.

Thanks for stopping by, xx


Monday, 15 May 2017

Another Fifteen Minute Card

Hello everyone, it's time for another epic blog post over on the Chocolate Baroque Design Team Blog, featuring cards made by the Design Team, that take fifteen minutes or less to create. This monthly feature shows how the lovely stamps from Chocolate Baroque can be used to create simple cards in a flash, as well as the more elaborate cards often produced for the Design Team Blog. We want to share quick ideas for beginners, or for those of you who need cards in a hurry. Maybe you want to make a batch card for Christmas, a wedding, or perhaps you need ideas for a craft stall even, that do not take hours to create.

I have made a simple little card as part of the blog post, using a gelli plate to create a background. I brayered two colours of Distress Ink onto a smaller gelli plate, (the 3" x 5" plate), and then pressed some bubble wrap onto the plate to create a pattern. I stamped the gelli plate onto a white card blank, like a stamp.

I stamped the bird from the Spring Fairy Collection stamp set onto the background, adding some coloured detail with Polychromos pencils. Finally, I added a sentiment from the Words of Wisdom stamp set.


Changing the words on this card could make it suitable for so many occasions, both masculine and feminine. It was a really quick card to make, and I hope that it has given you a few ideas to make some cards of your own. Do check out the rest of the blog post on the Design Team Blog, and see the fabulous projects from my Design Team mates.

Thanks for stopping by, xx

Sunday, 15 January 2017

Time Saving Cards

Hello everyone, I have a couple of speedy cards for you today. They form part of a regular feature over on the Chocolate Baroque Design Team Blog- Fifteen Minute Cards. We aim to create cards made in fifteen minutes or less and they can be clean and simple in style, or simply cards that are quick to make. These can be cards aimed at beginner stampers, or for someone who needs to make a card in a hurry, or maybe a batch of cards. We try to show that speedy can still be elegant and stylish, inspirational and have a wow factor. You do not always need to spend all day making a card. I cannot promise that these two cards deliver on everything that I have just written about, but they might give you some ideas to go off and try something quick for yourself.

To create the first card, I used some kraft card, and a stamp that I have not inked up before, which I was surprised about, considering how long I had owned these stamps. I used Versamark and white embossing powder to stamp the image from the Pretty Poppies stamp set, before colouring it with Zig clean colour markers. I chose earthy tones to tie in with the kraft background, and they happen to be my favourite colour palette. I added a sentiment from the same stamp set, using Plum Archival Ink. Finally, I added a plummy coloured card to mat the background, before adding it to a kraft card blank. This will be a handy store cupboard card, as there is always an occasion to send a card like this to someone who needs cheering up.

To create my second card, I found a Brusho background in my scrap box, and stamped the Big Bold Background Leafy Brocade stamp over part of it, using a Versafine Deep Lagoon Ink. I cut another strip of the background, and stamped the large sentiment from the Birthday Words stamp set using the same ink. I edged both pieces of card with Memento Teal Zeal Ink, before attaching them to a white card blank. This card was so quick to make, these Big Bold Backgrounds cover the card so quickly, and the large sentiment finishes the card in an instant. I always have spare Brusho backgrounds left over from previous sessions, but this could just as easily have been created with a gelli plate background.

I hope that I have given you some ideas for some quick cards. I am certainly going to make a few of these to have on hand just in case I need a card in a hurry. There will be another Fifteen Minute blog post at the end of the month, but do pop over to the Design Team Blog, to see what the rest of my team mates have made today.

Thanks for stopping by, xx

Related Posts Plugin for WordPress, Blogger...