Followers

Showing posts with label Flora and Fauna. Show all posts

Sunday, 22 August 2021

Beautiful Poppies

Hello everyone, I am back with some projects featured on last month's TV shows. 

My first project was created by using Distress Ink on some Drawing Cartridge. I then stamped the main image from Polygon Poppies, adding a smaller corresponding stamp and a bee from the Honey Bee stamp set. I coloured the image with pencils, and decided to add pops of blue to coordinate with the bee wings. I added the silhouette hexagon stamp in blue and edged the background using the same colour. Finally, I chose a couple of the sentiments from the stamp set and added them to the background.

I created another Distress Ink background for my second card using a pale pink and bright green. I stamped the image from Flora and Fauna around the edges and coloured it with pencils. I added a sentiment from Loving Sentiments in the centre. 

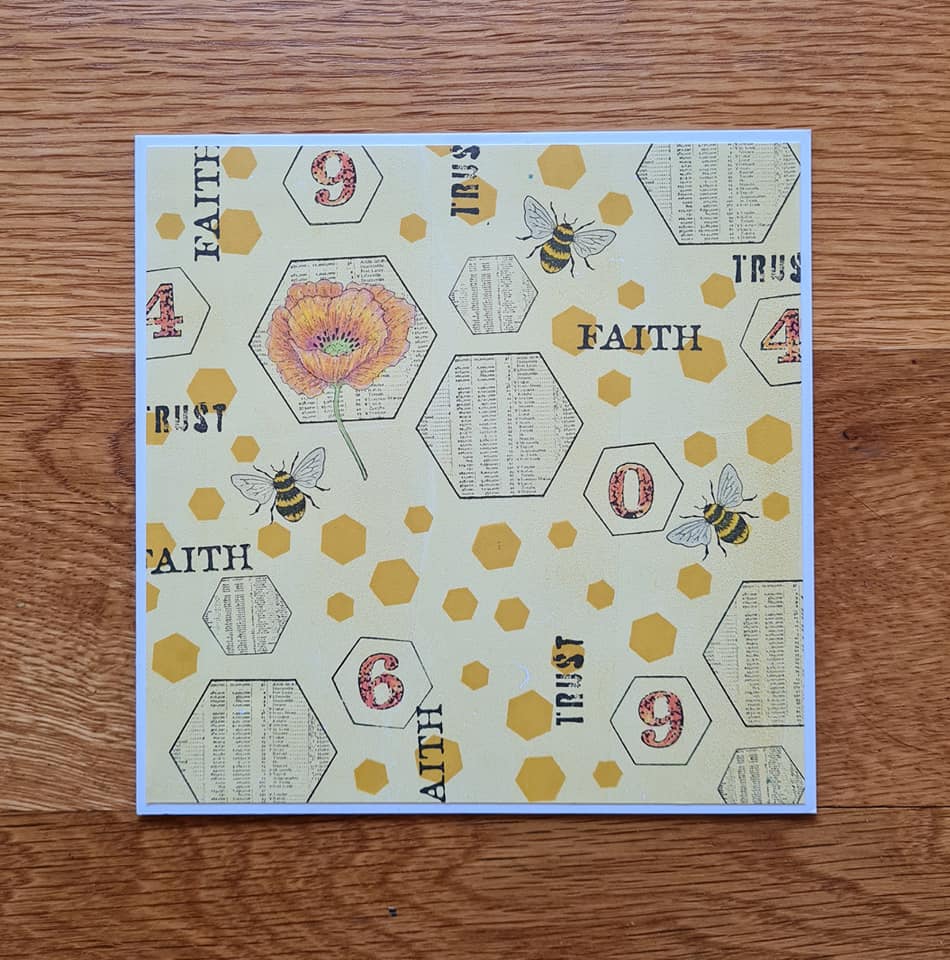
For my final project, I created a plain coloured background using a gel plate and Fossilized Amber Distress Ink. I used a variety of hexagonal images from Polygon Poppies, creating a collage, and sticking to a palette of black, orange and red. I added some of the numbers into the blank hexagons, and coloured the images with pencils. I added a few bees from the Honey Bee stamp set, and overstamped a few of the words from Polygon Poppies.
Poppies are one of my favourite flowers to work with and these stamps are no exception. I hope that you have enjoyed some of my ideas. Thanks for stopping by, take care. xx


Wednesday, 11 August 2021

Focus on Florals

Hello everyone, I hope that you are all keeping well. I am back to share more projects from last month's TV shows.

My first project was created with a piece of scrap corrugated packaging, the sort that comes as a parcel containing books or anything flat, really. I opened it out, took off any extra pieces, and peeled away the top surface to reveal the ridges underneath. 

I created a large piece of A4 background paper by using one of the little worker stamps from the Flora and Fauna stamp set, stamping and embossing it randomly over the background using white embossing powder. I then coloured the whole background using Fossilized Amber Distress Ink and a blending brush. I chopped the background into three pieces to fit my corrugated panel, and added a bit of torm script paper to the lower portion. I die cut three tags from Drawing Cartridge which had been stained with tea. I stamped the main images from Walk Tall onto the tags, and edged them with Black Soot Distress Ink. On one tag, I added a sentiment directly, and on the other two, I added a piece of black ribbon and a little piece of card with a sentiment. I stuck the tags to the background and added lace and black buttons. I matted the yellow background to black card for definition before adhering it to the corrugated card. I chose to score the corrugated card to make a tryptich that would stand up, and for stability, I added washi tape to the back.

I created a similar background for my second project, using another little worker stamp from Flora and Fauna, embossing the stamp using white embossing powder over the background. This time, I chose Blueprint Sketch Distress Ink as the background colour. I stamped the image from the same stamp set onto a piece of Drawing Cartridge, and coloured it initially with Distress Inks and a waterbrush. I added shading with pencils. I stamped a sentiment from Punky Expressions onto a small die cut rectangle. I edged all of the card pieces with Distress Ink before adhering them to the card blank.

I chose to use the very pretty foxglove from the Honey Bee stamp set as the main focus for my final card. I stamped the image three times, along with two of the bees, and masked the images, before adding colour to the background with Distress Ink. I spritzed the background with water. I stamped the silhouette image using first and second generation stamping using green and purple ink. I removed the masks and coloured the images with pencils. Finally I added the sentiment from the same stamp set.

I will be back later in the month with more projects to share with you. Take care, and thanks so much for stopping by, xx


Saturday, 10 September 2016

It's all about the Texture

Hello everyone, this month over on the Chocolate Baroque Design Team, we are exploring texture. It can be in a variety of ways, using stencils, stamps, patterns, layers, but as long as it represents texture in some way. I knew that I wanted to create this piece as my first project, as it incorporated lots of my favourite things. I hope that you enjoy what I have created, and use some of the tips along the way.

Those of you that know me, know that I adore poppies, and I decided to create a project using one of my all time favourite Chocolate Baroque stamps. I have used this stamp so many times over the years, and I decided to make it the focal part of my design. I covered a Tando plaque with a very thin layer of texture paste, do not make your layer too thick, or this will not work. I spritzed my poppy stamp with water, and stamped the excess off onto a non-stick craft mat, before gently pressing the stamp into the texture paste. I also used a small texture stamp from the Tangled Fragments stamp set around the edges. I set the plaque to one side to dry.

I covered a square canvas with gesso, and dried this completely. Using texture paste, I added some poppy heads to the canvas with a stencil. I let the canvas dry completely. I then took one of the Gold Aztec Paints, possibly Antique Gold, (mine do not have colours on them, so I do not know, but it is the duller of the gold options in the pack), and poured out two large blobs onto my non-stick craft mat. I added Vermillion Brusho to one blob, and Sea Green to the other blob. I painted the canvas using the paints, half red, half green, blending wherever they met. I also painted the Tando plaque, using mostly green, but added a small amount of red around the edges.

Once both of the pieces were dry, I added some stamping to the canvas, using a corresponding stamp from the Harlequin Fragments stamp set, using red and green Archival Ink. I added some gilding wax to the textured areas on both pieces, and edged both pieces with Gold Soft Form Relief Paste. This makes a super edging, as it is very easy to apply.

I added some pretty green/grey lace to the canvas before attaching the Tando plaque. I wanted this piece to provide a bit of a boost on those days when I am feeling a bit grey, and so I added an inspirational quote from the Words of Wisdom stamp set.


The picture taken outside shows the shimmer from the paint and the gilding wax, whereas the photograph taken inside shows up the texture detail a bit better.

I will be back later in the month with another texture piece to share. Thanks for stopping by, xx


Friday, 13 May 2016

Fifteen Minute Krafting


Hello everyone, there is a huge blog post over on the Design Team blog today, featuring more of our fifteen minute cards. This is a bi-monthly feature running on the blog, showcasing quick and simple cards, using stamps from Chocolate Baroque. We are trying to show how cards can be made in fifteen minutes or less and still be fabulous and eye-catching.

I am sharing two projects in the blog post today, both made using kraft card, hence the title of my blog post, please excuse the pun. The first of the projects is a set of little notelet cards, suitable for lots of occasions, and small enough to be gift tags, if I wanted to use them that way. To create the notelets, I took two sheets of A4 card, and measured 9.8 cms across the card, and cut three equal strips of card. I then scored and folded the card strips in half, and rounded all of the corners. I stamped the images and sentiments using Versafine Onyx Black Ink.

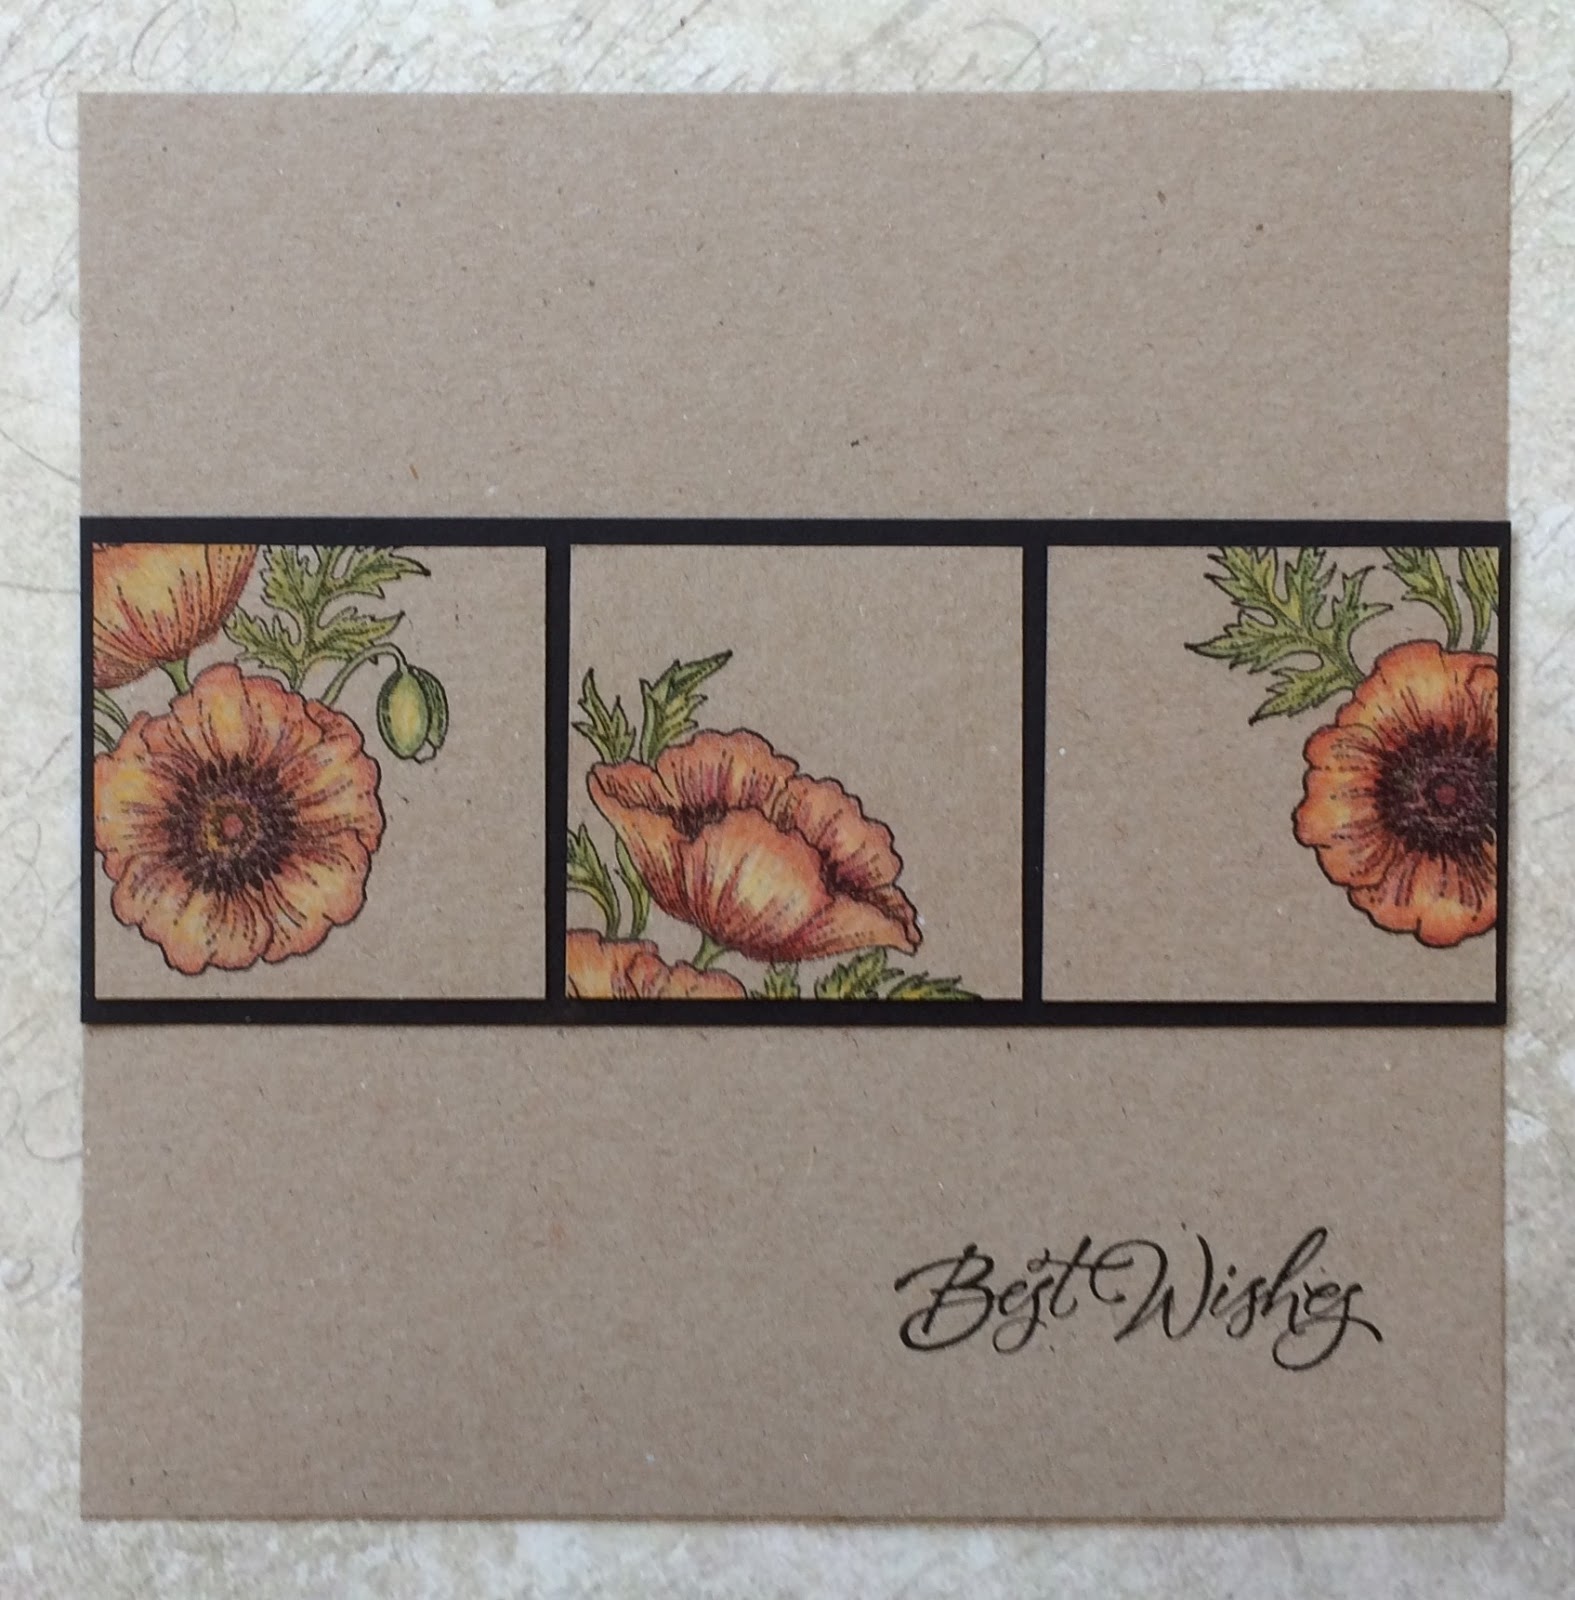
I have also created a card using a Poppy image from the Flora and Fauna stamp set. I die cut three squares, and stamped a segment of the image onto each square, and coloured it using Polychromos pencils. I mounted the squares onto a strip of black card, before adding the strip to another piece of kraft card. I added a sentiment from the Card Sentiments clear stamp set.

Please pop over to the Design Team blog to see the rest of the post, you will get so much inspiration from the rest of the projects. Thanks for stopping by, xx

Monday, 1 February 2016

Some of my favourite stamps

Hello everyone, I am taking a look back at some of my favourite Chocolate Baroque stamp sets during this blog post. It was a tough call, but poppies featured heavily in my choices, so here are a couple of cards, that I came up with.

For my first card, I have chosen to combine stamps from the Poppy Meadow and Flora and Fauna stamp sets. I have stamped these images, and after masking them off, created a sponged background using Distress Inks, and a Crafters Workshop stencil. I wanted a crumpled finish to the background, and the soft grey ink really helped to achieve this effect. I have added a sentiment from the Loving Sentiments stamp set, and a grey mat behind the background.


My second card uses a stamp from the Poppy Edges stamp set, which I have stamped several times onto watercolour paper using Dylusions in red, orange and yellow tones to spritz the paper. I cut the images out, and stuck them onto another sprayed background, adding a smaller image from the Poppy Meadow stamp set. I used some black card to mat and layer the background, and then added a sentiment from the Mackintosh Sentiments stamp set.


Thanks for stopping by, xx

Wednesday, 8 July 2015

Vintage Poppies

Hello everyone, it's time for another post on the Chocolate Baroque Challenge Blog, and this week, we have a free digital download for you. I have created a card using the download to provide a bit of inspiration, and hope thatyou will pop over to the blog to take a look at some more DT inspiration. We are also looking at some fabulous customer artwork that has been entered into the challenge this month. The blog is fast approaching its one year Anniversary, and we are preparing for the big event, which is not to be missed, as there will be prizes across the month. Do keep visiting the blog if you get a chance, and leave a comment if you have the time.

To create my card, I printed off Lesley's download onto some smooth white card, and trimmed it to 19cms x 19cms, and matted it onto a black card blank. I added some self-adhesive cream lace across the card. I took a piece of Prima Epiphany paper, and die cut a circle, and then stamped the poppy image from the Flora and Fauna stamp set, using Versafine Onyx Black ink. I coloured the image with Polychromos pencils, and then edged the circle with Hickory Smoke Distress Ink, before attaching it to the card. I have not added a sentiment yet, because I will wait until I know what I need to use the card for before I add any wording.

I hope that you will join in the challenge, as there are still a few days left. Here is the link to the post where you can add your entry.

Thanks for stopping by, xx


Monday, 30 June 2014

Building Backgrounds

Hi Folks, I have a couple of samples to show you today, using the Harlequin Fragments/Tangled Fragments multibuy stamp set from Chocolate Baroque

I love to make my own backgrounds, and these large stamps are perfect for mixing and matching over sprayed or inked surfaces, or even patterned papers, to create layered backgrounds. For my first card, I have chosen a soft colour scheme, using a printed Julie Nutting tag, and embossed the dotty harlequin stamp using white embossing powder. I have used the large dotty stamp on the main background, stamping my image onto scrap paper first, then onto the card to get a fainter image. This is known as second generation stamping. I stamped three butterflies from the Briar Rose Butterfly stamp set onto beige vellum, using white embossing powder.

The poppy image is from the Flora and Fauna stamp set, which I stamped onto white card and coloured it using Polychromos pencils before cutting it out. Lastly, the sentiment comes from the Mackintosh Sentiments clear stamp set, and I have again embossed this with white embossing powder. I sanded the edges of all of my pieces of card to give a shabby feel to them, before assembling my project and added some cream lace.

I cut my card to 7" x 7" size so that I could use the tag without the top edges showing, I quite like this size, and may make more if I can find a ready source of envelopes. A bit of searching on the Internet, methinks.


My second project was made using a tag that I coloured with leftover inks from my project here as I did not want to waste the remaining ink. I coloured two further tags, and this was one of them. I am trying to create a stash of available backgrounds for future projects, saving me time when I am starting to make a card or tag. I do try to rummage through what I have already made to see if I have something I can use when I am making something. Like me, I'm sure a lot of you have a scrap box full of bits and pieces left over from previous projects.


I stamped the large background stamp using cobalt archival ink, and added white highlights with a signo uniball pen. I used a stamp from the Artistic Expressions stamp set on the background using forget-me-not archival ink, which I also used to edge the tag.

I stamped a peacock feather from the Tangled Peacock stamp set onto pale green vellum three times using navy ink and clear embossing powder. I coloured the reverse of the images with copic markers before cutting them out. A piece of emerald ribbon finishes the tag.


Keep popping over to the Design Team Blog to see what my team mates have made, they have some super samples coming up in July using these stamps. Thanks for stopping by, xx


Monday, 15 July 2013

Golden Poppies

Hi Folks, I have a poppy sample to show you today. I love poppies, they are my favourite flower, so I have really enjoyed working with these lovely stamps. For my sample, I have created a wrinkle free distress background, and then used a poppy stencil over the top with two different colour green inks. With the poppy stencil still in place, I added a script stencil, and used a permanent marker to write over the words. Once the two stencils were removed, the poppies have script over them.

I stamped the main image onto white card, adding two little dragonflies from the Flora and Fauna stamp sheet. This is another beautiful set of stamps with some amazing poppy images that would go really well with this new set. I coloured my image with Distress Markers. I made a flower using handmade paper that had been coloured with re-inkers. I simply scrunched the layers up while they were wet, and set them with a heat gun. This makes the flower set really hard. I added a brad to the centre of the flower and placed it onto some lovely olive green ribbon with some Crealie leaves.


This card really makes me think of hot Summer days, and we are certainly enjoying those at the moment! Thanks for stopping by, xx


Related Posts Plugin for WordPress, Blogger...