Followers

Wednesday, 28 January 2015

Bee Happy, Don't Worry


Hello everyone, I'm posting my inspirational project for this month's challenge over on the Chocolate Baroque Challenge Blog today. Each week, we like to provide something different throughout the month to help inspire any visitors to the blog. It's winner's week over on the blog, and we are announcing who has won last month's challenge, so it's worth taking a look if you entered to see if you have won the prize. The Design Team also choose their Top Three favourite entries each month just for fun.

So, onto my project, I have based my card on the challenge colour swatch, which I will show you at the end of my post. I stamped the artichoke thistle onto a piece of smooth watercolour paper, and masked the image. I then stamped the foxglove image several times, and masked these images as well. Finally, I stamped the silhouette foxgloves, and I was ready to complete the background.

I coloured the background with Scattered Straw, Mustard Seed and Wild Honey Distress Ink, blending the colours where they met. I then stamped the honeycomb image across two opposite corners, using Siena Archival Ink, but I used second generation stamping, for a faded look. I also added a script stamp using Forest Moss Distress Ink over and around the honeycomb image.

I removed the masks, and coloured the images using pencils. I stamped three bees diresctly onto the page, and then stamped them again onto a scrap piece of card. I coloured the bees, and cut out only the bodies from the scrap card, sticking them onto the main background.

To create the sentiment, I cut an oval of shrink plastic, and stamped the bottom line of the wording using Timber Brown Stazon. I then stamped 'e happy', masking off the letter 'b' before I inked up the stamp. I then inked up 'be', masking off the word 'happy' before I inked up the stamp and completed the sentiment. I shrunk the oval, using a heat gun, and flattened it with an acrylic block when it had shrunk to size. Once it had cooled down, I added some alcohol inks to the reverse in toning colours and left it to dry.

Here is the colour swatch for this month's challenge:
We would love to see your entries, so please do pop over and read all about it. Thanks for stopping by, xx


Saturday, 24 January 2015

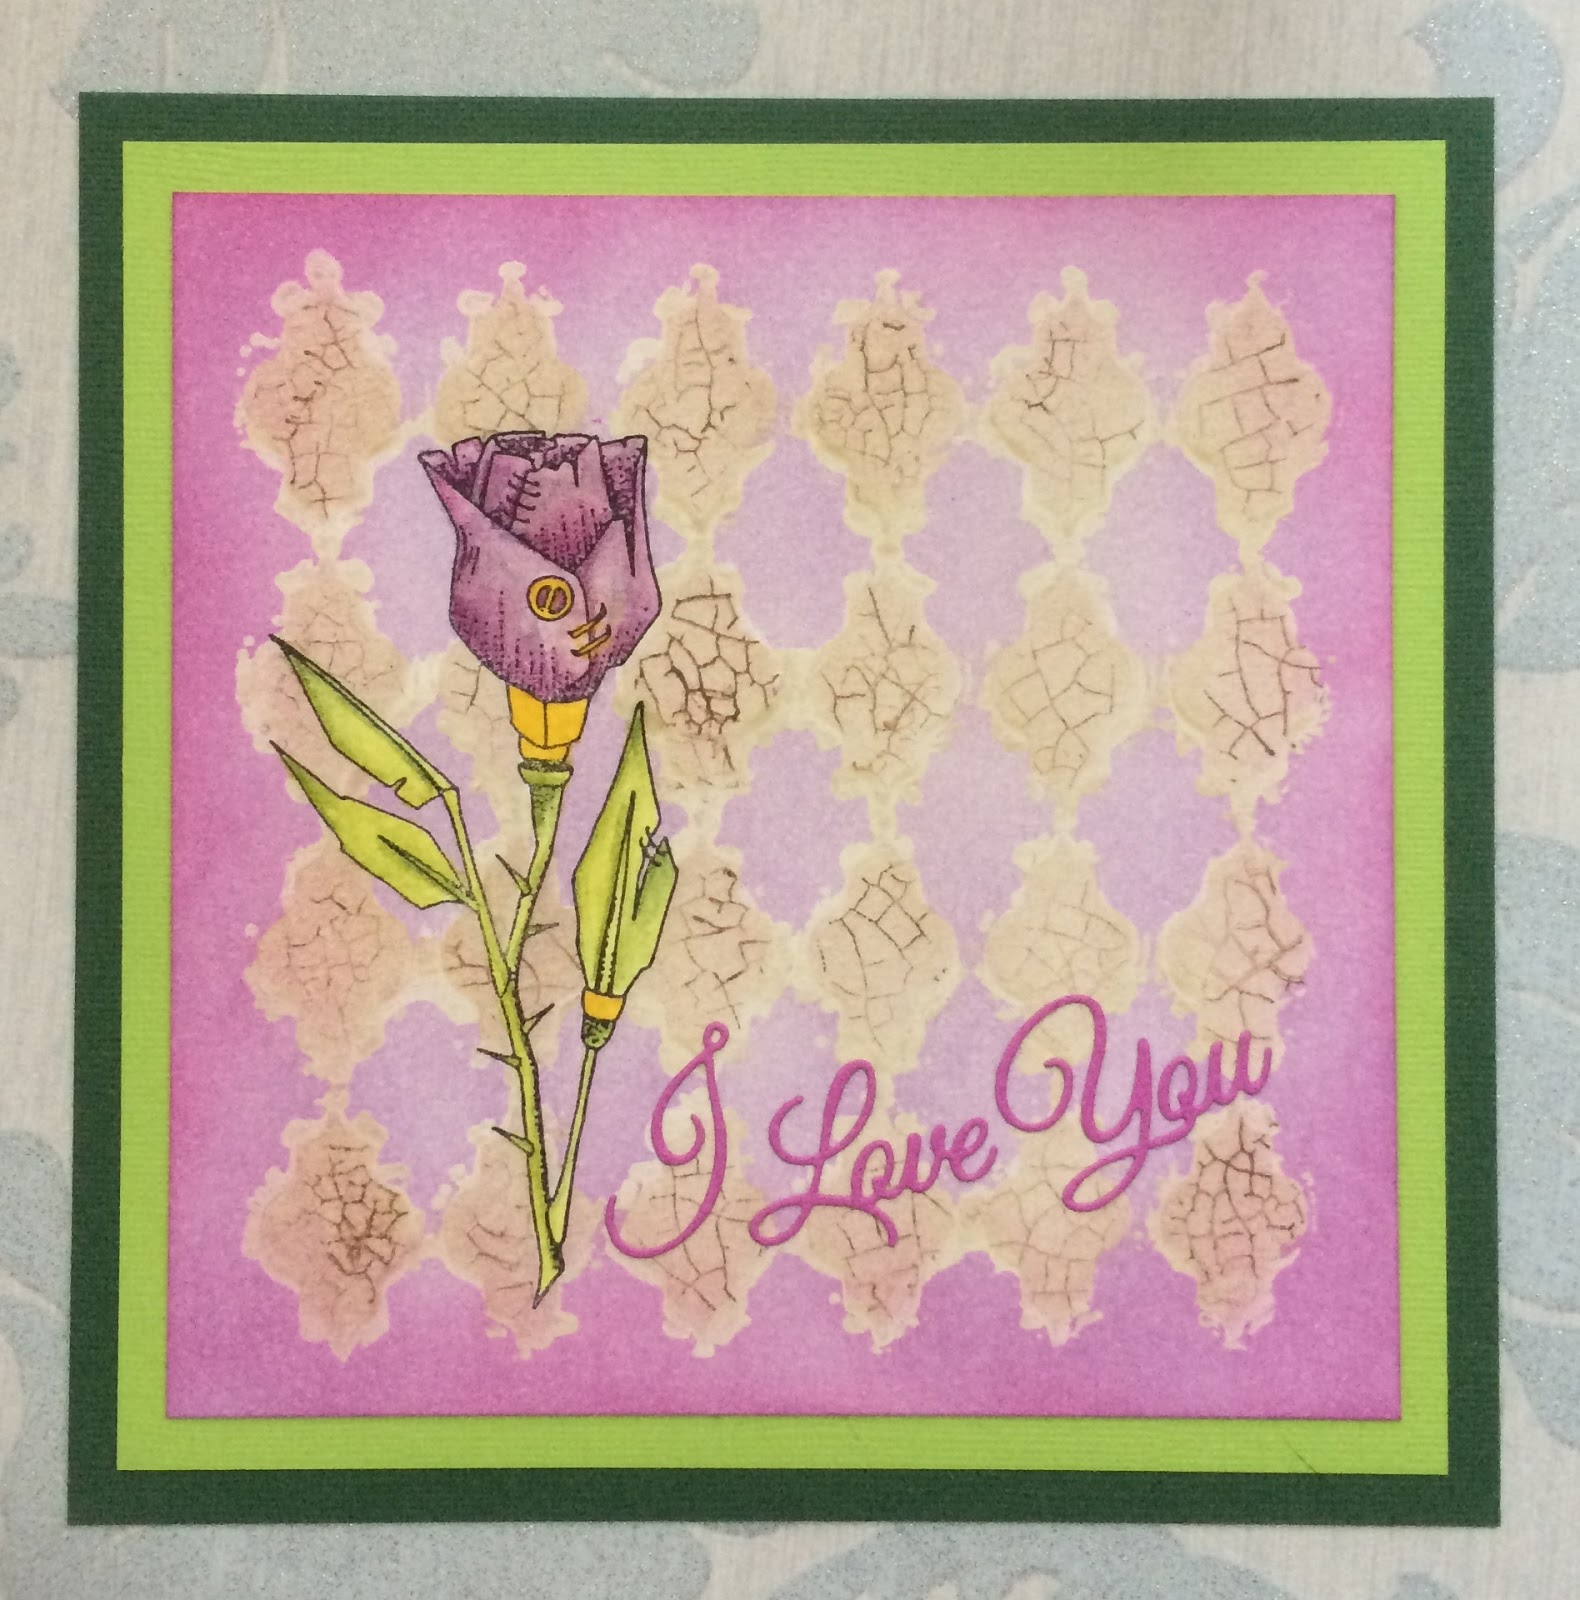
Valentine Rose


Hello everyone, I have a project to show you today using the Punky Hearts stamp sheet, currently on offer on the Chocolate Baroque website. It's coming up to the time of year when Valentine's cards are needed by ourselves, or requested if we make cards for other people. Here is an idea for the lovely punky rose.

I began my project by stamping and masking the punky rose on a piece of smooth watercolour paper. I then covered the background with a stencil, and using Memento Desert Sand ink, I coloured through the stencil. With the stencil still in place, I stamped the crackle stamp from the Echoes of Italy stamp set all over the background, using Memento Rich Cocoa ink. I stamped the image onto scrap paper each time first, so that I got a lighter image. This is called 'second generation stamping', as I did not want the ink to be too dark. Once the ink was dry, and with the stencil still in place, I brushed a layer of acrylic wax over the top, and allowed this to dry.

I removed the stencil, and covered the rest of the background with Memento Lulu Lavender ink, and then added a darker colour around the edges . The wax acts as a resist, protecting the area that was covered earlier. I buffed the wax areas, to remove any of the lilac ink, and the contrast between the two areas became much sharper.

I removed the mask from the rose, and coloured the image using more Memento inks stamped directly onto an acrylic block, which I picked up with a waterbrush. I picked out the 'metal' areas of the rose using a gold pen. I added a die cut sentiment, and matted the project onto green card.


Thanks for stopping by, Judith xx


Tuesday, 13 January 2015

A Bird for all Seasons and Ophelia the Mermaid?

Hello everyone, I have a project using one of the new individual cling mounted stamps from Chocolate Baroque, called Song Thrush to show you today.

I wanted to show the diversity of this lovely stamp, and how it could be used to create cards all year round, so I have made a Christmas card for my sample. I started by embossing the image a three times, using white embossing powder on some green scrapbook paper, and colouring the image with pencils. I decoupaged the flowers and bird. I layered the image onto kraft card, using some dark red card as a mat for contrast. I also added some holly die cuts, and some more stamping, using a berry stamp from the Woodland Dreams stamp set which I also coloured with pencils. I tucked some flowers from a spare image under the main frame, along with the holly die cuts. I added some shading around the edge of the kraft background, using Festive Berries Distress Ink. Finally, I added a sentiment taken from the Warm Christmas Greetings clear stamp set.

I always start out with good intentions to make Christmas cards throughout the year, in order to be ready when December comes around. Hopefully my card will have given you some inspiration.

For my second sample, I stamped Ophelia onto a piece of heavy weight cartridge paper, and then masked the image. I coloured the background, by blending Shabby Shutters, Peacock Feathers and Salty Ocean Distress Inks randomly all over the page. I stamped an image from the Texture Fragments stamp set onto opposite corners, using Salty Ocean Distress Ink. I then flicked water onto the other areas of the page, and dried it with a heat gun, to emphasise the watermarks.

I stamped and embossed a seaweed image along the bottom of the page, from the Underwater stamp set,  using a blue/green metallic powder. I then added some flowers which I had cut out and coloured with pencils from the Song Thrush Silhouette image. It just goes to show that you can add flowers to just about anything! I coloured Ophelia using pencils, and matted the project using toning coloured card.

For a bit of underwater shine, I added Glossy Accents to the centre of my flowers. Thanks for stopping by, xx

Saturday, 3 January 2015

Everyone should have a Heart

Hello everyone, I hope that you all had a good Christmas and a very Happy New Year.  I am working with the Punky Hearts and Fluttering Hearts stamp sets this month, and want to show you how versatile these sets can really be.

My first card is a very quick card for those occasions when you do not have much time to make something. I stamped a large flourish from the Butterfly Dreams stamp set onto a small square card using Versafine Vintage Sepia Ink. On a piece of scrap paper from my stash, I stamped the apple and half of the butterfly from the Fluttering Hearts stamp sheet. I used Distress Markers to ink the stamps, enabling me to get the multi-toned effect. I also stamped a half butterfly directly onto the card. I cut the images out and attached them to the card, and finally added the sentiment in the bottom corner.
 My next card is again very CAS in style, as I wanted to create a masculine card suitable for an Anniversary or Valentine's card. I masked off a large area of the background, leaving only a horizontal strip showing, and then stamped the area with the floral heart using black ink, covering it with clear embossing powder. I then added some colour using three different tones of Distress Inks, before removing the paper masks. I stamped and embossed the heart once more onto a piece of kraft card, before cutting it out, and adding it to my design with 3D foam pads. Finally, I added a sentiment from the Words of Love stamp set and matted my background onto black card.
 My last project is a mixed media tag, using a real mixture of stamps, which I love to do when creating my projects. I already had the tag in my stash, coloured using the wrinkle free Distress method in a mixture of blues and greens. I had used the tag to mop up some spare ink on my craft mat left over from another project, rather than just waste the ink.

I took some Pearl Soft Form Relief Paste and added some Brusho powder to it on my craft mat, using a palette knife. Once the colour was mixed thoroughly, I spread some of the paste over my chosen stamp, the large steampunk heart, and left it to dry overnight. I used some of the left over paste through a stencil onto the tag. (I actually had enough to do another tag as well, waste not, want not!) There is a brilliant review of this product written by Lesley on the Chocolate Baroque website that you can read if you want to know more about it: Testing the new Soft Form Relief Pastes.

Once the paste was dry, I carefully peeled the stamp away from the heart shape, and started to change the colour, as it was too bright for my project. I added some black acrylic paint, just a small amount, almost dry brushing it onto the heart shape, and the harlequin area of my tag. I then added some gilding wax to help create a patina effect. I gave the areas a good buff with some kitchen towel.

To complete the background of my tag, I stamped a script stamp from the Eccentric Edwardian stamp set, using jet black Archival Ink, and the thistle artichoke from the Mellow Fruitfulness stamp set. I added some chain and jump rings for some added texture.  

 I hope that I have given you some inspiration with my projects. Thanks for stopping by, Judith xx
Related Posts Plugin for WordPress, Blogger...