Followers

Showing posts with label From Nature 2. Show all posts

Saturday, 10 September 2022

Dotty Strip Stamp

Hello everyone, I hope that you are keeping well. I have a couple of projects to share with you today showcasing stamps featured on last month's shows from Create and Craft.

I started my project with a large card blank, and drew along the opening edge using one of the Chocolate Baroque Draw and Tear Rulers Set 1 using a pencil. I cut the excess card away. On the inside of the card, I stamped the long dotty strip from Slim Word Strip 2 with a yellow dye based ink. I stamped a word strip from Slim Word Strip 1 over the top. I used one of the leaves from the From Nature 2 stamp set to stamp randomly over the front of the card using second generation stamping. I wanted a paler background because I did not want to detract from the other parts of the card.I added a splatter stamp from Timeless, using green and yellow ink.

I took a whiteboard heart and coloured it with the same yellow and green inks, and then stamped the same word strip as I had used along the card edge. I filled the heart, moving the strip across each time I stamped, to get a random compilation of the words. It looks great on one of these hearts. 


This card was fairly quick to complete, and I can see lots of possibilities for adapting the design to suit lots of occasions. Using the big word strips, especially now we have two sets for you to choose from gives lots of choices, and I hope that you will try out this idea, or a variation of the theme.

I decided to make another card featuring the dotty strip from the Slim Word Strip 2 stamp set. I stamped the strip onto a piece of Drawing Cartridge several times using shades of green and orange Distress Ink to create an ombre effect. I stamped the fruit tree from The Tree of Knowledge stamp set onto a piece of book paper, and coloured it with Zig Clean Colour markers. I added some shading around the edges using green Distress Ink. This card would be suitable for lots of occasions- a graduation, a book lover's birthday, or even just to show someone you are thinking about them.


 Thanks for stopping by, take care, xx


Thursday, 8 September 2022

Leafy Bokeh Card

Hello everyone, I hope that you are keeping well. It's time for another monthly Fifteen Minute Card spot, and this month, I'm in a leafy mood. I have chosen to use the beautiful leaves from the From Nature 2 stamp set to create a quick Christmas card.

I stamped and embossed the leaves using a silver glittery embossing powder, and added a few snowflakes using white embossing powder. Keeping my background very speedy, I added shading with green and blue Distress Inks. I added some white circles with a stencil and Brilliance Ink for a bokeh effect. Finally, I added a sentiment from the Pears and Baubles stamp set. I love the font on this sentiment.

If you get the chance to make a quick card in Fifteen Minutes or less, then head over to the Chocolate Baroque Facebook Group where I have created an album for this month. You can pop your cards or other projects in there. We would love to see what you have made. Thanks for stopping by, 

Take care xx


Thursday, 1 September 2022

Creating Stamps Using Leaves From The Garden

Hello everyone, I hope that you are keeping well. I have some cards to share with you today showcasing some of the wonderful stamps that we brought to the TV shows last month on Create and Craft. If you watched the shows, you will have heard the story behind some of these images, and how they came to be created. From Nature 1 was an incredibly beautiful stamp set, created from leaves collected around where David and Lesley work. I offered to send some leaves to Lesley from my garden in Norfolk, as I have some interesting leaves which are unusual, and would make fabulous stamps. So, I packed them up in resealable bags, and sent them to Lesley. The leaves were in pretty good shape when she received them, and therefore, From Nature 2 was created. I did craze Lesley to add a particular leaf to the stamp set, but they are all so versatile, and I had great fun creating my projects with them.

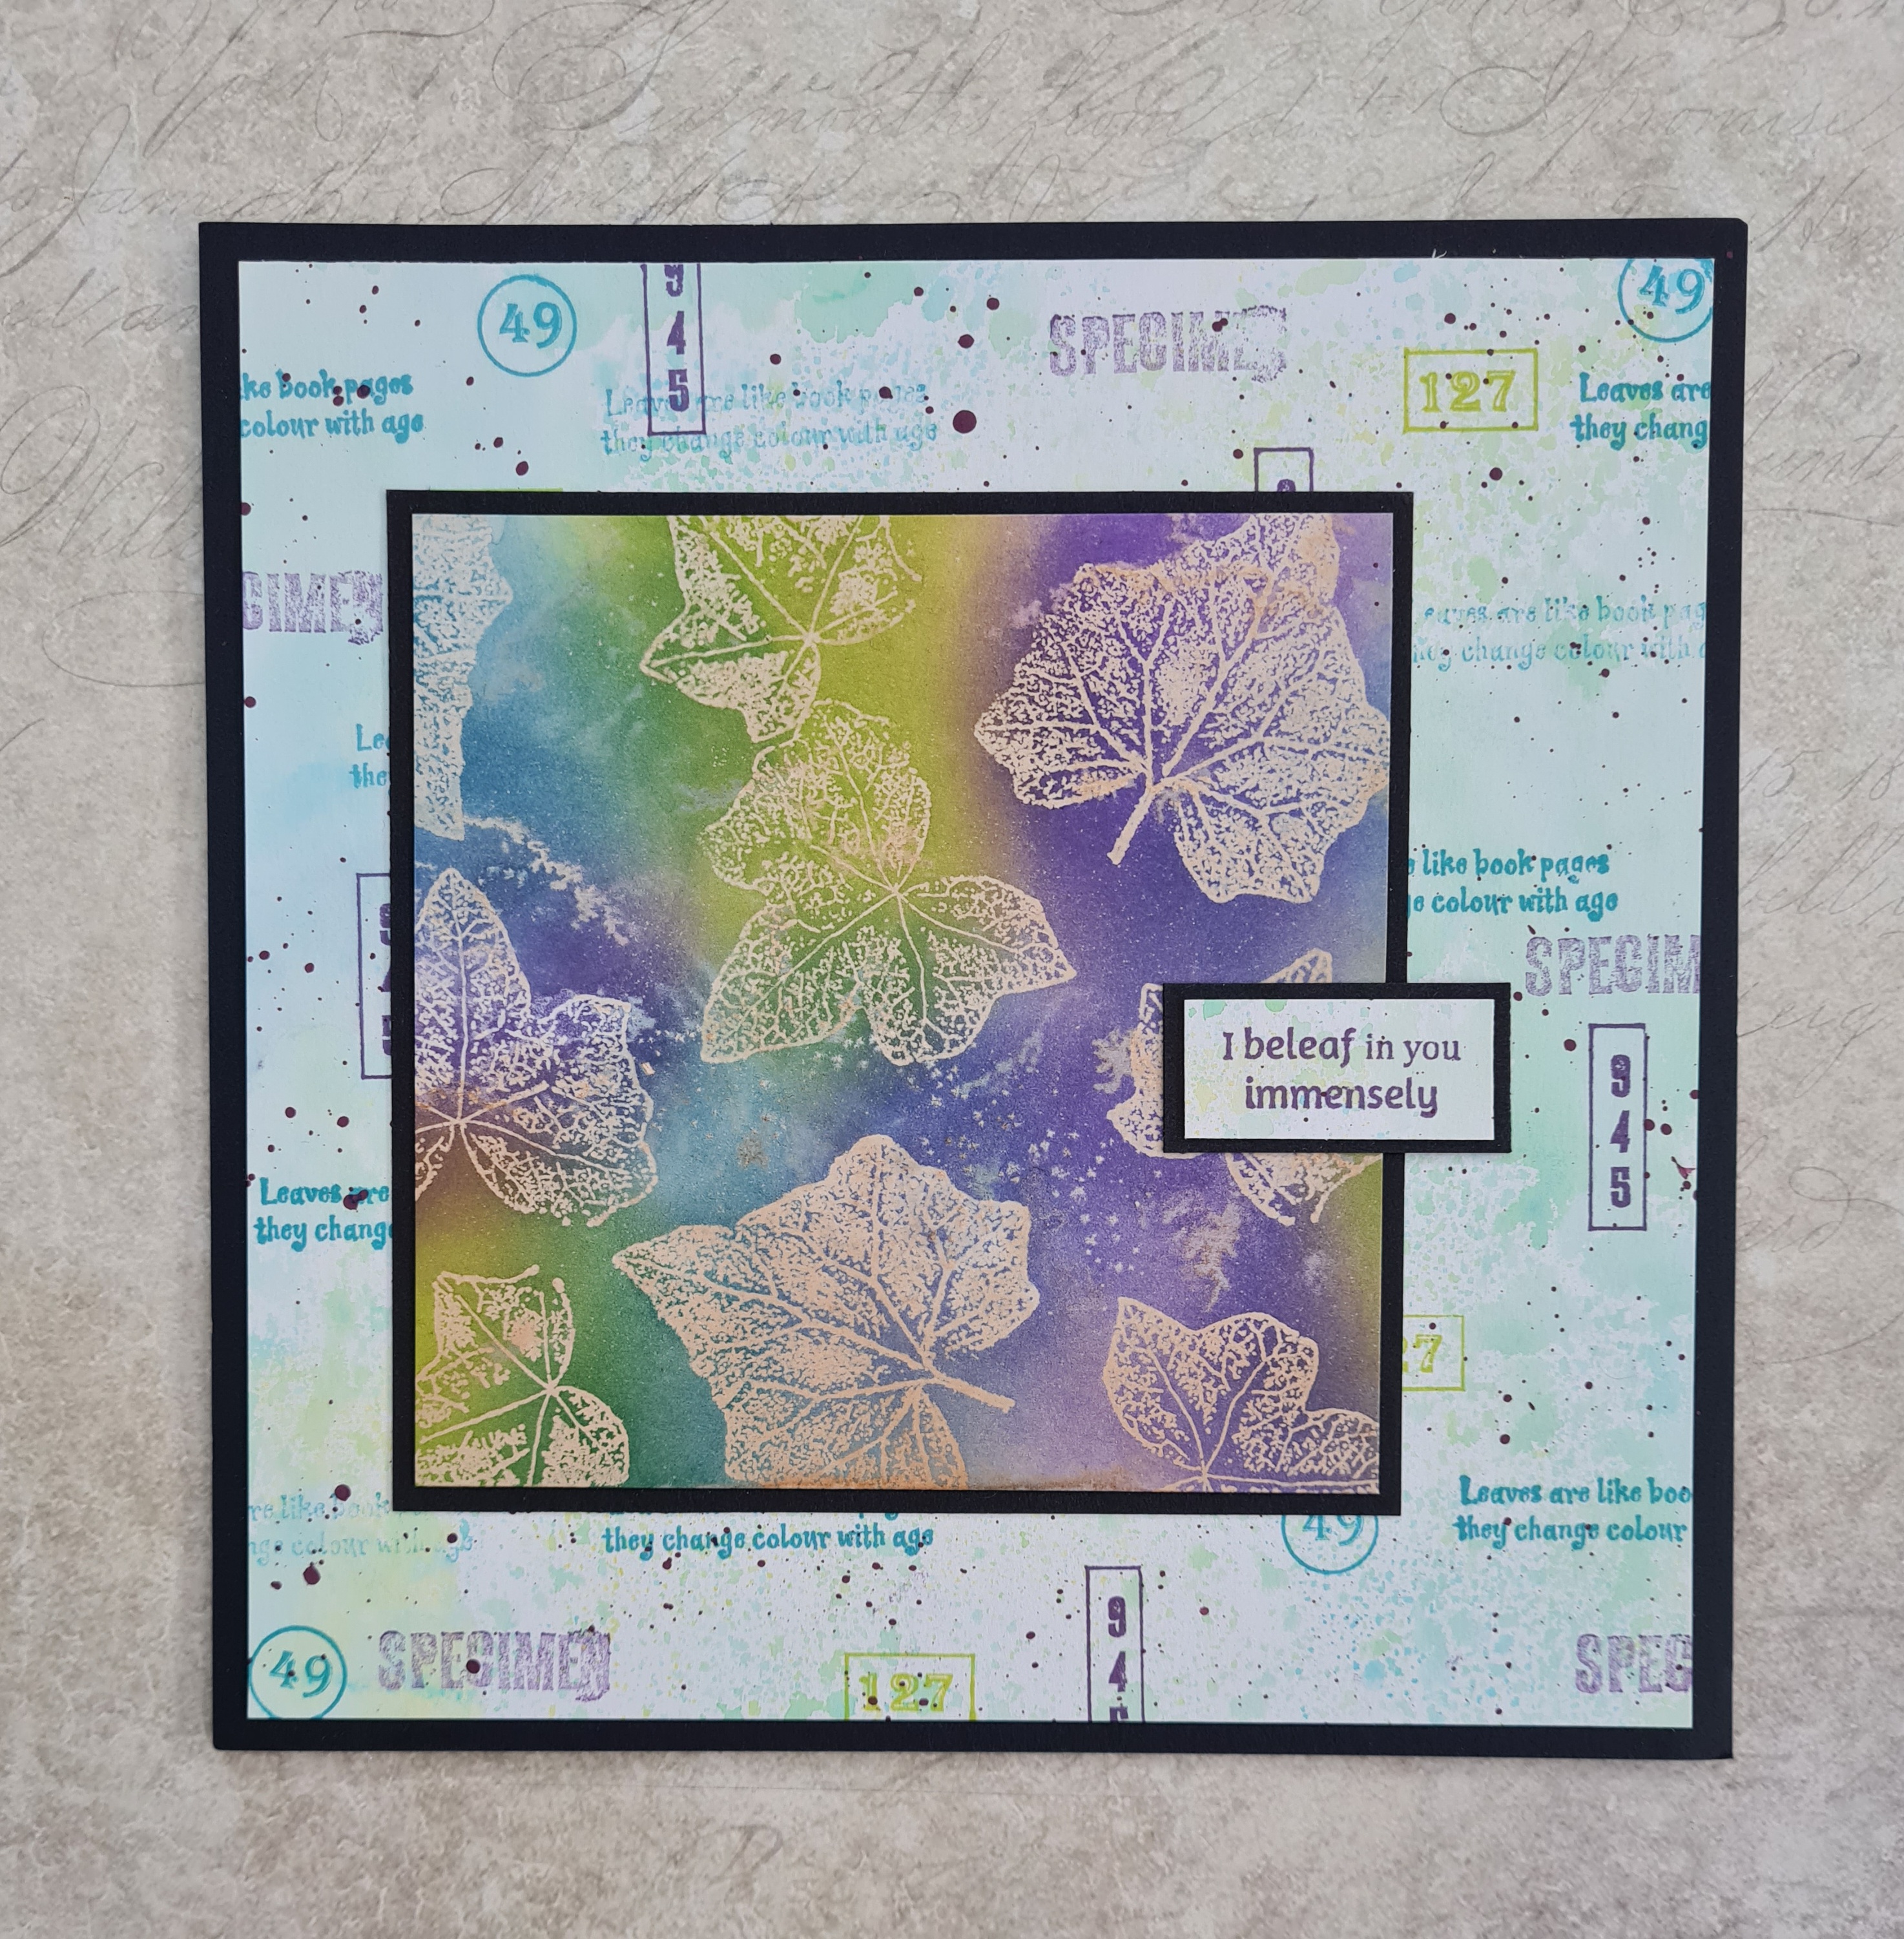
For my first card, I created a Distress Ink background and added a few extra paint splatters. I stamped some of the various words and sentiments over the top. I chose colours that would tone in with the focal part of my card, using Versafine Clair Inks. I used a small spare piece of this background card for a sentiment too.

To create my topper, I covered a piece of Drawing Cartridge with cold tea, and added sea salt to the background while it was still wet. I left the background to dry naturally, and then brushed the salt away. The salt leaves great markings on the background. I stamped and embossed the three sizes of ivy leaf onto the background. You can use clear or white embossing powder, it doesn't matter, although white embossing powder will enable you to see where you are embossing more easily. I then added Distress Ink all over the top of the background. 

I placed some copy paper over the background, and then ironed the embossing powder off the design. I kept checking that the embossing powder had all gone, replacing the piece of paper each time I checked. You can use brown paper if you prefer. By taking away the embossing powder, you get a completely flat surface, this is called a 'faux batik' effect, it looks like the batik material that originates from Indonesia, which is created by using wax as a resist when dyeing fabric. I also felt that by using the tea dye behind the Distress Ink, the irregularities looked like the background had been sun bleached, as if I had created a cyanotype effect. 

I used blue inks on another piece to really highlight this effect.

My second project features the stunning Plume Poppy leaf, or Macleaya Cordata if you prefer the latin name. I used an actual leaf to create the background, using a technique that my lovely friend Elaine, an ex Chocolate Baroque Design Team member, taught me. To create the topper, I simply stamped and embossed the leaf, and added colour using Distress Inks, water and a brush. A few splatters of brown ink, and one of the smaller stamps from the set complete the design.


For my final card, I chose to use the Smoke Bush or Cotinus leaves, there are two on the stamp set. I arranged them in clusters, just as you would see them on the bush, and coloured them with pencils. For the larger background, I simply stamped them with a plum coloured ink. Both backgrounds are simple Distress Ink backgrounds, and I have edged both layers with a plum coloured ink to avoid using extra card to mat and layer.

I hope that you have enjoyed the story behind these stamps and will try out some of the ideas that I have shared with you. I will be back later in the month to share more leafy projects with you. Thanks so much for stopping by, take care, xx


Wednesday, 17 August 2022

Launching Fifteen Minute Cards Again!

Hello everyone, I hope that you are keeping well. I am sharing a few projects to launch an old favourite on the Chocolate Baroque Facebook Group and also on Instagram today. I used to run the Chocolate Baroque Colour Challenge Blog, and a regular monthly feature was the Fifteen Minute Card feature. Myself and the Design Team used to create cards in fifteen minutes or less using stamps from Chocolate Baroque. We used up scraps from our stash, or made clean and simple cards, any style of card was achievable really, but this style of card was great for batch cards, craft fairs, Christmas cards, Wedding Invitations, etc. If you needed a card in a hurry, or wanted to make a quick card or two for your collection, being able to make a card in fifteen minutes is such a good idea. It's great for beginners too, as you do not need to make anything complicated, and can try out lots of ideas quickly.

I am sharing lots of familiar ideas in this post, and I will be creating a post once a month, roughly around the middle of the month. I won't post on exactly the same day, life gets in the way; holidays, and other commitments, but I will always share what I have made, and let you know where you can post your projects if you would like to create along with me and the Chocolate Baroque family. I hope that you will enjoy yourselves, just playing with your stamps and materials for fun. After all, hopefully we can all spare fifteen mintes every now and then!

For my first two cards, I created backgrounds using an acrylic block. I added Distress Ink to the block for my card, and spritzed it with water. I placed the block onto a square piece of Drawing Cartridge, pressing down all over the block. I peeled the block away and left the background to dry. (I created several backgrounds all at the same time while I was doing this background, and so I timed myself for four cards in an hour). I could have dried the background of with a heat gun, but it would have faded the background colours a bit.

Once the background was dry, I stamped the tree from Fantasy Woodland onto the background. I added foliage from Silhouette Grasses along the bottom, and a sentiment from the From Nature 2 stamp set randomly over the background. I coloured the tree with Koh-I-Noor pencils, just using two colours for the fruit, and two colours for the leaves. It was really quick, and took me just a couple of minutes. I trimmed the panel and edged it with green ink before attaching to to a piece of linen card.

For the second card, I used Distress Oxides on the acrylic block, creating a background as before. I chose a selection of stamps from the Silhouette Grasses stamp set, and using Versafine Clair Ink, I created a meadow scene. I added a sentiment from Words to Dazzle and Sparkle.

My third card was stamped directly onto a card blank, and was so quick to make. I used a circular gelli plate, and added Distress Ink to the plate before 'stamping' this onto the card blank. I stamped two dragonflies from The Phenomenal Butterfly Elements stamp set onto the card, and masked them, before adding a couple of script rings from the same stamp set. I masked these as well, and then added a couple more stamps to complete the collage effect. I removed the masks and coloured in the dragonflies and script rings with pencils. The coloured circles are from the Floral Paraphernalia Elements stamp set.


My final card was created by using a piece of patterned paper. Lots of the work is already done for you when using patterned papers, but you can add so much detail over the top. We all have bits and pieces lurking in our stash, don't we? I stamped the beautiful dandelion clock from Not More Flowers! and added elements from Making More Marks, all using Archival Ink.


I hope you have enjoyed my selection of cards this month, and that you will join in making a few quick cards yourself. Head over to the Chocolate Baroque Facebook Group, where I have created an album, look for Media at the top of the page and search for the August 2022 Fifteen Minute Cards Album. Alternatively, head over to Instagram, and upload your cards with the hashtag #chocolatebaroquefifteenminutecards

Take care, and thanks so much for stopping by,


xx



Related Posts Plugin for WordPress, Blogger...