Followers

Showing posts with label Not More Flowers!. Show all posts

Thursday, 30 May 2024

May Fairies

Hello everyone, I hope that you are keeping well. I have a few projects to share with you today featuring our May Fairy set of stamps that were showcased on this month's shows on Create and Craft. 

My first project is a simple card using some of the May patterned papers designed by Lesley. I trimmed the paper slightly and added it to a DL black card base. I stamped the fairy and a couple of butterflies onto some smooth stamping card, and coloured them with pencils to match the patterned papers. I cut them out and attached them to the background. I popped the fairy into a flower, as if she was resting there, and added some shading under her foot using a green pencil. I stamped a sentiment from Words to Dazzle and Sparkle to complete the card.


I have used a mixture of stamps to create my next card. I found a background paper designed by Lesley from my stash, and used the colours as the basis for the colour scheme. I added a dandelion head from Not More Flowers! and some dandelion seeds from Seasonal Fragments. The foliage stamped in green and heather tones is from Autumn Hedgerow, stamped in first and second generation stamping. The fairy blowing the dandelion appears to be making a wish, so I have used the same sentiment as before because it fits this card so perfectly.

I have used a couple of the smaller stamps from the May Fairy stamp set to create a little bookmark. I cut a rectangle of Drawing Cartridge and stamped the iris and butterfly from the stamp set. I added a sentiment from the Mindfulness stamp set. I painted the images with watercolour paints. I created a border with black card, punched a hole at the top and bottom and added some ribbon. This was quite a quick project, and you could make several of these in a session to give as gifts.


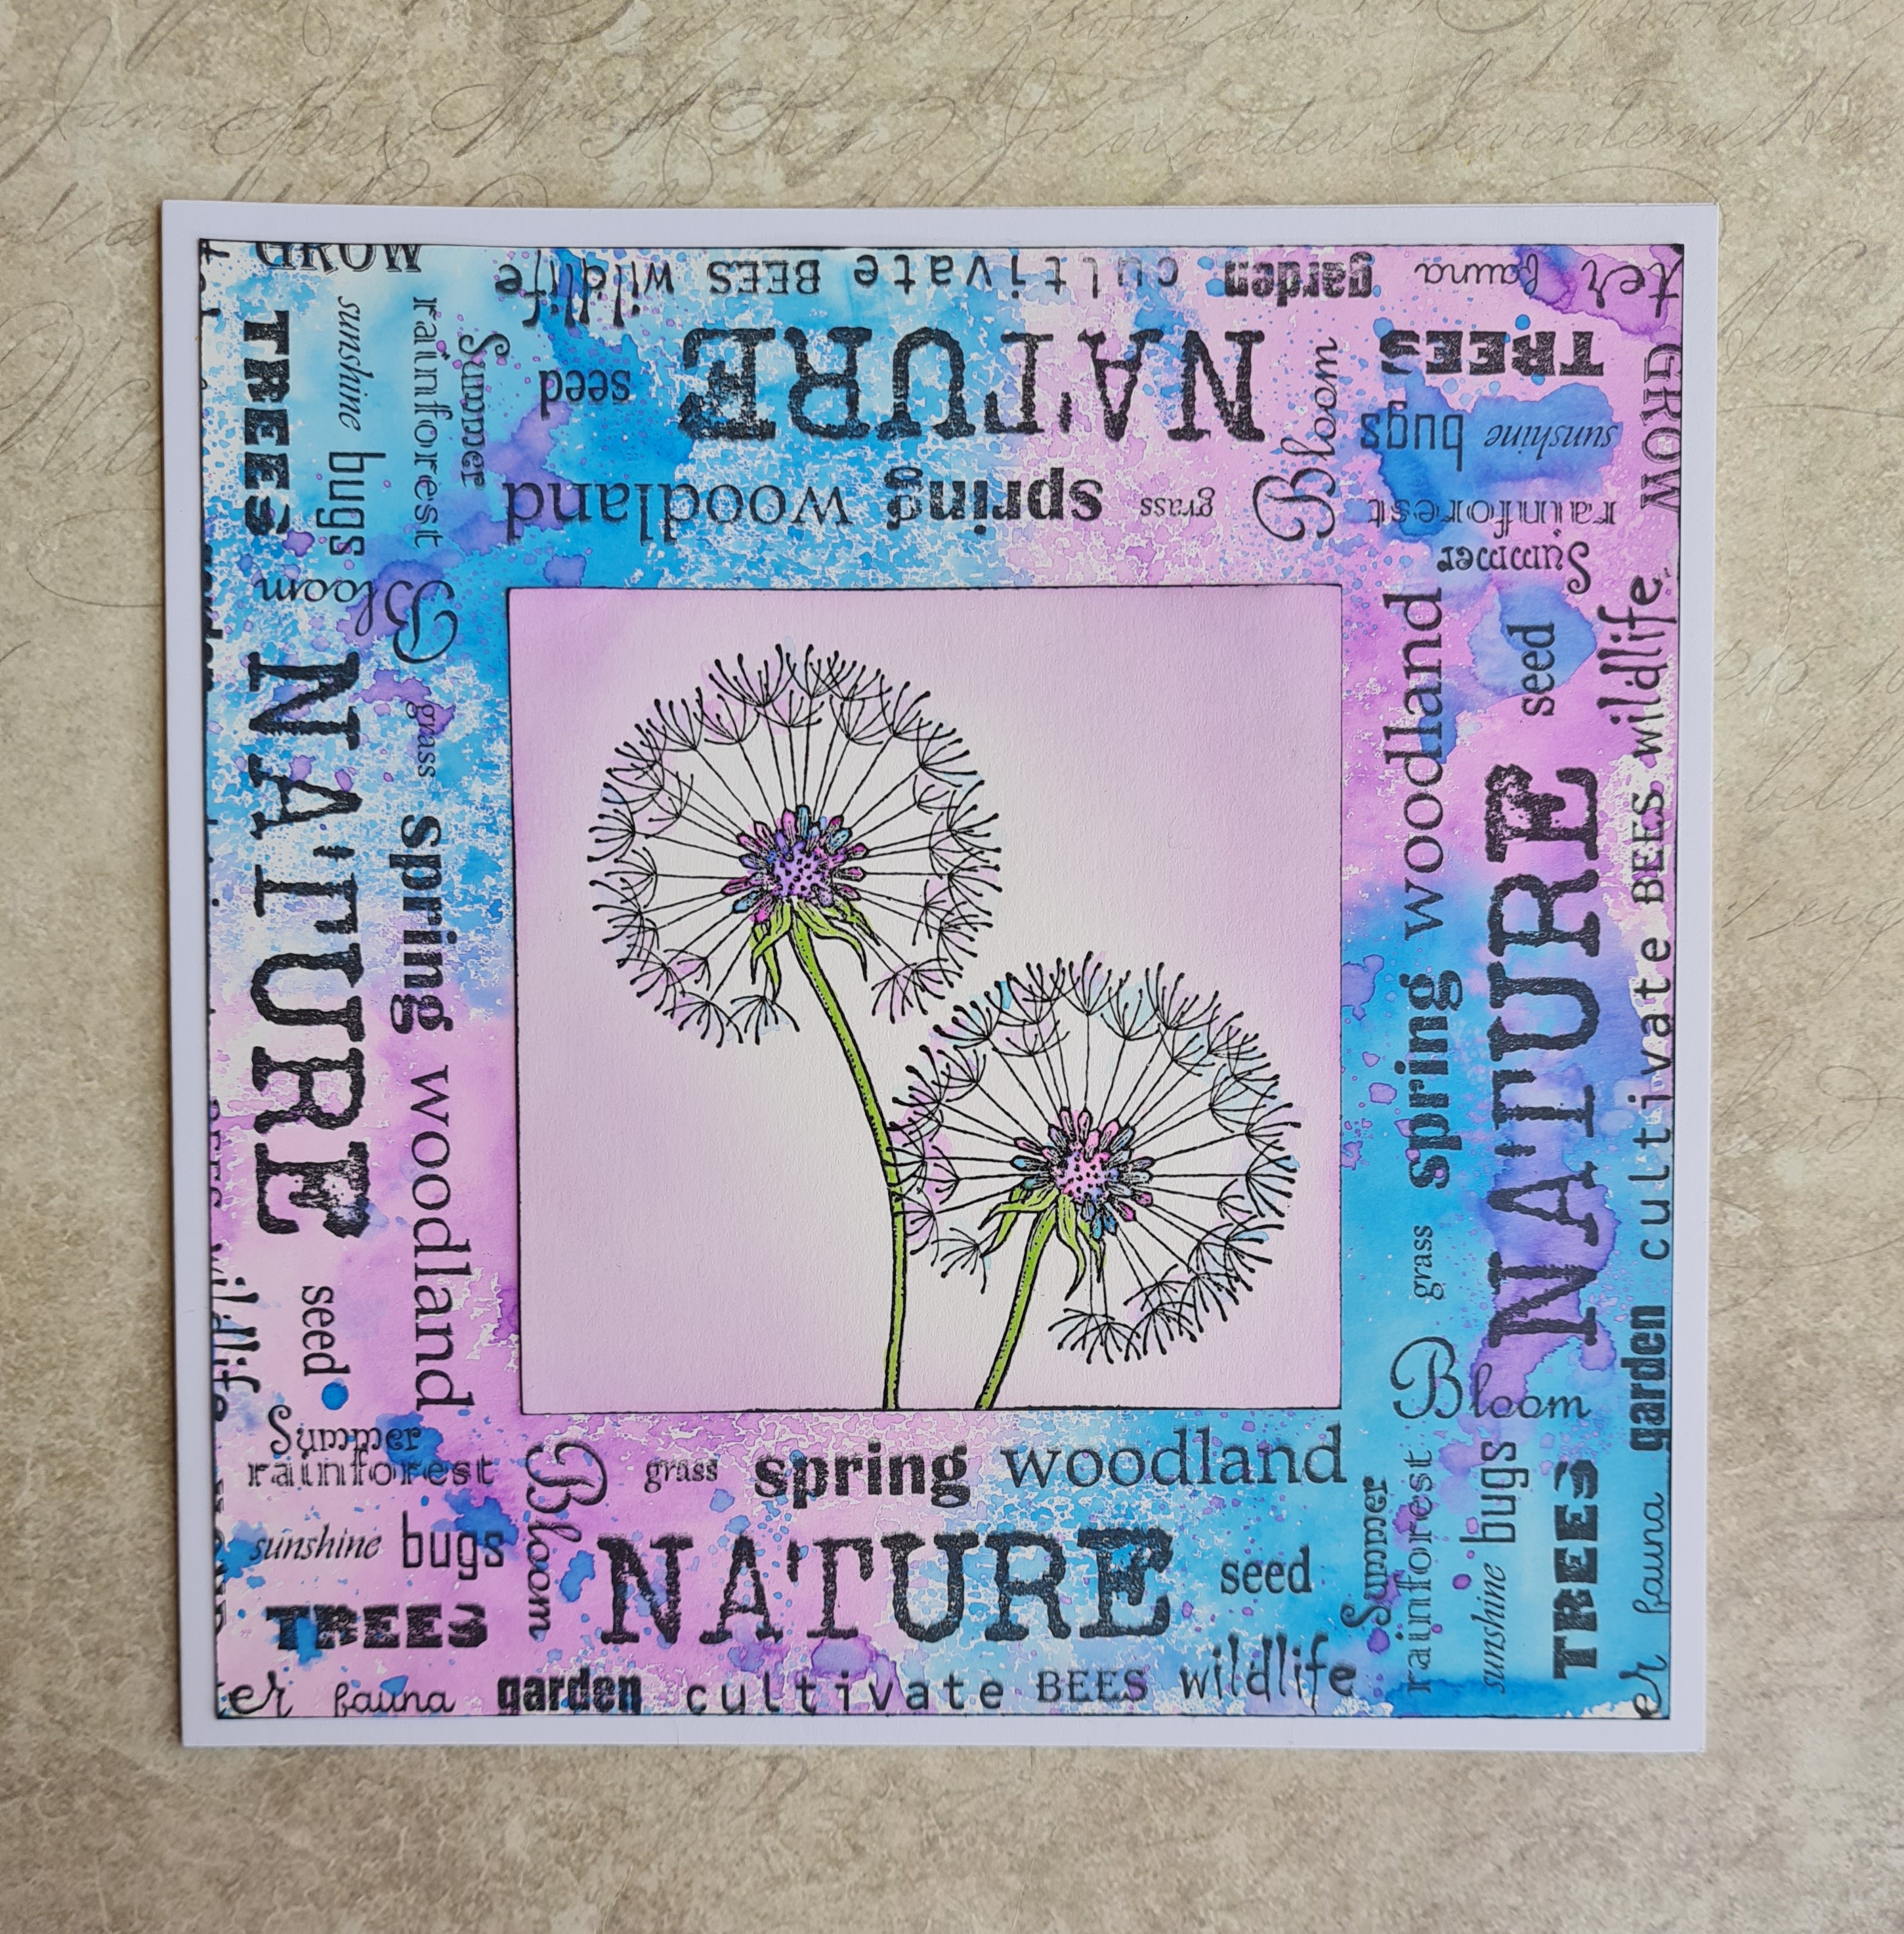
I made a pretty Floral card using the main image from the new Floral Abundance stamp set. I stamped this using a heather coloured ink for a change onto smooth stamping card and coloured the image with pencils. I created a background by stamping the Mindfulness word cloud repeatedly over a Distress Ink background. I used the same Heather coloured ink for the stamping to tie everything together. I used the Mindfulness stamp loose in my hand, rather than on an acrylic block, so that I could partially stamp the image in the little gaps between the circles, thereby creating a complete background.

Finally, I am sharing a quick progress photo of my concertina book. I am making this throughout the year using the patterned papers that Lesley designs each month, and using the fairies from each month's stamp sets. Once I had constructed the book, and added the black matting layers to each page, all I needed to do each month was to create the individual pages. The covers are designer papers from another set that Lesley created. I have decorated the front cover with stamps from the first half of the year, and intend to decorate the back cover with stamps from the second half of the year. It will be great to see this project through to the end and to look back at all of the designs once I have finished my book.

Thanks for stopping by, your visits are always much appreciated. xx



Wednesday, 17 August 2022

Launching Fifteen Minute Cards Again!

Hello everyone, I hope that you are keeping well. I am sharing a few projects to launch an old favourite on the Chocolate Baroque Facebook Group and also on Instagram today. I used to run the Chocolate Baroque Colour Challenge Blog, and a regular monthly feature was the Fifteen Minute Card feature. Myself and the Design Team used to create cards in fifteen minutes or less using stamps from Chocolate Baroque. We used up scraps from our stash, or made clean and simple cards, any style of card was achievable really, but this style of card was great for batch cards, craft fairs, Christmas cards, Wedding Invitations, etc. If you needed a card in a hurry, or wanted to make a quick card or two for your collection, being able to make a card in fifteen minutes is such a good idea. It's great for beginners too, as you do not need to make anything complicated, and can try out lots of ideas quickly.

I am sharing lots of familiar ideas in this post, and I will be creating a post once a month, roughly around the middle of the month. I won't post on exactly the same day, life gets in the way; holidays, and other commitments, but I will always share what I have made, and let you know where you can post your projects if you would like to create along with me and the Chocolate Baroque family. I hope that you will enjoy yourselves, just playing with your stamps and materials for fun. After all, hopefully we can all spare fifteen mintes every now and then!

For my first two cards, I created backgrounds using an acrylic block. I added Distress Ink to the block for my card, and spritzed it with water. I placed the block onto a square piece of Drawing Cartridge, pressing down all over the block. I peeled the block away and left the background to dry. (I created several backgrounds all at the same time while I was doing this background, and so I timed myself for four cards in an hour). I could have dried the background of with a heat gun, but it would have faded the background colours a bit.

Once the background was dry, I stamped the tree from Fantasy Woodland onto the background. I added foliage from Silhouette Grasses along the bottom, and a sentiment from the From Nature 2 stamp set randomly over the background. I coloured the tree with Koh-I-Noor pencils, just using two colours for the fruit, and two colours for the leaves. It was really quick, and took me just a couple of minutes. I trimmed the panel and edged it with green ink before attaching to to a piece of linen card.

For the second card, I used Distress Oxides on the acrylic block, creating a background as before. I chose a selection of stamps from the Silhouette Grasses stamp set, and using Versafine Clair Ink, I created a meadow scene. I added a sentiment from Words to Dazzle and Sparkle.

My third card was stamped directly onto a card blank, and was so quick to make. I used a circular gelli plate, and added Distress Ink to the plate before 'stamping' this onto the card blank. I stamped two dragonflies from The Phenomenal Butterfly Elements stamp set onto the card, and masked them, before adding a couple of script rings from the same stamp set. I masked these as well, and then added a couple more stamps to complete the collage effect. I removed the masks and coloured in the dragonflies and script rings with pencils. The coloured circles are from the Floral Paraphernalia Elements stamp set.


My final card was created by using a piece of patterned paper. Lots of the work is already done for you when using patterned papers, but you can add so much detail over the top. We all have bits and pieces lurking in our stash, don't we? I stamped the beautiful dandelion clock from Not More Flowers! and added elements from Making More Marks, all using Archival Ink.


I hope you have enjoyed my selection of cards this month, and that you will join in making a few quick cards yourself. Head over to the Chocolate Baroque Facebook Group, where I have created an album, look for Media at the top of the page and search for the August 2022 Fifteen Minute Cards Album. Alternatively, head over to Instagram, and upload your cards with the hashtag #chocolatebaroquefifteenminutecards

Take care, and thanks so much for stopping by,


xx


Sunday, 12 June 2022

Creating a Journal Page and Some Added Extras!

Hello everyone, I hope that you are keeping well. I have a project or two to share with you today showcasing stamps from last month's TV shows on Create and Craft. 

My first project is a two page journal spread, created in a large journal, almost A4 size. It is an American size, so not exactly the same measurement. I like to experiment in a journal, as I can often get ideas for cards and other projects when I am messing about creating journal pages. If I do not like what I create, I can just turn the page, and start again, there is no judgement, my journal is just a place to try out ideas.

I started both sides of the journal spread by inking up the large blank stamp from Slim Word Strip 1 with Distress Oxide, and spritzing it lightly with water. I pressed the stamp down the edge of each page. I chose a lovely moss green. I also stamped the stamp again onto a piece of scrap Drawing Cartridge for later.

Once the edges were dry, I stamped a couple of the word strips over the coloured edges using Versafine Clair Nocturne. I chose random stamps from Making More Marks, and Not More Flowers! using a combination of black orange and green ink to create a background over the pages. I stamped the lovely dandelion clock into the centre of the large circle on both pages, and added some of the olive gree ink within the circle to highlight the flower.


I also added some colour to the flower using Zig Clean Colour watercolour pens, a brush and some water. Finally, I masked up the strip word stamps, and inked up two of the large words on the stamps, before stamping them onto a piece of the spare Drawing Cartridge that I had coloured previously. I cut them out and scrunched these for a bit of added texture before adhering them to the page. 

I did not add any background colour to the page, the stamps themselves were enough I felt, but you could add more colour if you wish, I like the white space, it gives the stamps room to breathe.

Also available on the show were some fabulous embellishments. The first were some really useful acrylic rings, that could be coloured and stamped over. I created a card using the pretty echinacea style flower, which I stamped onto a Distress Ink background. I coloured this with watercolour pens as before, for a soft finish. I added a sentiment from the same stamp set, and then I coloured both pieces of acrylic with alcohol ink. Once they were dry, I stamped the large ring with script from Ace Card, and the little circle with a bee from Honey Bee. These embellishments are just so useful for highlighting a key area of your project, but light enough not to add to your postage costs.

Finally, we had a new sheet of shapes from Tando in three different shapes and two different sizes. These word pebbles are very versatile and can be painted, coloured, textured to create all sorts of effects. I have three samples here to show you just how effective they can be. The first example has had Drawing Cartridge added over the top, and I have added a word from one of the strip stamps, plus the little bee from the Honey Bee stamp set once again.   

The second has another word from one of the strip stamps and the Large Crackle Background over a simple painted background. 

Finally, I added coloured texture paste to  the last pebble and stamped the word strip directly into the paste. Once the paste was dry, I added some black paint, which I rubbed away after a moment or two.


I hope that you have enjoyed my projects, and will be inspired to try some of these ideas out for yourselves. Thanks for stopping by, take care, xx


Wednesday, 1 June 2022

In The Frame

Hello everyone, I hope that you are all keeping well. I have some projects to share with you today showcasing stamps that were featured on last month's TV shows on Create and Craft. Each of the projects were created in a very similar way, just using a different focal stamp and colours.

I started my first two projects by creating a wrinkle free distress background - adding Distress Inks to my craft mat and spritzing them with water, before placing a piece of Drawing Cartridge over the top to pick up the colour. I dried the background, and patted the Drawing Cartridge onto the craft mat again, to get a second layer of color and dried the background again.

I selected one of the long word strips from the Slim Word Strip 1 stamp set, and stamped it around the edge of the background to create a frame. I started partway in on the first side, and that allowed me to follow around each side in the same way until I had finished. 

I chose the Dandelion Clock image from Not More Flowers! which I stamped twice and embossed with clear embossing powder. I coloured the image with Zig Clean Colour watercolour pens, and then edged the background with Distress Ink. I ran a black inkpad around both layers of card before I attached them to the card blank. This saves using black card as a matting layer.

I chose a subtle yellow/green background for my second card, and the pretty large daisy or gerbera image. I used the same strip stamp, but simply varied the section that I chose to stamp.

The last background was completed by blending Distress Ink over the background with blending brushes and then spritzing the background with water. The effect is a bit softer, but definitely takes longer! I used the pretty echinacea style flower, colouring it to match the background.

I really enjoyed creating these cards, and hope that I have inspired you to try something similar. Thank you for stopping by, take care, xx


Related Posts Plugin for WordPress, Blogger...