Followers

Showing posts with label Happy Flower's Day. Show all posts

Wednesday, 1 December 2021

Happy December

Hello everyone, I hope you are keeping well. Many of you have been experiencing the cold weather lately, and it really feels like Winter has set in, doesn't it? I have just come back from a trip to Mexico, where it was lovely and warm, and the sunshine was very uplifting. I wanted to share a feeling of that sunshine with you with the colours that I have used in some of my projects today. I cannot promise to make you feel any warmer, but perhaps the cheery colours will brighten your day.

My first project was created by blending some Distress Ink onto a piece of Drawing Cartridge. I chose shades of blue and yellow throughout the whole project for continuity. I added some stencilling and stamped segments of the Small Graph Paper stamp using the stamp in my hand, not on an acrylic block, so that I could curve the stamp, to get smaller sections on the background. I also stamped the butterfly definition from the Happy Flower's Day stamp set on the background.

I stamped the large butterfly from the same stamp set first onto the background twice, and then again onto a piece of spare smooth white card. I coloured the images on the spare card using pencils, cut them out, and attached them to the background.

For my second project, I chose a piece of patterned paper and stamped the magnolia from Happy Flower's Day twice, masking the image as I went along. I added the flower definition in a toning colour and the main sentiment in black in the background. I coloured the image with pencils. I attached the panel to a chipboard panel using matte medium. When the adhesive was dry, I sanded the edges to give a white edge. 

My third project was created by placing Distress Oxides onto a craft mat and spritzing them with water. I placed the Drawing Cartridge onto the mat and picked up the colour. I used a whiteboard heart to do the same with the remaining colour on the craft mat, giving a paler version.

I stamped the flower definition over the background, and the fritillary flower and sentiment onto the heart using Versafine Clair Twilight. I picked up a bit of the Distress Oxide colour from the craft mat and painted the flower with a water brush.

For my final project, I chose to use grey card for a completely different look. I stamped the floral sprig from A Heart Full of Love around the edge of the background, and then added the floral heart in the middle. I coloured the images with Faber Castell Black Edition pencils. I used white pencil first on the flowers, and added the other colours afterwards, this really helps on darker coloured card.

It's actually my Birthday today, and I would like to wish you all the best of days today. I will be spending the day with my little Granddaughter Ruby, who has just learned how to sing Happy Birthday, a precious moment.

I will be back later in the month with more projects to share with you, take care, and thanks for stopping by, xx


Saturday, 16 May 2020

Happy Flowers

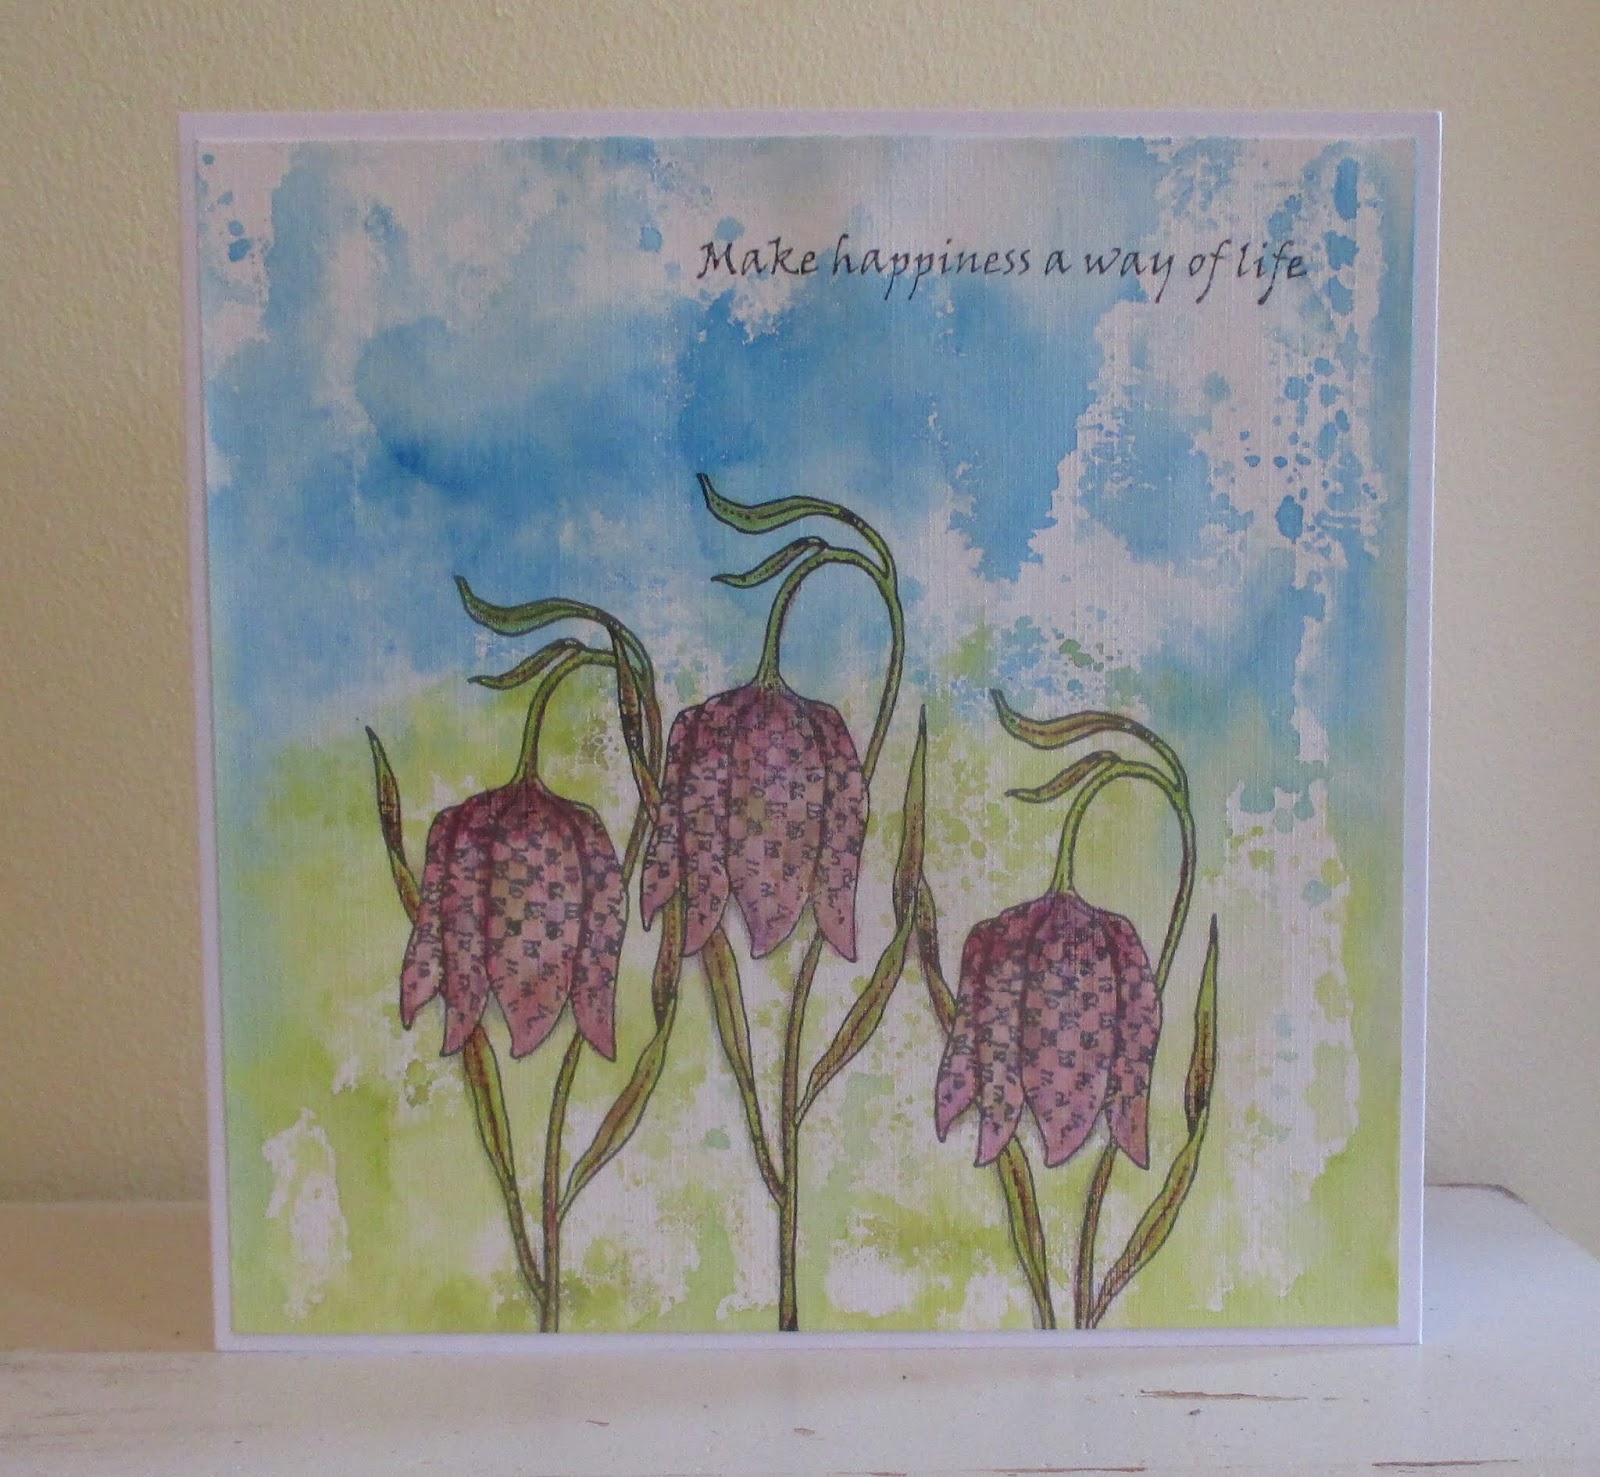
Hello everyone, I have made a quick little card to share with you today. My intention when making this card was to spread a bit of cheer during the lockdown period. I know that I have days when I feel down, and I am sure that it hits everyone else in the same way. If you are reading my post, and you are feeling low, then I hope that you can feel brighter by my wish for happiness for you. Try to look after yourself, and take time out to do something for yourself if you can.

I have taken a piece of Textured Art card, which I coloured with Distress Inks and water. I then stamped the large Fritillary stamp from Happy Flower's Day three times, masking the first image before I stamped the image twice again. I coloured the image with Koh-I-Noor watercolour pencils, and added some water with a brush. I used lots of different colours on the flower, to create a blended final colour, which is a bit more natural than colouring with just one colour. I added some grey for shadows around the stalks and underneath the flowers.

A sentiment from the same stamp set completes the card.

Take care, stay safe, and thanks for stopping by, xx


Wednesday, 6 November 2019

Vintage Ephemera With an Added Cup of Tea

Hello everyone, I have a couple of vintage themed projects to share with you today using the stamps that we launched last month on our TV shows on Hochanda. These fabulous new stamps are so useful, and can be used with lots of your existing stamps, as you will see from both projects that I have created.

I coloured some drawing cartridge with some cold tea, and then sprinkled the background with sea salt, leaving it to dry. I brushed the grains of salt away, and then stamped one of the images from Baroque Ephemera 1 randomly over the background. I dry brushed some pale blue chalky paint from Little Birdie over the top, to push the images into the background. I really like the blue and beige combination.

I stamped Floral Grunge over the top, using black Archival Ink, and also stamped the flower head a couple of times onto spare piece of background paper, also coloured with tea. I cut these out, and stamped the same ephemera image over the top, so that they look as if they had been stamped onto a piece of text. I decoupaged the images onto the background. I added some ricrac, also painted with the blue paint. I created a little tag by dry brushing a section of lolly stick with the paint, and stamping a word from Baroque Ephemera 2 over the top. A black brad and black card to mat the background complete the card.


I used some of the same background to complete my second card. I used the alphabet strip to create a frame around the edge. I added a postcard created by stamping onto another piece of the background, and adding a section of Movie Strip Collage in the corner. I added the lovely butterfly from Happy Flower's Day, and coloured both of these images simply with Koh-I-Noor watercolour pencils and a water brush. I added tickets stamped from the ephemera stamp sets and some little stamps complete the card.

Both cards were a lot of fun to create, the stamps are great for building up backgrounds, and adding a little something extra to your projects. They can be mixed with your other stamps or create something special in their own right. I hope that you will enjoy playing with them as much as I have!

Thanks for stopping by, xx


Sunday, 6 October 2019

Blue Butterfly


Hello everyone, I have a project to share with you today featuring stamps from last month's TV shows on Hochanda. Sadly I was unable to go with Lesley to Hochanda, as we were saying goodbye to my lovely Mum on what would have been her 80th Birthday. Mum was instrumental in introducing me to card making, and it was through her that I got to know Glenda and Lesley. She was so proud when I joined the Design Team, and loved to watch me on the TV. Mum was a huge Chocolate Baroque fan, and had compiled a large collection of the stamps in her own right. She loved to create cards with me whenever we got together, and some of my happiest memories with my Mum are of us crafting together.

I have chosen to make a card using stamps from the lovely Happy Flower's Day stamp set, which is such a versatile collection of images. The flowers and butterfly are just delightful, and the script is incredibly useful to add as a background or embellishment. I think these are going to be a long time favourite of mine!

I started out by creating a background using the large butterfly, and stamping and embossing over a piece of drawing cartridge with white embossing powder and Versamark Ink. I added Brusho powder in Sea Green and Turquoise, then spritzed with water. I dabbed the background with a piece of kitchen towel to blend the background, and the butterflies acted as a resist for the vibrant colour.

I used the damp kitchen towel to colour a whiteboard heart, creating a much paler colour, which was exactly what I wanted. I then stamped the butterfly definition over the top using a Library Green Archival ink. I stamped and embossed the butterfly once more onto a piece of coloured vellum, and cut it out, attaching it to the whiteboard heart. Finally, I used a piece of deep green card to mat the background, and pull everything together.

I will be back later in the month with more projects to share with you. Thanks for stopping by, xx

Related Posts Plugin for WordPress, Blogger...