Followers

Wednesday, 2 October 2013

Make a box and cards

Hi Folks, it's time for another challenge over at the Crafting with Dragonflies challenge blog. This week, the challenge is to make a box containing at least three cards.

I have chosen to make a box following a design that I saw on the Internet that I really liked. There wasn't a template, so I made the pieces up myself based around the size of my cards. I cut two pieces of chipboard 14 cms x 14 cms and another piece 14 cms x 3 cms, and covered these in one long piece of patterned paper on both sides, leaving a small gap in between each piece, so that they could fold up into a basic book shape. I then cut four pieces of chipboard 13.5cms x 3cms, which I also covered in paper on both sides, wrapping them around into a frame. I glued these inside the book with a wet glue for added strength. I stuck a piece of ribbon underneath the frame before I glued it into the book shape. Finally, I cut two more pieces of chipboard 13.4cms x 13.4cms which I covered on just one side with paper. I stuck one inside the frame to trap the ribbon. The other piece, I stuck inside the top of the inside of the box, trapping another piece of ribbon underneath. I inked all of the edges of the paper with Distress Ink to add some shading.

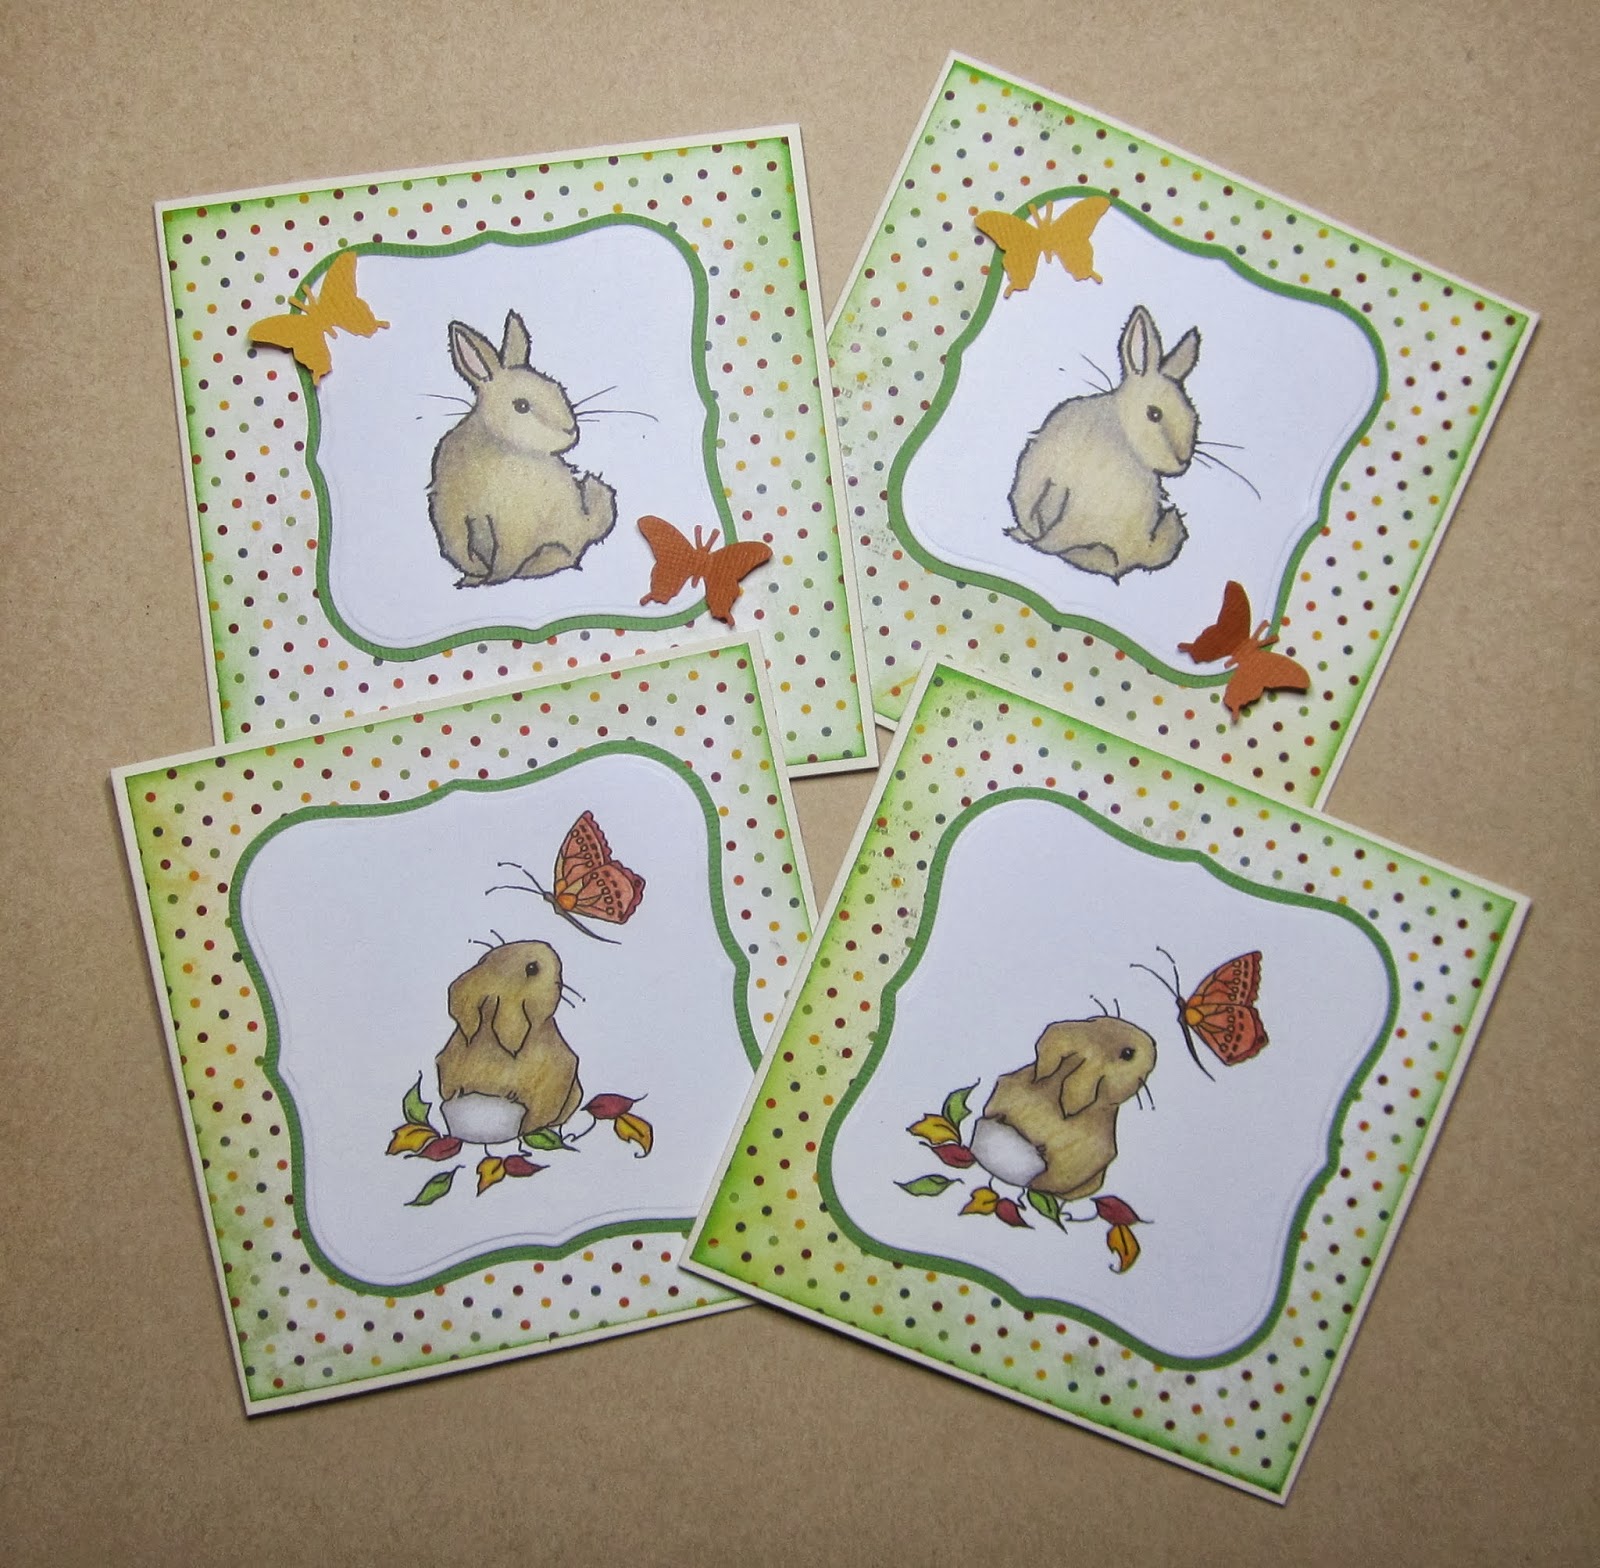
I printed my images and coloured them with pencils before cutting them out with Nestability shapes, and matting them onto green card. I have used two images from our sponsor A Day for Daisies. The first is 'Hoppity' and the second is 'Fuzzy Bunny Thoughts'. I added some punched butterflies to the second image to tie in with the first.


My box could actually hold a couple more cards with their envelopes, as it is quite deep:


Here you can see it tied up with the ribbon. I really like this design, and will probably make it again.


These little rabbits are so cute, and as my cards are blank, they could be used as Birth announcements, little Birthday cards, or just general any occasion cards.

Please hop over to the challenge blog to see the really inspirational projects that my Team Mates have made and have a go at entering the challenge yourself. There is also a Design Team call out at the moment for our blog, so if you are interested, please apply on the relevant post. We would love some new members.

Our sponsors this week are A Day for Daisies who are offering a $12 Gift Certificate to spend in their shop, and Di's Digi Designs.

Thanks for stopping by, xx



Saturday, 28 September 2013

Autumn Reindeer?

Hi Folks, I have a sample to show you today, using a new set of stamps recently released at Chocolate Baroque called Reindeer Landscape. This is traditionally a Christmas stamp set, but I wanted to show that the stamps could be used all year round. We live on the edge of the beautiful Thetford Forest, and see lots of deer on our travels through the woodland, so my card design hopefully reflects this.

I have embossed the image using copper embossing powder, and then coloured it with Distress Markers. I have created a background using the wrinkle free distress method. I chose to use Wild Honey and Seedless Preserves, as these two colours create a lovely warm blend when they are mixed together. I then stamped a diagonal band of leaves from the Sunny Sunflowers stamp set, which I coloured with pencils. Finally I added one of my favourite sentiments, from the Nature's Peace stamp set, again embossed with copper embossing powder.


I will be back in a few days time with another sample for you, but in the mean time, thanks for stopping by, xx


Thursday, 19 September 2013

Autumn foliage

Hi Folks, I have a card to show you today, using some stamps from the Autumn Fairy unmounted stamp collection from Chocolate Baroque

I made a background using Seedless Preserves, Wild Honey, Mustard Seed, and Forest Moss Distress Inks, blending them with brushes to get a soft finish. I then placed a mask in two opposite corners of the background, and used the same colours again, to deepen the colour and create an abstract pattern.

I stamped the foliage stamp onto a piece of card cut with a Nestie, and added a couple of butterflies as well. This foliage stamp has a very Art Nouveau feel, which I really love. I coloured the image with Distress Markers. I stamped the large 'Autumn' onto a tag shape, and matted it onto a piece of olive ribbon, using large black brads, which echo the black bubbles in the main image.


These new fairy stamps are a lovely mixture of stamps and will be great to use all year round. They are so versatile and I look forward to showing you lots more ideas with these over the coming months mixing and matching them with other Chocolate Baroque stamp sets. I love to mix my stamp sets together, and these can be used for so many occasions. The foliage stamps are so useful, and girls of all ages will love the fairies.

Thanks for stopping by, xx

Wednesday, 18 September 2013

Use your scrap


Hi Folks, it's time for another challenge over at the Crafting with Dragonflies challenge blog. This week, the challenge is to use your scrap, and we would like to see at least five different pieces of scrap designer paper incorporated into your design. This may sound difficult, but there is a lot of inspiration out there. You could try paper weaving, iris folding, tea bag folding, lots of those techniques that you might have put to one side lately.

I have used an image from our sponsor this week, Meljens Designs, called 'Steampunk Girl' for my card. I have coloured her with Polychromos pencils, incorporating colours from my background. I chose to cut my papers into strips. and make them look as though they were stitched onto the background. My image has stitch lines incorporated into the design, so this seemed to fit really well. I staggered my strips into a loose brick effect, and where two strips met, I drew a faux zigzag stitch. I had a lot of fun with this design. My papers are from all sorts of companies, as they were true offcuts. I stuck to the theme of this challenge by rummaging through my offcut box, so I can't tell you who they are all from I'm afraid, although I know one or two.

I have added some Prima flowers that I have had for years I had forgotten about them! I decided to put some little screw top brads into the flowers in keeping with the Steampunk theme.


Please pop over to the challenge blog to see what my team mates have made for your inspiration, and have a go at entering the challenge yourself.

Meljens are offering a fabulous prize of four digis of the winner's choice:

Bugaboo are offering seven digis of the winner's choice:

I am entering my card into the following challenges:

Challenges4Everybody Anything Goes

Come and Get it Challenges Focal Image on the Side

Hiding in my Craft Room Super Scraps Saturday

Our Creative Corner Forgotten Things

The winner of my mini album from the last challenge is commenter number 5 Aquarius So, I will send it on its way to you asap.  

Thanks for stopping by, xx


Monday, 16 September 2013

Frame It

Hi Folks, it's time for another challenge over on the Artistic Inspirations challenge blog. Sadly this will be my last contribution as a Design Team member, as I have decided to step down due to ever-increasing family commitments. I have been a DT member on the blog ever since it started, so it will seem very strange not to be part of the team any more, but I wish them well, and I'm sure that I will pop in to see how they are doing.

This week the challenge is along the theme of 'Frame It'. I have chosen to use a lovely image from our sponsors Eureka, who are offering the winners a prize of five digis og their choice.

I created a background using the wrinkle free Distress method. I used Wild Honey and Seedless Preserves to get a lovely warm background. Once this was dry, I printed the image onto the paper, and coloured it with pencils. I matted the image twice, using a rich gold and burgundy card. My background paper is taken from the Bo Bunny 'Autumn Song' collection, these papers are beautiful. I have used a sentiment from Chocolate Baroque, one of my all time favourites.


I have added some die cut leaves to echo the image.

Why not have a go at entering the challenge yourself? You can make whatever you like as long as you follow the theme. Thanks for stopping by, xx


Sunday, 15 September 2013

New Fairy Stamps at Chocolate Baroque

Hi Folks, I have a few samples to show you introducing the new Autumn Fairy stamp plate and new clear Fairy word stamps from Chocolate Baroque.

My first card is a Halloween card, using a cat taken from the Autumn fairy stamp plate, combined with a little mouse from the Bewitched Moonlight stamp set. I have created a background using Distress Inks, and added the two main images. I then used a white gel pen to add highlights to the mushrooms and wings.


My second sample uses another lovely silhouette stamp from the Autumn fairy collection, stamped onto a background made with alcohol inks. I have added a black frame, and a co-ordinating backing paper. The sentiment is one of the new clear Fairyland  words stamps, which go with the other fairy stamps so well.


My last sample sample uses the same fairy stamp, showing how different the stamp can look depending on how it is used. I have stamped and embossed the image using white embossing powder. I used alcohol inks to colour the background.


Thanks for stopping by. xx

Wednesday, 4 September 2013

Dragonfly Mini Album

Hi Folks, it's time for another challenge over on the Crafting with dragonflies challenge blog. The theme this fortnight is to create a mini album. It can be in any format that you like, and I chose to make a mini envelope album. I found lots of inspiration on Pinterest, and the particular album that I used, I found here

My album is very small, but I had great fun making it, and have decorated all of the tags using a dragonfly theme. I chose two images from one of our sponsors this week, called large dragonfly, and small dragonfly, which were the starting point for my project. I made a background on a piece of watercolour paper using the wrinkle free distress method, and once this was dry, I printed the two dragonflies onto the paper, and cut them out, using the size of the card as my guide. I then cut six more cards from the remaining paper and decorated them with some more stamps. I have tangled one of the dragonflies, and added some tangled flowers to another one of the cards. All of the images have been coloured with Inktense pencils and a waterbrush.

The book was made by covering pieces of chipboard with scrapbook paper, and inking and sanding the edges. The envelopes were covered with recycled dictionary paper, and also inked.


Here is the album open with the little cards inserted:


Here are all of the cards, plus the album sitting on a piece of 12" x 12" scrapbook paper, so you can see how small it really is:


I would be happy to give my little album away at the end of the fortnight to anyone that would like it. So, if you are interested, please let me know in your comment. If there is more than one person interested, I will do a random draw for the winner.

Our sponsors this week are Eureka Stamps who are offering 5 digis of the winner's choice:


Di's Digi Designs who are offering a $10 gift certificate:


So get your thinking caps on and have a go at making a mini album or book and enter our challenge. Pop over to the challenge blog to see what the rest of the DT have made for your inspiration.

I am entering my album into the following challenges:

Sunshine Mail Bugs and Critters

Hobbycutz Recycle

Jellypark challenges Things that fly

Cute card Thursday Things with Wings

Thanks for stopping by, xx

Monday, 2 September 2013

Lin Brown Classes and AI Challenge

Hi Folks, I was very lucky yesterday to attend a course with Lin Brown at It's Crafting Time in Shepreth. We made a project like the one mentioned in her blog post here and had a great time.

The project was a trifold alterable piece, which we added Grunge paste to, then painted and added some Treasure Gold. We made some flowers using Lin's flowers stamps, and then layered up the finished piece, adding some stamping if we wanted to. This is my finished sample:


This is the outside, showing the textured Grunge Paste areas, lots of crackled areas and the Treasure Gold that has been added. I also added a light wash to bring in an element of warmth to the overall colour.


This is the inside, showing the flowers and extra stamping. I love the colour combination, one of my favourites!

A couple of weeks ago, I attended one of Lin's other classes, also at the same venue, where we made some tags. Sadly, I didn't finish all of my tags, but here are the ones that I managed to complete:


I just love the colour of the background on this one, the deep blue and claret are lovely.


I love the idea of using the paint as a resist on sticky backed canvas.


The transluscent wash over the book page is beautiful, and the gold foiling is so pretty. I have two more tags to complete, so I will show you those once I have managed to finish them.

Finally today, I have my DT project for the Artistic Inspirations challenge to show you. The theme this week is 'buttons'. The sponsor this week is Sassy Studios, and they are offering a prize of 4 digis to the winner. I have chosen to use 'Sally' from their images in my card and have made a halloween themed project.

I made a background of Pan Pastels, and stamped some spider's webs around the edges using Versamark and more Pan Pastels. I used a piece of black card, and again using Versamark, I stamped some more spiders webs and added metallic PPs. These look really dramatic against the black card. Sally is coloured with Polychromos pencils. My stamps are all from Chocolate Baroque.


Please pop over to the challenge blog to see what my team mates have been making for your inspiration, and have a go at entering a button themed entry. Thanks for stopping by, xx


Saturday, 31 August 2013

Hi Folks, I have a sample for you today using the new Halloween stamps from Chocolate Baroque

My sample was created by masking off the top and bottom of the card with Post it notes, using a ruler, to get a nice straight edge.

To begin, I stamped a small castle from the Howling Moon stamp sheet onto the background, and used a small piece of Post it note to mask off the moon. I then coloured the background with Distress Inks by blending them in a sideways motion, to create a streaky sky. I ensured that I used some yellow around the moon, and extra shading underneath the castle. I added some pieces of branch along the bottom, then added the witch and a sentiment from the Bewitched Moonlight stamp sheet. I then peeled away the Post it notes, and added a lace stamp from the Lace Fragments stamp sheet at the top and bottom of the background.

To finish, I added white highlights to represent the moonlight. This technique is called the bandana technique, and on a more complicated pattern, would look like a bandana scarf.

There is a giveaway over on the Design Team blog  at the moment, so be sure to pop over there. You will find lots of inspiration from my Team mates over the coming days. Thanks for stopping by, xx


Thursday, 29 August 2013

Christmas Greetings!

Hi Folks, there are new stamps over at Chocolate Baroque today. There are two sets of Halloween stamps, and some fabulous new clear Christmas greetings to use on your Christmas cards.

I have a Christmas card to show you today, using one of the greetings and my favourite feisty angel fron the Gothic Angels stamp set. I have used Pan Pastels to create the background, including one of the the new metallic Pan Pastel in a scrumptious coppery colour.


The greetings are large enough to be used as features on a card in their own right, and come in a great selection of fonts. Look out for these creeping into our samples over the coming weeks, as they are really fabulous.

Thanks for stopping by, xx


Sunday, 18 August 2013

Tangled baubles

Hi folks, here are a couple more Christmas samples for you using the Tangled Baubles Big Background stamp. For my first sample, I created a background using alcohol inks. I dropped alcohol inks onto some water in an old ice cream tub, and then dipped my card into the tub, ensuring the background was completely covered with colour. Once I had dried the background with a heatgun, I stamped the image using archival ink. I stamped part of the image again onto another spare piece of card, also coloured with the alcohol inks, so that I could decoupage one of the baubles. I added some co-ordinating card to mat and layer the image, and stamped a sentiment from the Gothic Angels stamp sheet.I simply added some ribbon to finish.


My second card uses the Tangled Bauble stamp again as my focal point, and this time, I simply stamped the image with black archival ink. I then watercoloured the background using some red paint, adding shading for depth around the baubles. I stamped a sentiment from the Pears and Baubles stamp sheet onto a piece of card, slightly larger than the sentiment itself. I used a permanent pen to draw a design around the outside, and after making sure that it was completely dry, I used the same watercolour paint to colour the border. I used some co-ordinating card to add some matting and layering again.


These simple cards are quite quick to make, and would be great for anyone who loves Zentangle.

.
Thanks for stopping by, xx


Friday, 16 August 2013

Yuletide Angel


Hi Folks, I have a project to show you today showcasing the new Gothic Angels stamp sheet from Chocolate Baroque. This stamp sheet is a fabulous mix of gothic images and background pieces, perfect for making your Christmas cards with a traditional feel.

I have chosen to create a card using a leafy background technique taught to me by my crafty friend Elaine a couple of years ago. I stamped the angel onto a piece of white card, and then stamped the holly stamp around her, creating a frame. I coloured the images with Polychromos pencils, and cut around the leaves, leaving a small border for definition. I added some purple ribbon to correspond with the colours in the image itself, and added a greeting from the stamp sheet.


This card would be ideal for someone who does not necessarily celebrate a traditional Christmas. I like to call this angel 'Feisty Angel' as she looks very strong and knows her own mind. However, in more delicate colours, she would look completely different.

I will be back in a couple of days, with some more samples to show you, thanks for stopping by, xx


Related Posts Plugin for WordPress, Blogger...