Followers

Showing posts with label Paper Artsy. Show all posts

Thursday, 19 March 2015

A very colourful workshop

I recently attended a workshop run by the very talented Lin Brown whose classes I enjoy enormously.This class was a bit different to the usual classes that she runs, because she decided to look at composotion with us, rather than presenting us with a specific finished project to make. We looked at how to use pieces of scrapbook paper that we might have lurking around in our stash to form the basis for our backgrounds, and then how to build up a series of layers on that paper to produce a backdrop for the stamped images. I was not very keen on the piece of paper that I had to start with, and almost asked to swap it for something different. However, I figured that I was going to be covering it up fairly well, so I would just run with it and see what happened. I really like the finished piece, so I am glad that I stuck with the original piece of paper, and it just goes to show that you can use up those pieces of paper left over from paper pads that you do not want to use for anything else.

Lin showed us how she creates her layered backgrounds step by step, using opaque and transluscent Fresco Finish paints from Paper Artsy. I have seen her demo many times, but it is always fascinating to watch her create a piece of artwork. Her background was much busier than I had realised, and it gave me the chance to experiment with trying this new look out. We had a lot of fun with her vibrant paint colours and the latest stamp images. She also showed us how to make some cute little padded birds to add to our project if we wanted to.

This is my finished project, which I actually completed at home. I had one or two things that needed to be put together after the class. I added some extra stamping to the background to ground the flowers and yet another layer over the white detail, with the little black dotty stamp.

I had such fun making this project, and it sits in my craft room where I can see the vibrant cheery colours to brighten up my day.

Thanks for stopping by, xx


Saturday, 27 December 2014

#3UP project for Paper Artsy

Hello everyone, I hope that you are enjoying the festive season. I have a project with a difference for you today, as I volunteered to be part of the latest round of #3UP bloggers on the PaperArtsy blog. I am one of a group of three individuals blogging tonight and we had to say what our favourite technique might be. I opted for working with fabric, stamping, colouring, creating embellishments, you name it, I really love to use fabric as you would paper. I have been on a few classes with the lovely Lin Brown and she has taught me lots of amazing tips and tricks using fabric, and you will see a lot of these reflected in my project.

I have chosen to make an expandable journal, as I intend to try and journal a lot more next year. This journal will be a blank canvas to start me on my way, and because it is so tactile, I will be more inclined to work in it hopefully! The other good thing is that the pages are removable, so while I am getting them inky and painty, the cover will not get so messed up in the process. Here are the basic instructions and a list of materials that I used:

Materials:

Smooth white cotton fabric
White felt
Chipboard
Patterned fabric
Strong wet glue
Iron on Adhesive
Ric rac, ribbon, metal embellishments, etc
Stamps: ELB07, ELB01
Stencils: PS002, PS005
Archival Ink: Jet Black and Plum
Paper Artsy Chalk Paints

Instructions:

Cut a piece of white material 13" x 19", and a piece of patterned material 11" x 17" and 2" x 10". Spritz the pieces of material with water as you paint them with your chosen colours, and ensure that the fabric is nice and moist while you are painting. Use a watered down strength of paint, blending the colours as you go along. Dry the fabric thoroughly and set to one side. Paint the ric rac to match your colour scheme and allow to dry.

Cut two pieces of chipboard 7" x 10", and four pieces of felt the same size, plus a piece of felt 2" x 10".

Prepare smaller sections of white fabric in the same way, using pale green, lemon and ivory , drying the fabric, before stamping the leaves, flowers and butterflies in archival ink. Attach iron on adhesive to the back of these pieces of fabric, and then back the sections with oddments of patterned fabric. Cut out the images, and then add more colour using transluscent paint for shading.


Add some stencilling to the main background, using Snowflake, and then dry this with a heat gun. Using one of your transluscent colour options, add a wash of colour over the top of the stencilling.

Add the spine to the centre of the outside, using iron on adhesive as before. Attach all of the leaves, flowers and butterflies, and then attach the ricrac.


Glue the felt to the chipboard pieces, and lay them down on the inside of the cover, with the felt side down, and the chipboard facing up towards you. Lay the smaller piece of felt in between them. Fold the edges of the fabric over and stick it down.Fold a small allowance of the patterned fabric over all around the edges and then stick the patterned fabric onto the inside of the cover, by adding glue onto the folded allowance.

Punch three holes in the spine 2", 5" and 8" from the top.


Create pages for the journal using any suitable paper and ephemera that you like. I used medium weight cartridge paper, as this takes a reasonable amount of water and is nice and thick. I have added tags, music paper, envelopes and bits of stash in between my pages to add interest in my journal. There is also room for another signature (set of pages) to be added at a later date. Using ribbon or string, thread through the holes, first from the outside holes, and back up through the middle, to then tie a bow on the outside.

I have added some metal keys to the centre of my fabric butterflies, and may add a bit of surface stamping to the background of the cover at a later date. I intend to add fabric detail to my inside pages as I go along, to tie in with the fabric cover.

I love using fabric in my projects, the feel of a completed book like this in my hands afterwards gives me such pleasure. Working on fabric is just as easy as paper, and the possibilites are so varied. You can shred the edges, go shabby and grungy, add some sewing, and lace, the choice is yours. I hope that you have enjoyed my project, Judith xx

Wednesday, 22 October 2014

Fabric Book


Hello everyone, it's not often that I write a post these days without my DT hat on, as life tends to be very hectic and I do not have much time for any extra crafting. However, this post is one of those times, and I have a project to show you that I made at a recent class taught by the lovely Lin Brown at It's Crafting Time run by the equally fabulous Nina.

We made a fabric covered book, with hand stitched binding, using Donna Downey stamps, Paper Artsy paints, and Luminarte Silk Acrylic glazes. It was a very full on day, with lots of concentration needed. I was not feeling very well on the day, and it was a real struggle to make the book, which I have actually finished at home. I am so glad that I went, because it is such a beautiful project, and I always learn so much from Lin. She is a very generous teacher with her tips and suggestions.

The book is lined with some lovely floral fabric which is painted, and the gold outlining shows through the paint:


Here is the back cover, showing the lovely Donna Downey birdcage, which was appliqued onto the cover:


Some of the lining fabric also forms the spine, and you will see that I have picked the colour out in my flowers on the front cover:


The dimensional flower has been stamped and gathered, and the lace and trim has also been painted. I would really love to make some more of these books as gifts now, because they are so pretty, and feel lovely to hold. I am a bit of a notebook collector, and love to buy pretty books. Now, I can make my own. I'm sure that it won't stop me buying more though!

Thanks for stopping by, xx


Friday, 13 June 2014

Fabric Journal and CSQ Project

Hi Folks, well it's my turn to post my project on the Craft Stamping Quartet blog. We are all making a little accordian style book as suggested by Elaine, and inspired by Kate Crane.

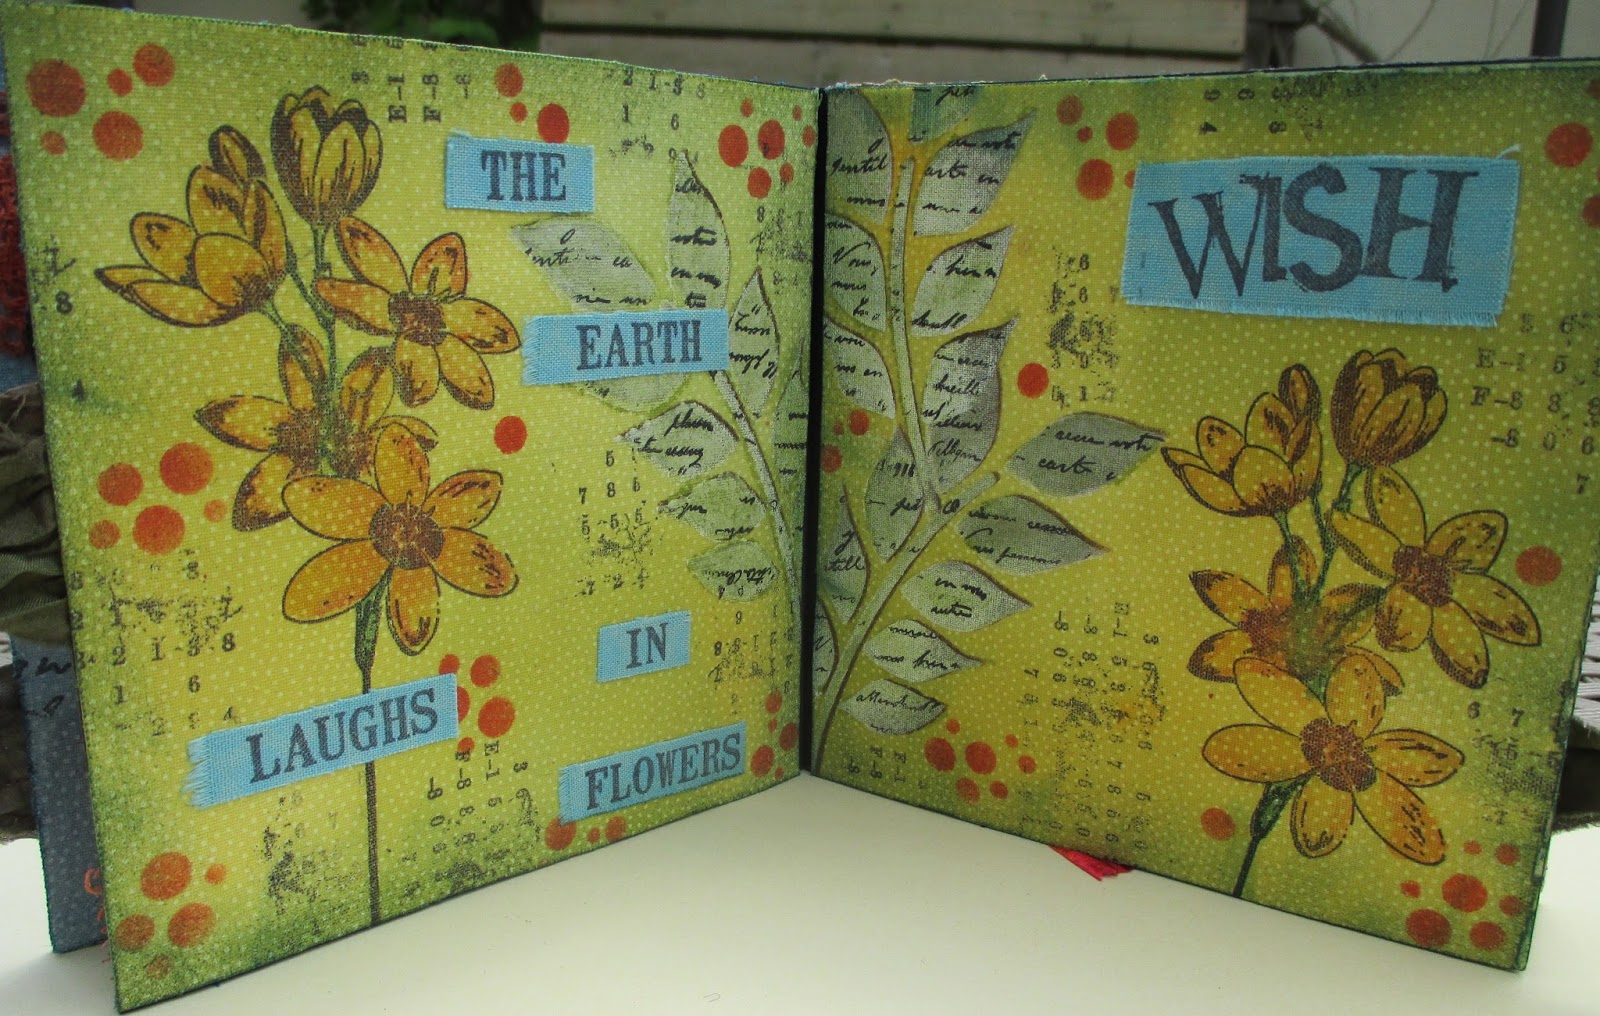
I decided very early on that I wanted to use fabric as the basis for my book inspired by the work of Lin Brown whose work I admire so much. I was very lucky to attend one of her fabric journal workshops recently covering this very subject, so it helped my project along enormously! Here is a sample of what I made at the workshop, and you will be able to see that I was very much inspired by this in my book:


I started by cutting out some watercolour pages to 5" x 5", as this was the size that I wanted to work on. I covered all of the pages with fabric, using Bondaweb, and gave them a wash of colour using Paper Artsy paints. I added stencilling, stamping, and in some cases, some texture paste through stencils as well. I coloured some of the texture paste before I used it with paint for my front and back covers, saving time colouring the paste afterwards.

I stamped several images onto sparkly acetate, and also onto spare watercolour paper, which I painted with the paints to co-ordinate with my backgrounds. I then stuck the acetate to the painted images before I added them to the backgrounds.

I have used a couple of Lin Brown stencils on this page, which is the front cover of my book, and a Paper Artsy butterfly.


On these two pages, I have added some lace painted with paint to tie into my colour scheme, and some stamps by Jo Capper-Sandon join the Paper Artsy stamps.

I have watercoloured some stamped flowers directly onto the fabric on these pages, and added more stencilling. This time I have added script to the stencilling as well. The words are stamped onto painted fabric.


I have added a flower stamped onto black card to this page and another little Jo Capper-Sandon butterfly on sparkly acetate. The foliage was stamped in white, and given a colourwash of yellow and orange.


I have added fabric tags to these two pages, stapling the fibres to the tags instead of tying them in the traditional way.


Finally on my back cover, I have added scraps of tinted lace along with the Jo Capper-Sandon stamps. More textured stencilling completes the background.  I have dry brushed the edges of all of my pages with paint, using a variety of colours to tone in with each page. I also added some fabric tabs between the pages for interest.

My construction is not the same as Kate's, I have hidden the ends of my pages within the concertina folds, preferring an edge to edge look inside the book. I went for black card, like Elaine, as I felt that it complimented my bright colours and black stamping.

I have enjoyed the process of making my little book, and hope that you like the end result. If you have any questions, please ask, and I am happy to answer them. Thanks for stopping by, Judith xx


Saturday, 10 May 2014

Fluttering By

I needed to make a Birthday card for a very dear friend recently, and my project here is the end result. I had a vague idea as I started out, and knew which main components I was going to use. They were purchases from my recent trip to Ally Pally, but I wasn't sure of the exact outcome, that's part of the fun of crafting sometimes!
I used some fairly plain background paper from my stash which was a soft golden colour, and stencilled a flower from one of Lin Brown's new stencil plates onto the background fairly randomly, using a soft pinkish acrylic paint. I then added a coral colour to the edges of the petals. I added some ferns from another one of the stencil plates, using an olive green. I added some stamping to the background, using a deep brown, but used second generation stamping, as I did not want the stamping to be too dark. I added a touch of Distress Ink around the edges of the background, using an olive green to blend with the colour palette that I was already using.

I stamped a large butterfly from IndigBlu onto watercolour paper, and coloured the image with Distress Markers and a waterbrush. I stamped the body and antennae part of the butterfly directly onto the background, which allowed me to cut the watercoloured butterfly out, omitting the fiddly antennae parts. I then attached the butterfly to the card.

My camera battery was flat when I needed to take a photo of this card, so I used my phone. The picture has come out fine, in fact, I think that it has probably turned out better! 

Thanks for stopping by, xx


Wednesday, 17 April 2013

Practising with my PA Goodies


Hi Folks, I've had a day playing with my craft supplies today. It's a rare thing for me to craft without a deadline or an agenda in mind, and today was a day where I just dabbled for sheer enjoyment, it was so relaxing. I've been using my Paper Artsy supplies, some of which I purchased over the weekend at Alexandra Palace. I watched lots of demos by Lin and Leandra, and wanted to experiment before I forgot what I had picked up from their examples. I have a memory like a sieve these days!

I made a project using a piece of greyboard similar to one that Leandra made at the weekend. I loved the colours that she had chosen, sort of 'shabby French' using shades of turquoise with a white wash effect and crackle down one side. I've added some of Lin's Eclectica stamps and some metal elements to finish my project off. I've stamped the flowers onto black card, as Lin does, the effect is fabulous. She has some great samples on her blog, which you can reach on my sidebar.

I've mixed puff paint with the Grunge Paste as Leandra showed us at the weekend, the result is really great:


This would look lovely on a mirror frame or other home decor projects. The texture is really brilliant. I've then brushed lots of different colours of Treasure Gold over the raised areas.


I had some spare Grunge Paste/Puff Paint mixture left over, and just like Leandra at the show, I decided not to waste it, so I made a tag. I looked for something textural to drag through it, and found a pie slice in my utensil drawer. I'd better wash it thoroughly before I use it next time! I also stamped into a couple of areas, and then painted the whole tag. I brushed lots of Treasure Gold over the whole thing before giving it a good buff.

I added some lace, a flower and a word, not forgetting a little dragonfly coloured with TG as well.


These samples aren't rocket science, as they are along the lines of what Lin and Leandra make many times at the shows they attend. However, it's given me a chance to flex my muscles with the materials, and hopefully, I can go on to create some more bits and pieces now.

Thanks for stopping by, xx


Friday, 10 August 2012

Forgotten Friday 62-Paper Artsy Haberdashery stamps

Hi Folks, well, shortly less than a week after my last FF post, here I am again, with a look at what I've been making with my neglected craft stash.

I'm still recovering from my asthma troubles, so some quiet crafting is doing me some good, keeping me in one spot for a change! It's nice to be home for more than a few days at a time, that's for sure. Hopefully, my course of antibiotics will sort me out, and I'll be right as rain in a few days.

This week, I decided to look through my Paper Artsy stamps. I had several plates that I hadn't even cut out, shame on me. The haberdashery plates are absolutely gorgeous, and I decided to use some of those to make a 6" x 6" card. I stamped some of the images onto a sheet of Prima Ledger paper in a soft pinky brown, and then stuck these onto thin card before cutting them out. I did this so that I could curve them a bit for added dimension when I stuck them onto the finished card. I added a bit of Tattered Rose or Old Paper Distress Ink to the images, then edged them with Vintage Photo. I stamped several images onto a piece of green paper from the same paper stack, using Coffee Archival ink, and also stamped a dressmaker's pattern using Old Paper, so that it appears like a ghost stamp on the background. I embossed a phrase using Wow embossing powder, and used the same EP for the scissors image, and the stand part of a TH dressmaker's dummy. I rubbed Vintage Photo Distress Ink over the top of the Dressmaker's dummy afterwards to age the appearance. I like this colour combination, and will use it again. I added some gathered lace to the base of the bodice before attaching it to the card. I continued the lace theme by adding a scrap of cotton lace to the base of my card.
It's been a lovely sunny day here, and I noticed that Buzz had decided to settle down amongst my bling, which was on the floor below the table where I was crafting. The sun was shining on the floor, and she obviously didn't mind lying on the lumps and bumps of my stash, she just wanted to sunbathe!
Why don't you have a rummage through your stash and see what you have neglected to use for a while? If you make something, leave a comment, and I'll pop along to your blog and take a look. Thanks for stopping by, xx


Wednesday, 18 January 2012

Popping in midweek, whatever next?

Hi folks, it is unusual for me these days to find the time inbetween my Forgotten Friday posts to come and say hello. However, I have been feeling that my poor blog has been woefully neglected lately. My OH and I have just got back from an overnight trip at a lovely hotel called Dunston Hall on the outskirts of Norwich, in Norfolk. My two BILs bought us the trip for our Silver Wedding Anniversary back in November. It was a lovely gift, as it gave us a brief bit of time out, and the surroundings were lovely.
The hotel seemed very imposing when we arrived, but I loved the tall twisted chimneys.
The frosty mornings were just so cold though, I would have liked to have seen more of the grounds, but it was just too chilly to walk around. This week, I have been working on shrink plastic with my card class, at their request. I made a card with them based on a lovely project made by Linda Elbourne for the Craft Barn She used Tim Holtz fragments, Paper Artsy stamps, and shrink plastic. I started by getting the class to make a masterboard with Distress Inks, choosing Old Paper, Victorian Velvet, and Crushed Olive for myself. They chose completely different colours. I kept the application fairly light, as I wanted to add lots of layers afterwards. Now as my shoulder is still quite painful, my blending is still a bit off, so I misted my card with water when I had finished, which kind of smoothes the blending out a bit. I then used a chicken wire mask and went over the Old Paper sections again, using Old Paper DI over the mask. At this point, I chopped my card in half. On one piece of card, I started to add lots of small Paper Artsy stamps, using the DI colours that I had used on my background, to build up some layers. I then stamped the large flower head in Black Archival Ink three times. I stamped the word 'Fly' and the 'birds in the grass' stamp onto the plainer piece of card, again using archival ink, and heat set this. I stuck the fragment pieces over the top of these stamped images with Glossy Accents, trimmed around them, and smoothed the edges with a nail file. I then cut two Nestability butterflies from clear shrink plastic, after sanding it a bit, to give it a key. I coloured it lightly with pencils, and then stamped it with parts of a scroll stamp, using Stazon ink. I shrunk these, bending them slightly with my asbestos fingers, while they were still warm (very hot!) Then I edged these with a gold Krylon pen. Once the card was assembled, I stuck the butterflies to the card with Glossy Accents.
I loved Linda's original project, and I hope that she won't mind me casing it for the much simpler project that my card class really enjoyed putting together.
Thanks for stopping by today, and I'll be back on Friday with my Forgotten Friday project, xx


Friday, 30 September 2011

Forgotten Friday 34- Paper Artsy Tag


Hi folks, it's Friday again, and time to rummage through your forgotten stash. Have a look to see what crafty items you have neglected, and make something with them.

This week, I have chosen to make a Kraft tag, using stamps from Paper Artsy. I have lots of their stamps, that don't get a proper airing. Some of these haven't been used before, so it was a good excuse to get them out and make this tag. I decided to use the lovely bluebell stamp, so chose a blue theme for my tag. I used some  Versamagic chalk inks to make the background, and then stamped the flower with a sepia Archival ink. I coloured the flowers with my Polychromos pencils, and added lots of smaller stamps to build up the completed tag.

If you care to make something yourself with some forgotten items, leave a comment, and I'll pop along to your blog to take a look. Thanks for stopping by today, xx

Monday, 9 May 2011

The first cut is the deepest

Hi folks, it's a very sunny Monday here in Norfolk, I hope it's the same wherever you are.
I have another Birthday card to show you today, that I made for a very special friend of mine recently. I've not had much time for crafting lately, and wanted to make something extra special for her. Time unfortunately was against me, but I found a lovely blog recently and the blogger, Paulien had made a beautiful tag which I thought was so pretty. I decided to use the same technique to create a background for my friend's card. You can see a how to on this lady's blog, it's really straightforward.
I decided against making some of the lovely organza flowers, as she has had some of those from me before. I got out my Paper Artsy Thordon Hall paper pack, and decided to use some papers from there to make some flowers.
Now I am a paper hoarder, I buy pretty papers, and I don't use them, it pained me greatly to use these lovely papers, to make that first cut into the new pack. Does anyone else suffer with this problem? I am terrible! Once I got started, I was okay, I used several sheets, and I was fine!
I used three of the Paper Artsy dies to cut out the flower shapes, scrunched them, and fixed them together with brads, before colouring the edges with Vintage Photo Distress Inks. I used a Paper Artsy sentiment stamped onto a background coloured with Fresco Finish paints. I distressed the edges of this, and again coloured it with Vintage Photo DI. The leaves have been stamped onto the same green card as the sentiment, and these are Paper Artsy stamps too.

Don't forget to pop over to Paulien's blog to look at the lovely things that she makes, she is a very talented lady. I'll be back tomorrow hopefully, with some more projects, thanks for stopping by, Judith xx

Wednesday, 9 February 2011

WOYWW 88

Hi folks, I didn't make it to What's on your workdesk Wednesday last week. The week just flew by, but I'm trying to be more organised this week. I cut my finger on a cat food tin this morning, so I'm typing this with one finger. I'm sorry if I don't comment on many of your Blogs this week, but it's really sore!
I went To the Stamperama Show at Stevenage on Sunday, so I've got lots of goodies sitting on my desk this week. There are lots of bird themed pieces, as I have a bit of a thing for birds at the moment. I went and watched Hels Sheridan demo with beeswax, and bought a couple of lovely silicone moulds and some beeswax too, so I'm itching to have a play with that as soon as I get a chance. I found some gorgeous keys and locks, and some fab little bird embellishments. Several stamp sets that I wanted to buy, and other bits and pieces that I've already put away. It was a good day, and I took some of the girls from my card class with me. They really enjoyed themselves, as some of them hadn't been before. It's only an hour's drive from where we live, so it makes it a good day out.
I hope that you are all having a good week, happy Wednesday, and thanks for popping by, Judith xx

Tuesday, 25 January 2011

Masterboard makes

On last week's WOYWW post, I showed a masterboard that I had made with my card making class, and promised that I would post the finished samples. Now normally my class samples don't get finished, as I make them in a hurry, I have to be one step ahead of the girls, and they are rushed affairs, not necessarily my best work. I needed to finish the second sample for this week, so that they could see what to do, so I figured that I might as well finish the first one while I was at it. I got all of the patterned sections of card from one piece of A3 card, with a small section left over, for these two cards. The first card is based on Linda Elbourne's projects in the February Craft Stamper, making a pocket to put a packet of seeds in, or something of a similar size.

The second card is using the rest of the masterboard, and Vix Kennedy's design on page 83 of the same magazine, to make an easel card with a Post-it note block as the stopper for the card. On both cards, I have used large black beads to embellish my Wendy Vecchi butterflies, Paper Artsy stamps, and a mixture of Distress Inks and Memento Inks. I used a little bit of shrink plastic for the sentiment.
I really enjoyed working with these colours, they feel like Spring is just around the corner. It's too cold for that here at the moment, but we can live in hope. Thanks for popping by, Judith xx

Wednesday, 19 January 2011

WOYWW 85

Hi folks, it's Wednesday again, and time for a nosey around Blogland to see what's on everyone's desks. If you're wondering what I'm on about, then head over to Julia's place to check it out. I'm sorry that I didn't make it to many desks this week, but I was busy creating things, and had to keep my head down somewhat. Say no more. I've finished what I needed to make, and my time is a little bit easier this week. I've been working as an invigilator too. My Mother-in-law thinks I'm a vigilante, as she can't say invigilator. It's quite a mental picture, to imagine walking around the exam room with a lassoo and a cowboy hat, keeping the teenagers in order!
Anyway, onto what's on my desk this week. I've been working on a masterboard based on the project in this month's Craft Stamper by Linda Elbourne with my card class. We've made a piece of A3, so that hopefully we can make a couple of projects. The class made some lovely sheets last week, and this week, I'll get them to make some cards with them. I didn't have the exact set that Linda used, but liked them so much, that I ordered them, and they've arrived. So, I'm going to have a play with them, time permitting, and make another colour way up. I also got a set of the Hot Picks words, as I really like those. Once I've made my samples, I'll blog them, promise! 
Sorry for the quality of the second photo, but I took them last night, so that I could post nice and early this morning before I took off for the day. Also on my desk is a lovely book from Paperchase, covered in black felt, with an embroidered butterfly on the front. This is my ideas book. It is very tactile, and I love it. I have a bit of a felt thing going on at the moment, I bought a kit just before Christmas, and want to have a go at making felt from scratch. I'm even thinking of going on a course, because I really love the stuff! My Daughter thinks I'm mad, (I probably am). There are also two little chipboard trees beside my craft mat, I have a lovely project in mind for these, and want to get on with that this week. I also have my Bah Humbug card to make, hence the little pile of bits to the left.
Just by my computer is a set of Elusive Images stamps, 'Weekend in Venice', I am offering these to anyone who doesn't have them, and would like them. No strings attached. Just leave a comment on the relevant post, dated Friday 21st January, and I'll put you in the random generator thingy. You DO NOT need to be a follower, or jump through hoops.
I hope you're all having a great day, thanks for stopping by, Judith xx
Related Posts Plugin for WordPress, Blogger...