Followers

Tuesday, 22 March 2022

Mosaic Circles

Hello everyone, I hope that you are keeping well. I have a project to share with you today showcasing stamps from last month's TV shows.

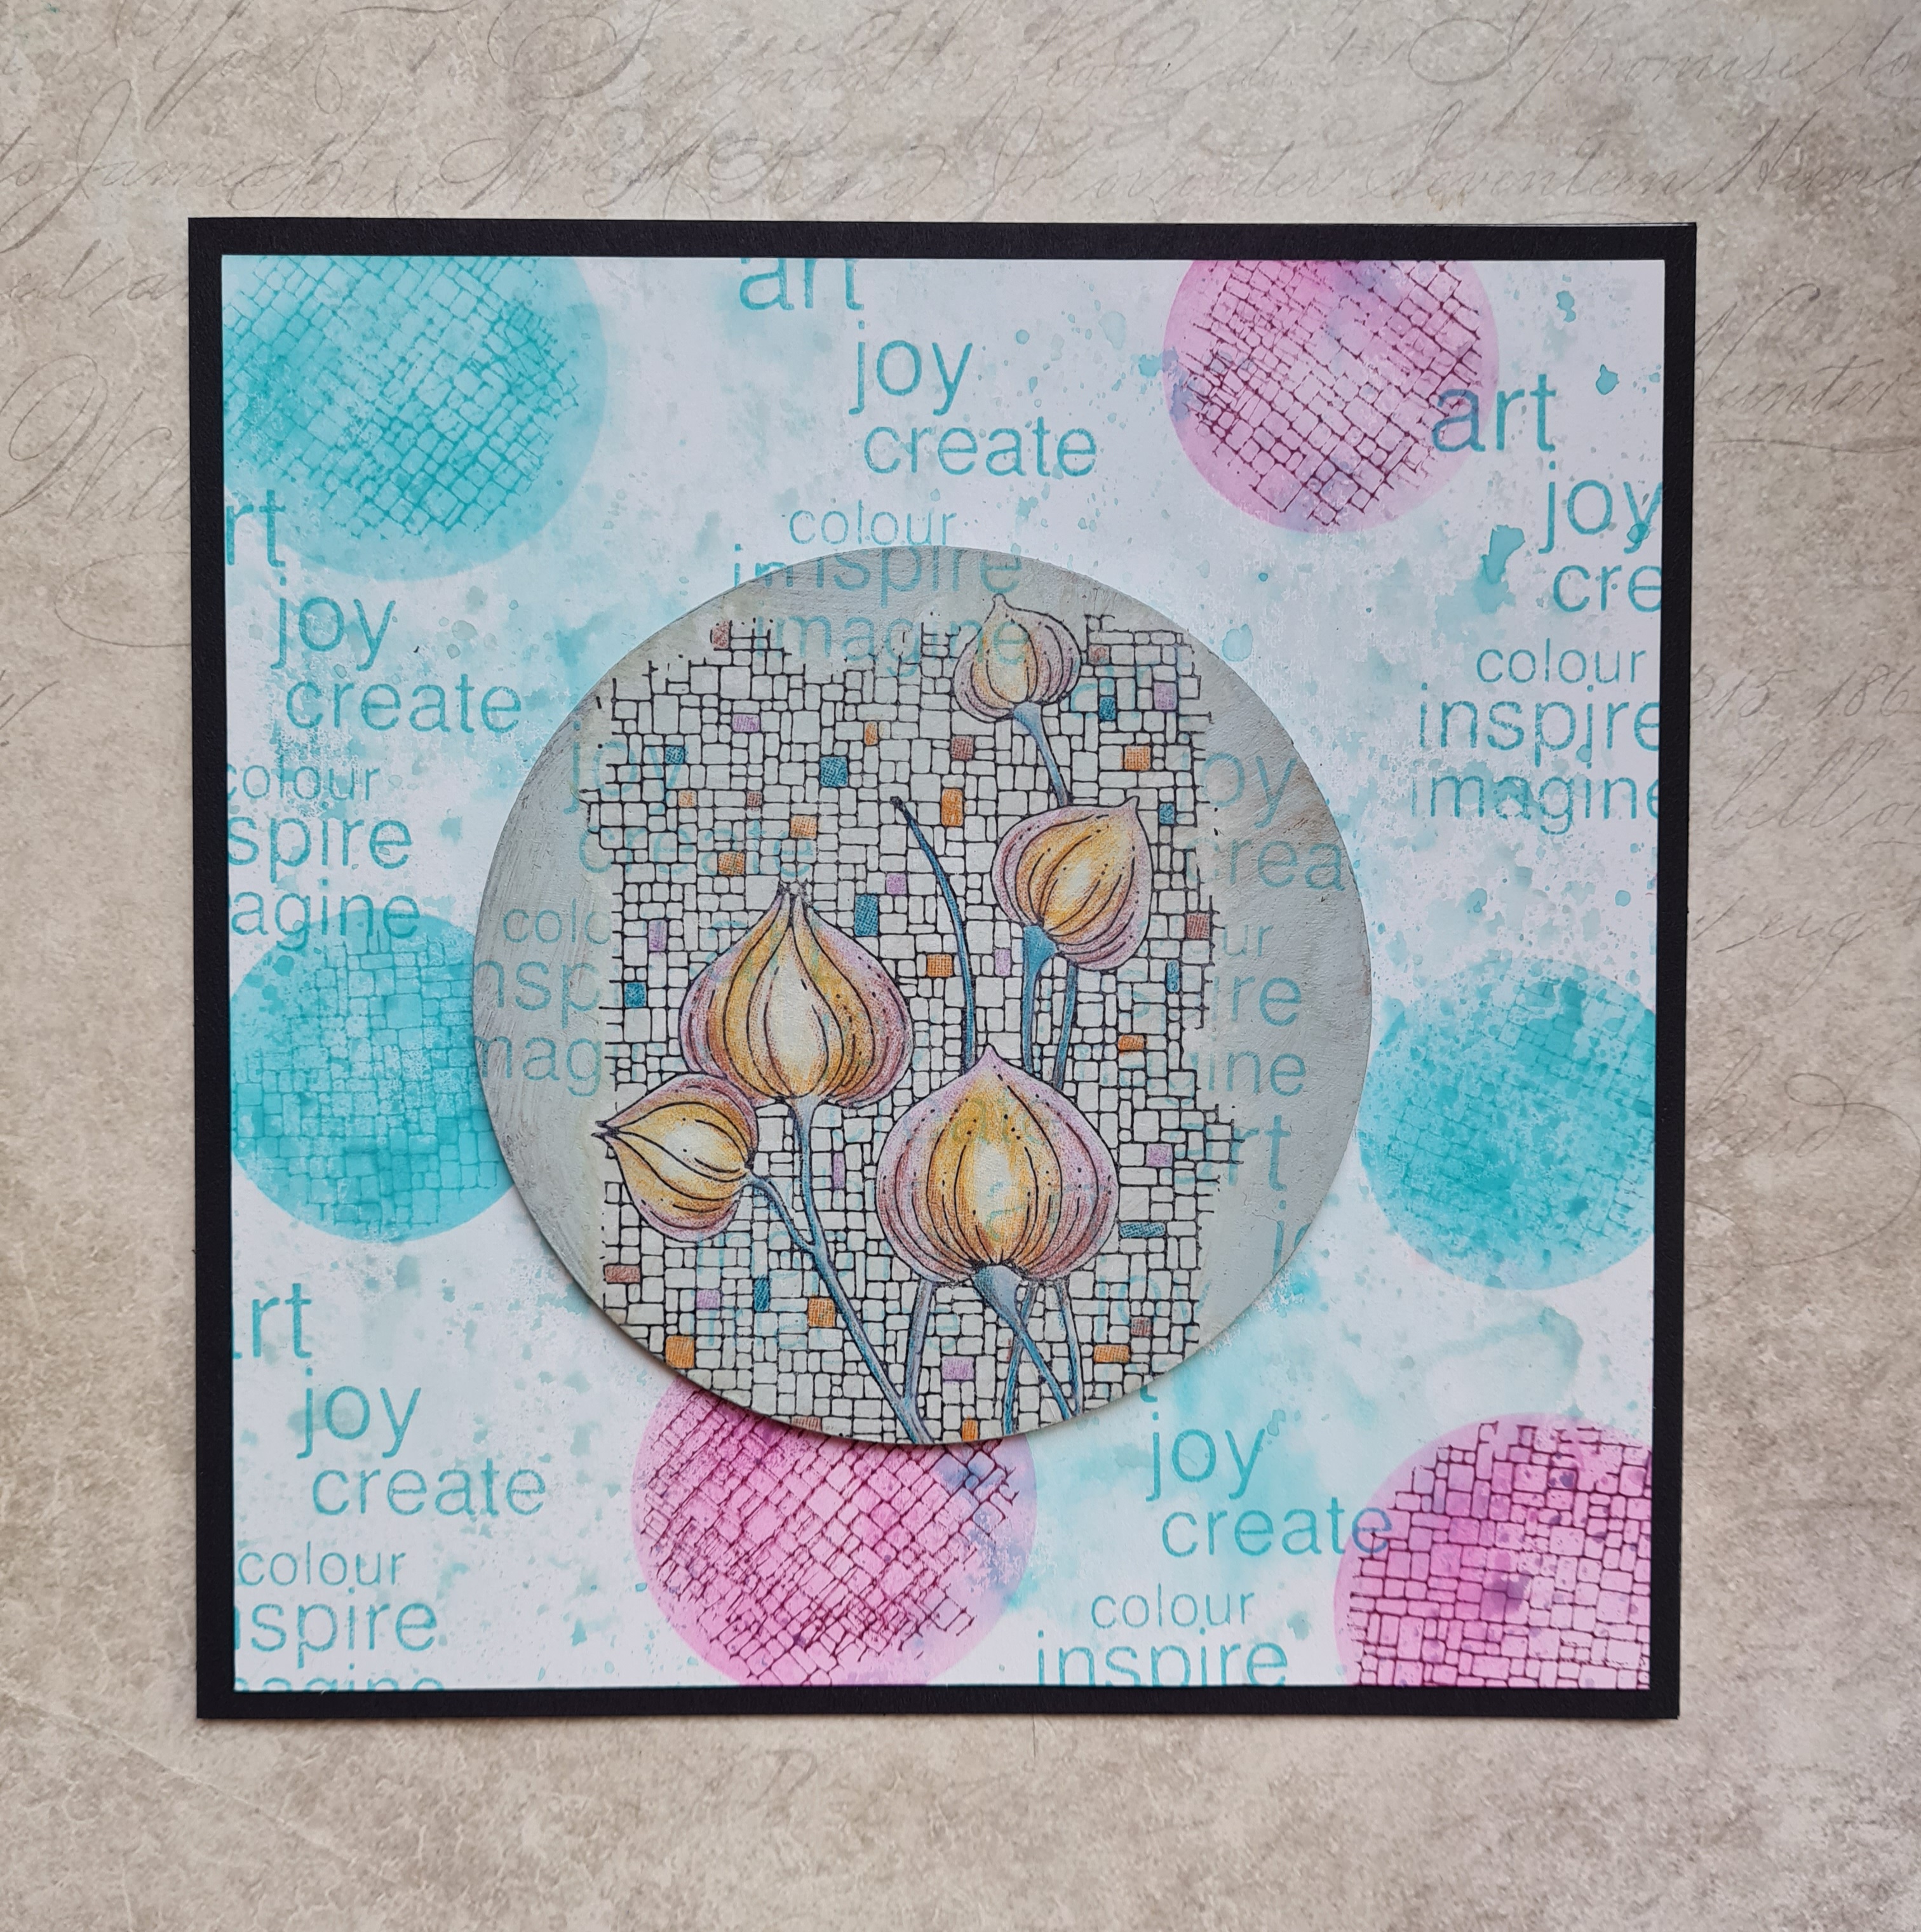
I created a background using Distress Oxides, and then used a stencil to apply colour over the top with blending brushes, and stamped On The Tiles through the stencil with corresponding colours in Archival Ink. I added some words from the Bird of Joy stamp to the background to finish.

I painted a chipboard circle with acrylic paint, mixing white with a dark green to get the colour that I wanted. I added the same words that I had used on my background over the circle. I stamped the Mosaic Flower onto a piece of tissue paper, and coloured it with Luminance pencils, before sticking it to the circle with Matte Medium. I then attached the circle to my background, and used a piece of black card as a mat before adhering the background to a card blank.

I will be back soon with more projects to share with you. Thanks so much for stopping by, take care xx


Friday, 11 March 2022

Mini Cards

Hello everyone, I hope that you are keeping well. I have a trio of cards to share with you today using stamps from last month's TV shows.

I have made some little 4" x 4" cards, I really like this size of card, as they are lovely to send as a Thank You card, or just to cheer someone up when they are feeling down. They are perfect for gift tags too, or for popping a voucher or money inside.

I made a gelli print as the background for all three cards in various colours, using Distress Inks, and stamping on the gelli plate with a texture tool to create an interesting patterm before I pulled a print. For one of the cards, I then used the Square Bubbles stamp all over the background, using Versafine Clair ink in a lovely Teal colour. I added a couple of the butterflies and a sentiment from Butterfly Mind and also decoupaged the butterflies, using some Drawing Cartridge that I had coloured with Distress Ink picked up from my craft mat.

For the second card, I randomly stamped the largest butterfly around the edge of the background using black ink, and added another sentiment in the centre.

For the final card, I added a sentiment horizontally and vertically, and then used the smallest butterfly to fill in the gaps. Finally I took the splatter stamp in my hand and added sections of it in between the other stamps.

I hope that I have shown you just how versatile these stamps can be. Even though these cards are small, you can use these ideas on your bigger cards, they will work just as well. I will be back later in the month with more ideas to share with you. Take care, and thanks for stopping by, xx


Tuesday, 1 March 2022

Butterflies on Film

Hello everyone, I hope that you are all keeping well. I have a couple of projects to share with you today, showcasing stamps from last month's TV shows.

My first project was created by covering a piece of Drawing Cartridge with a wash of cold tea. This is a really quick way of adding a vintage look to your backgrounds, and I tend to colour several sheets of paper at a time, let them dry and save them for another time.

I stamped the film strip from Butterfly Mind down the background, and masked the background, leaving only a segment of the film strip uncovered at a time, so that I could stamp a portion of a butterfly into the area. I moved along to the next portion, covering where I had stamped previously, and rotated the butterfly, for a different angle.

I added the splatter stamp from the same stamp set to the background, using two different colours of ink. I coloured the butterfly wings in toning colours, to match the background splatters. The sentiment also comes from the same stamp set.

The following two projects are not new, but I thought I would share them with you again. I have used the film strip from Butterfly Mind once again, but added it to one of the fabulous flowers available from Chocolate Baroque, Floral Grunge. The film strip helps to create a fabulous collage effect, and with the use of Masking Tissue over the flower, was really easy to create. 

Finally, I created a bokeh effect background over some Brushos, using a stencil and white ink, then added three brightly coloured butterflies from Butterfly Mind. By choosing contrasting a colour for the background, the butterflies really pop.

I will be back soon with more projects to share, thanks for stopping by, xx

Monday, 21 February 2022

More Anything Goes Projects

Hello everyone, I hope that you are all keeping well. I have a couple of projects to share with you today on an 'Anything Goes' theme. There are so many stamps to choose from in the Chocolate Baroque stamp collection that I had a hard time narrowing down my choices for my final blog post this month!

For my first card, I decided to make a useful Birthday card to add to my stash box, handy for when I need a card in a hurry. I took a piece of fabric and frayed the edges. I painted the fabric using watered down acrylic paint, I used an ochre colour. Using Plum Archival ink, I stamped an image from the Brocade Backgrounds stamp set. I stamped a sentiment from Loving Sentiments onto an inked die cut rectangle. To complete the card, I added some pretty pleated ribbon and some metallic card as a mount.


 For my second card, I had a left over background from a previous project created using Brushos. I stamped the large butterfly from Patchwork Butterfly in one corner. I masked the butterfly using masking tissue, and stamped images from Make your Mark and Numerology over the background, plus the sentiment from Patchwork Butterfly. 

Once I had built up the background sufficiently, I removed the Masking Tissue, and coloured the image with Faber Castell Black Edition pencils. I added a couple of grey pencils around the edges of the butterfly to give a shadow and to create the feeling of depth. The pencils coloured over the Brusho background quite well, avoiding the need to cut out another butterfly and decoupage over the top.


I have really had fun dipping into my library of stamps this month, and hope that you have enjoyed my posts. Thanks for stopping by, take care, xx


Friday, 11 February 2022

Tall Grasses

Hello everyone, I hope that you are all keeping well. I have a project to share with you today, mixing and matching several favourite stamp sets. That's the beauty of Chocolate Baroque stamp sets, once you have them, they can be used with other sets from your collection.

I started this project by stamping a couple of bees from Honey Bee and masked them using Masking Tissue. I worked out where I needed them to be by placing a couple of the foliage stamps on my background, so that I knew how tall they would stand. I then covered my gelli plate with green and blue Distress Oxide Ink and placed my background smooth stamping paper over the top.

I stamped a phrase from Words of Gratitude using third generation stamping in a couple of the corners. I wanted the words to be visible, but not overpowering.

I used a couple of silhoutte grasses from Walk Tall, and various shades of Versafine Clair to create a grassy meadow, using first, second and third generation stamping. I chose shades of green and purple.

Finally, I removed the masks and coloured the bees with Inktense pencils. I added a touch of water using a waterbrush to blend the colour. A touch of grey pencil around the bees makes them look three dimensional, but they are flat on the page.

Thanks for stopping by, I will be back later in the month, with something else to share. Take care,xx


Tuesday, 1 February 2022

Anything Goes Part 1

Hello everyone, I hope that you are all keeping well. This month, the Design Team are going to be posting projects on a theme of 'Anything Goes' as we did not have a TV show last month. It is not often we have a chance to run wild through our collection of Chocolate Baroque stamps, and having been on the Team for a very long time, I have a great number to choose from! I did not want to select my obvious favourites, which are mainly Autumnal stamps anyway, not really suitable for this time of year, so I had a really good look at what else I liked in the collection. I am also trying not to use my go to favourite colours either. I hope you like what I have selected.

My first card this month uses the beautiful Parsley Clock stamp set. I stamped the main image onto some green card, (gifted to me by a crafty friend), and added a smaller parsley sprig along the bottom, plus a single butterfly, and the lovely sentiment that Lesley added to the stamp set. The words are perfect for a Get Well card, or maybe for someone that needs cheering up. Equally, the card would make a fabulous Birthday card.

I added the splatter stamp using second generation stamping, so that it was not too overpowering. I then coloured the images with Faber Castell Black Edition pencils, keeping everything to a limited colour palette of yellow, orange, pink and green.

I created a larger background using Brushos, using the same four colours, and once this was dry, I added the splatter stamp in second generation stamping, as before. I matted both layers onto black card.

This is a lovely fresh colour palette for Spring, but you could vary the colours and create a completely different effect. Remember, you do not have to colour the flowers in realistic colours, I have added pink to the Parsley here, because it suited my colour scheme.

 I will be back later in the month with more projects to share with you. Thanks for stopping by, xx


Sunday, 23 January 2022

Colours of Nature

Hello everyone, I hope that you are keeping well. I have a couple of projects to share with you today featuring stamps that were showcased on last month's TV shows on The Craft Store.


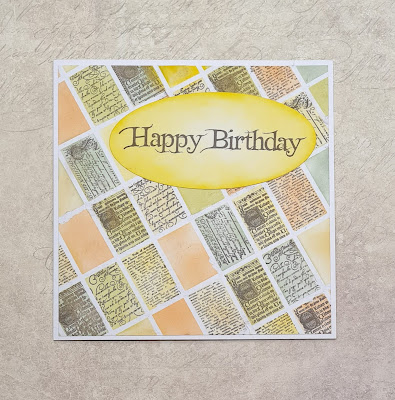
My first card features stamps from the Mini Scripts stamp set. I created a grid using very fine masking tape, and coloured each segment using Distress Ink in natural colours. I stamped some of the script stamps randomly in the segments using black ink.I chose to leave a few segments plain, as I felt it would be too dark if I stamped in every segment. I carefully peeled the tape away to reveal the tiled effect. I added a large sentiment from Birthday Words stamped onto a die cut which I had also coloured with Distress Ink.

TIP: The masking tape was a little bit too tacky, and I would ensure that I had placed it on something first before using it, so that it had lost a little bit of its stickiness. You can see where a couple of pieces of the design have been pulled if you look carefully. However, I want you to learn from my experiences, which is why I am pointing this out 😉

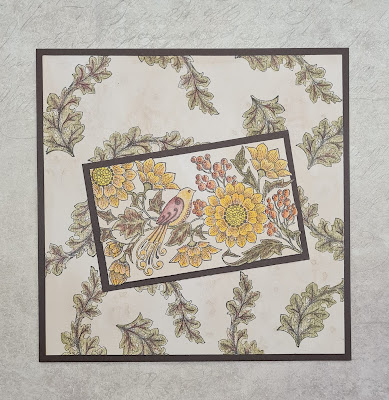
My second project is a remake of another project, using the Song Thrush stamp and a lovely leaf from Brocade Backgrounds. I coloured some Drawing Cartridge with some tea, and left it to dry. I stamped the main image, and then used a larger piece to stamp the leafy image randomly to create a background. I coloured all of the image with Inktense pencils, and blended them with a waterbrush.

I matted both pieces with dark brown card before adhering them to the base card. I hope that you have enjoyed seeing my projects this month. I will be back next month with more projects to share with you. Thanks for stopping by, xx


Tuesday, 11 January 2022

Teeny Weeny Flowers

Hello everyone, I hope you are keeping well. I have a couple of projects to share with you today featuring stamps that were showcased on The Craft Store last month.

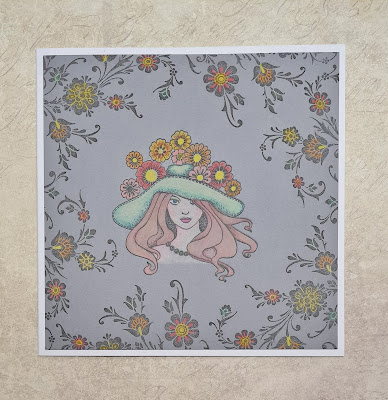
My first project uses the Lady in Hat stamp stamped on grey card, and I stamped a border using an image from Brocade Backgrounds. I coloured these images with Faber Castell Black Edition pencils.

Using a coloured background like this gives a completely different effect to the images, and the colours really pop.

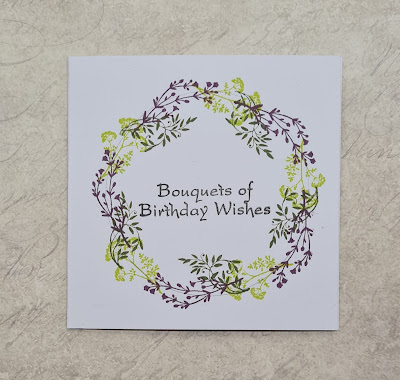
My second card is a really quick project; a little 4" x 4" card. I stamped a sentiment from Birthday Words in the centre of the card, and drew a pencil circle on the card. Using Versafine Clair ink, I stamped some of the images from Teeny Weeny Meadow around the circle to create a wreath.

I will be back later in the month with more projects to share with you, thanks for stopping by, xx


Saturday, 1 January 2022

Happy New Year

Hello everyone, I hope that you are all keeping well and that you have had a good break over the festive period. I want to wish you all a very Happy New Year and all the very best for 2022. 

I am sharing a couple of projects with you today showcasing stamps that were featured on last month's shows on The Craft Store. The first is a little book made from a huge tag and I have used the Damask Panel stamped three times onto a Brusho background, using a metallic embossing powder.

I adhered the pieces onto the tag, and then cut away the excess from the third piece to get the tag shaped end. I added some pretty scrapbook paper on the inside of the tag, and punched the hole again at the top of the tag.


I scored inbetween the pieces, to create the book. I cut a few pages, and sewed them into the book using bookbinding thread. 


I added a piece of teal ribbon through the hole at the top of the tag to allow the book to be closed. This simply wraps around the book, and ties in a bow. These little books make great gifts, and are really quick to make. You could add any kind of pages; old book pages, kraft paper, watercolour paper, whatever you like, to create a mixed media book, but I used drawing cartridge for my sample.

My second project is an old project, which I thought I would share again. I stamped Ophelia onto a piece of Drawing Cartridge and masked the image with Masking Tissue. I coloured the background with Distress Inks and splattered the background with water, which I blotted with tissue. I added some stamping over the top using a stamp from the Texture Fragments stamp set. I stamped and embossed the fronds from the Underwater stamp set before removing the mask. I coloured Ophelia with pencils. I added some foliage from the Song Thrush Silhouette stamp, which coloured this way tie in with the flowers in her hair quite well. I added a bit of Glossy Accents to the centres of the flowers.

I will be back later in the month with more projects to share with you, take care and thanks for stopping by, xx


Thursday, 23 December 2021

Trio of Trees

Hello everyone, I hope you are all keeping well and not feeling too frantic as we approach Christmas Day itself. I would like to wish you all a happy, peaceful festive season, and hope that you enjoy the days ahead, whatever you are doing.

I have a few final projects to share with you this month, showcasing stamps from last month's TV shows. My first project was created by inking a large square acrylic block with Distress Oxide ink, spritzing it with water, and pressing it onto a piece of textured card. I had placed a circle mask onto the card first, to block out an area for a sun or moon, which I painted yellow. I left the card to dry naturally, and once it was dry, I stamped the tree from the Harmony Tree set. I added the words around the tree in first and second generation stamping. I added some colour to the tree with Distress Ink and water, also grounding the tree by adding some shading underneath.


 My second project was also created on textured card using Distress Ink this time. I added a circle mask once again, choosing two colours for the background, and stamped the tree from the Remembrance Tree stamp set. I added the sentiment, and then drew in two birds with a fineliner pen using a stencil.

I added colour under the tree with Distress Ink and a water brush to ground the tree, then added pops of colour to represent a field of poppies or other flowers.

My final card was created with the Harmony Tree stamp set once again. I created a background using Drawing Cartridge, and Distress Ink. I then stamped the wording randomly over the background. I made a strap from Drawing Cartridge which I attached to the card. I stamped a whiteboard heart with the Harmony Tree and coloured this with Distress Ink and a waterbrush, then accentuated the details with pencils. The heart can be slotted into the heart but removed and kept as a memento.

Thanks for stopping by, I hope that you have enjoyed my projects this month, and will try out some of my ideas. Take care, xx


Saturday, 11 December 2021

Festive Trees

Hello everyone, I hope that you are keeping well. I have a couple of Christmas projects to share with you today. These projects feature stamps that aired on our November TV shows on The Craft Store.

My first project was created on kraft card.  I stamped the large heart from Artist Trading Heart, and masked the outside. I added trees from Trees a Crowd, and some scenery lines with a fineliner pen, using torn paper. Keeping the paper in place, I added some shading with white ink and a stencil brush. I used a white gel pen to add some highlights to the trees and dots in the sky for snowflakes.

I added a sentiment from Let's Get Festive to finish.

My second project consists of two little CAS cards stamped straight on 4" x 4" cards. I used two colours of ink and stamped straight onto the card blanks. These were really quick cards to make. I chose images from Frosty Trees for both the sentiments and main images. The teal and purple colour scheme is not traditional, but would suit someone with a modern home decor. You could choose any colour palette; black and gold, red and green, blue and silver, whatever combination you like, and use black card if you opt for metallic colours for even more drama. I added a little bit of glitter glue on the tree, you can click on the photo for a close up look.

I will be back later in the month with some more projects to share with you, thanks for stopping by,xx


Wednesday, 1 December 2021

Happy December

Hello everyone, I hope you are keeping well. Many of you have been experiencing the cold weather lately, and it really feels like Winter has set in, doesn't it? I have just come back from a trip to Mexico, where it was lovely and warm, and the sunshine was very uplifting. I wanted to share a feeling of that sunshine with you with the colours that I have used in some of my projects today. I cannot promise to make you feel any warmer, but perhaps the cheery colours will brighten your day.

My first project was created by blending some Distress Ink onto a piece of Drawing Cartridge. I chose shades of blue and yellow throughout the whole project for continuity. I added some stencilling and stamped segments of the Small Graph Paper stamp using the stamp in my hand, not on an acrylic block, so that I could curve the stamp, to get smaller sections on the background. I also stamped the butterfly definition from the Happy Flower's Day stamp set on the background.

I stamped the large butterfly from the same stamp set first onto the background twice, and then again onto a piece of spare smooth white card. I coloured the images on the spare card using pencils, cut them out, and attached them to the background.

For my second project, I chose a piece of patterned paper and stamped the magnolia from Happy Flower's Day twice, masking the image as I went along. I added the flower definition in a toning colour and the main sentiment in black in the background. I coloured the image with pencils. I attached the panel to a chipboard panel using matte medium. When the adhesive was dry, I sanded the edges to give a white edge. 

My third project was created by placing Distress Oxides onto a craft mat and spritzing them with water. I placed the Drawing Cartridge onto the mat and picked up the colour. I used a whiteboard heart to do the same with the remaining colour on the craft mat, giving a paler version.

I stamped the flower definition over the background, and the fritillary flower and sentiment onto the heart using Versafine Clair Twilight. I picked up a bit of the Distress Oxide colour from the craft mat and painted the flower with a water brush.

For my final project, I chose to use grey card for a completely different look. I stamped the floral sprig from A Heart Full of Love around the edge of the background, and then added the floral heart in the middle. I coloured the images with Faber Castell Black Edition pencils. I used white pencil first on the flowers, and added the other colours afterwards, this really helps on darker coloured card.

It's actually my Birthday today, and I would like to wish you all the best of days today. I will be spending the day with my little Granddaughter Ruby, who has just learned how to sing Happy Birthday, a precious moment.

I will be back later in the month with more projects to share with you, take care, and thanks for stopping by, xx


Related Posts Plugin for WordPress, Blogger...