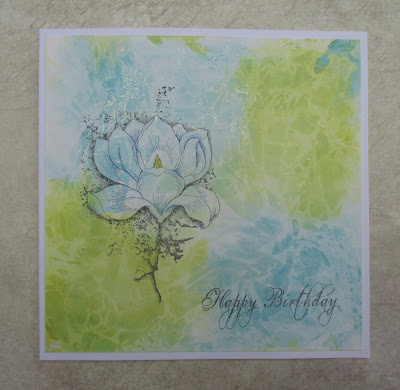
Hello everyone, as we come to the end of 2019, I would like to wish
you all a very Happy New Year and all the very best for the coming year
ahead. The past year has been a very busy year for all of us at
Chocolate Baroque, and we cannot believe how quickly the time has flown
by. As Lesley mentioned in her Christmas Day message, we sadly lost Sue,
our designer this year, we will miss her amazing creativity, but as you
continue to use her designs in your artwork, her memory lives on.
One
of the highlights of our year was a trip to Doncaster to Stamp Magic,
where we had a stand, and I helped out with a Make and Take area. We
were incredibly busy all day, and I thought that I would share a few of
the samples from the classes. The format was the same throughout, but
the colours and stamps varied. We used Distress Oxide Inks to create a
background on Drawing Cartridge, and then stamped over the top using
Versafine Clair Inks. We coloured a whiteboard heart with the left over
Distress Ink, and stamped an image over the top, adding some extra
colour with a water brush. White highlights could be added for an extra
pop.
The
hearts make great gifts in themselves, as Artist Trading Hearts, so I
also designed one card with a strap across, so that the heart was
detachable:
I also used stamps from Crafty Individuals on the day, as we shred a stand with Jean and Malcolm. Some of my samples became a mixture from both companies, which, when you are crafting at home, is probably what you would naturally do anyway. I have not finished colouring some of these, because they
were made on the day as quick examples. However, I now have a nice
collection of cards almost ready to give when required, and only need to
add a touch of colour to the hearts and a sentiment or two.
Enjoy a very happy, creative 2020.
Thanks for stopping by, xx
Followers
Tuesday, 31 December 2019
Sunday, 1 December 2019
Coaster Journal
Hello everyone, I have a project to share today showcasing lots of
the stamps featutred on last month's TV shows on Hochanda. If you did
not catch the shows, then you will be in for a treat this month as the
DT share their beautiful projects with you on the blog.
I have made a little handmade journal using a couple of coasters which were no longer wanted, and some Drawing Cartrige for the inside pages. I painted the coasters with some clear gesso, to give them a base to work on, and once this was dry, I added some acrylic paint. I stamped the Remembrance Tree on one coaster and the Harmony Tree on the other coaster, using Archival ink.
I cut strips of Drawing Cartridge just slightly smaller that the coasters, and scored them to make pages. Each strip made three pages, and I stuck them together with other strips to make one longer strip so that I had lots of pages to decorate. I added gelli print backgrounds, printed papers, or simply used Distress Inks to colour the pages.
I used the pages to try out ideas that could then go on to make bigger cards if I liked the ideas. These little journal are a great place to experiment and play. A small space gives you freedom to try something and move on. Sometimes a big space can feel a bit daunting.
Once I had decorated the pages, I added some ribbon inside the front cover, and attached the covers to the front and back blank pages. You could construct the book and decorate it afterwards if you want to. It depends how messy you are!
Here are a couple of the card ideas that came from the little book itself. A set of little note cards, useful for any occasion:
A film strip idea, expanding on the version in my little journal:
I hope that I have given you lots of ideas, and that you will try them out. Thanks for stopping by, xx
Thursday, 21 November 2019
A Burst of Colour
Hello everyone, as the nights are pulling in, and the days are often a
bit grey and gloomy, I thought I would share a few colourful projects
that I made for last month's TV shows on Hochanda. I hope that these
projects will brighten up your day and inspire you to get your inkpads
out and have some colourful creative fun yourselves.
My first project was created using drawing cartridge and Brushos. I wanted a zingy background, and chose yellow, red and orange to create the first layer. I sprinkled the Brushos first, and added water to get the lovely mixture of colours. I blotted another piece of drawing cartridge over the top, and saved that piece for another day's project. I added some stencilling using red and yellow ink, and stamped randomly over the background using the Klimt Panel cling mounted rubber stamp. I held the stamp in my hand rather than on a block to get just bits of the image here and there.
I stamped and embossed some chess pieces from The Art of Chess stamp set onto black card using gold embossing powder, and cut them out. I also stamped the sentiment onto a spare piece of my background card. I mounted the backgrounds before adding them to a tag shaped card.
The backgrounds for the next three cards were all created in the same way, I simply finished them off in different ways. The colours are so pretty, and I really enjoyed making the backgrounds. I made a lot, and still have some left for another creative session. I used Distress Oxide Ink spread onto a craft mat, which I spritzed with water. I placed my drawing cartridge over the top, and then added some gold mica spray, giving it a generous spritz. I put some crinkled cling film over the background and left it to dry completely. When the cling film is removed, you are left with some beautiful patterns, highlighted by the mica spray. There are lots of variations for this technique out there on the Internet, so do give it a try.
For the first of the three cards, I stamped the heart from Music Fanfare five times on a pink background, and once on green. I cut the green heart in half, and edged the cut side with black ink. I stamped the large music segment twice using a toning ink, and added a piece of velvet ribbon to the background. I scrunched, then arranged the hearts into a flower, tucking the green segments behind to resemble leaves. I wanted the flower to look more 'crumpled', and by scrunching the petals first, it gives them far more texture. I added a big black button in the centre. To finish, I added a sentiment from the Loving Sentiments stamp set and matted the background onto black card.
For the next two cards, I used the beautiful Floral Grunge stamp. I used patterned papers for the first card, paper piecing the image, and adding a butterfly cut from the papers themselves. I added one of the ephemera stamps using toning coloured ink, matching the background colours. You can really see the shimmer of the mica spray in this photo.
Finally, I added a bit of pencil colouring to the image on this last card, adding some grey pencil around the flower to give some shading and to give a feeling of dimension. I chose toning colours once again, and although this was a very quick card, it would make a lovely Birthday card. I used a sentiment from the Birthday Words stamp set.
I hope that I have given you a few ideas, and that you will try out some of the projects that I have shared with you today. Thanks for stopping by, xx
Wednesday, 6 November 2019
Vintage Ephemera With an Added Cup of Tea
Hello everyone, I have a couple of vintage themed projects to share
with you today using the stamps that we launched last month on our TV
shows on Hochanda. These fabulous new stamps are so useful, and can be
used with lots of your existing stamps, as you will see from both projects that I have created.
I coloured some drawing cartridge with some cold tea, and then sprinkled the background with sea salt, leaving it to dry. I brushed the grains of salt away, and then stamped one of the images from Baroque Ephemera 1 randomly over the background. I dry brushed some pale blue chalky paint from Little Birdie over the top, to push the images into the background. I really like the blue and beige combination.
I stamped Floral Grunge over the top, using black Archival Ink, and also stamped the flower head a couple of times onto spare piece of background paper, also coloured with tea. I cut these out, and stamped the same ephemera image over the top, so that they look as if they had been stamped onto a piece of text. I decoupaged the images onto the background. I added some ricrac, also painted with the blue paint. I created a little tag by dry brushing a section of lolly stick with the paint, and stamping a word from Baroque Ephemera 2 over the top. A black brad and black card to mat the background complete the card.
I
used some of the same background to complete my second card. I used the
alphabet strip to create a frame around the edge. I added a postcard
created by stamping onto another piece of the background, and adding a
section of Movie Strip Collage in the corner. I added the lovely butterfly from Happy Flower's Day,
and coloured both of these images simply with Koh-I-Noor watercolour pencils and a
water brush. I added tickets stamped from the ephemera stamp sets and
some little stamps complete the card.
Both
cards were a lot of fun to create, the stamps are great for building up
backgrounds, and adding a little something extra to your projects. They
can be mixed with your other stamps or create something special in
their own right. I hope that you will enjoy playing with them as much as
I have!
Thanks for stopping by, xx
Monday, 21 October 2019
Celebration Bouquet
Hello everyone, I have a project to share with you today using the lovely stamp set Celebration Bouquet, featured on last month's TV shows on Hochanda. The main image is so useful and can be used for a variety of occasions. You can use the image as a whole, or pick out parts of the image and stamp it onto a variety of surfaces to create embellishments for your projects, the possibilities are really exciting.
To create my card, I stamped and embossed the image and one of the sentiments using Versamark and white embossing powder onto kraft card. I painted the image using Koh-I-Noor paints and a water brush. I chose my favourite colour combination of plum and teal for the flowers and added a few sequins to the background. I mounted the kraft card onto a piece of patterned paper, which was one of Lesley's lovely designs from a previous paper pack that she created.
Thanks for stopping by, xx
Sunday, 6 October 2019
Blue Butterfly
Hello everyone, I have a project to share with you today featuring stamps from last month's TV shows on Hochanda. Sadly I was unable to go with Lesley to Hochanda, as we were saying goodbye to my lovely Mum on what would have been her 80th Birthday. Mum was instrumental in introducing me to card making, and it was through her that I got to know Glenda and Lesley. She was so proud when I joined the Design Team, and loved to watch me on the TV. Mum was a huge Chocolate Baroque fan, and had compiled a large collection of the stamps in her own right. She loved to create cards with me whenever we got together, and some of my happiest memories with my Mum are of us crafting together.
I have chosen to make a card using stamps from the lovely Happy Flower's Day stamp set, which is such a versatile collection of images. The flowers and butterfly are just delightful, and the script is incredibly useful to add as a background or embellishment. I think these are going to be a long time favourite of mine!
I started out by creating a background using the large butterfly, and stamping and embossing over a piece of drawing cartridge with white embossing powder and Versamark Ink. I added Brusho powder in Sea Green and Turquoise, then spritzed with water. I dabbed the background with a piece of kitchen towel to blend the background, and the butterflies acted as a resist for the vibrant colour.
I used the damp kitchen towel to colour a whiteboard heart, creating a much paler colour, which was exactly what I wanted. I then stamped the butterfly definition over the top using a Library Green Archival ink. I stamped and embossed the butterfly once more onto a piece of coloured vellum, and cut it out, attaching it to the whiteboard heart. Finally, I used a piece of deep green card to mat the background, and pull everything together.
I will be back later in the month with more projects to share with you. Thanks for stopping by, xx
Saturday, 14 September 2019
Tall Houses
Hello everyone, I am sharing a few projects today showcasing the
beautiful stamps that we shared on last month's TV shows on Hochanda.
These lovely house stamps designed by Sue Page were such a delight to
work with, and demonstrate, as always, Sue's eye for detail and her
talent as a designer. We celebrated Sue's wonderful work during these
shows, and she will be sadly missed. Her artwork will continue to be
appreciated through your projects and creativity.
My first project is a colourful street created using the Dutch House stamp set. I stamped the image several times, masking the image to enable me to add the subsequent images slightly behind the first central image. I also added some background foliage by stamping a tree from Trees A Crowd. I coloured the background using Distress Ink, then set to colouring the houses with Polychromos pencils.
For my second project, I stamped the Bridge House onto a piece of scrapbook paper using Archival Ink, and coloured it with pencils once again. I stamped foliage from Silhouette Grasses onto an Acrylic Tag using Plum and Olive Archival Ink and allowed this to dry completely. I covered the paper with Matte Medium and stuck it to the tag.
My final project was a TV demo, showing how to create a project with just three colours. I used some Koh-I-Noor acrylic paints to splatter across a piece of kraft card to create a very quick background. I then stamped the Turret House onto a piece of watercolour paper and coloured the image using the same three colours of paint; red, blue and yellow, mixing them to create orange, purple, brown and grey, by simply adding a little bit of one of the colours each time.
Thanks for stopping by, xx
Tuesday, 3 September 2019
A Little Catch Up
Hello everyone, I do not generally post anything other than craft related matters on my blog, but occasionally I decide to make an exception to that rule. Two recent events have been causing life to be more than a little eventful, and 2019 has certainly not been an easy year.
Sadly on 20th August, my lovely Mum passed away, and yesterday was her funeral. She would have been 80 years old, and we celebrated her life with a birthday cake and her favourite flowers. We sang Happy Birthday to her and talked about happy memories.
The wreath on the coffin was beautiful, heart shaped, and again in her favourite flowers. Such cheery colours and not sad at all.
Thanks for stopping by, normal crafty posts will resume again soon! xx
Sadly on 20th August, my lovely Mum passed away, and yesterday was her funeral. She would have been 80 years old, and we celebrated her life with a birthday cake and her favourite flowers. We sang Happy Birthday to her and talked about happy memories.
The wreath on the coffin was beautiful, heart shaped, and again in her favourite flowers. Such cheery colours and not sad at all.
My memories of Mum are mostly craft related, Mum taught me to knit and sew, plus lots of other skills as well. I crafted with Mum from a very tiny age right through to more recent times. We went to craft fairs together and even had stands of our own selling our handiwork at lots of different venues. Mum was incredibly proud of me, telling everyone 'our Judith is on the TV', and loved to watch me doing my demos. Crafting was a great way of us spending a bit of time together, having a catch up and a bit of a natter. It was quiet time, and we could share a common interest. Mum's illness was hard, and she is at peace now.
My second piece of news is more joyful and those of you who are friends with me on Facebook will already know. I became a Grandmother on 25th August when my Daughter gave birth to little Ruby Isla, weighing just 5lbs 9oz. Little Ruby is a ray of sunshine at this time, and we love her to bits. She is such a little sweetheart and I was very priveleged to be at the birth. Megan and Ruby are doing well, and we are looking forward to spending lots of time with them both.
Sunday, 1 September 2019
My House, Poppy Cottage
Hello everyone, I have a few projects to share with you today featuring a very special stamp showcased on last month's TV shows on Hochanda, but first of all I would like to talk to you a little bit about the background of the stamp.
You are all probably very familiar with the very talented Kim Moody whose stamps are manufactured by Chocolate Baroque. His quirky stamps feature architectural images, and seaside scenes which are such a delight to work with. Kim also does commission drawings of houses and other buildings, adding his particular eye for detail. I decided to ask Kim some time ago to draw a picture of my own house Poppy Cottage, and we discussed adding lots of features that I love about my house; the dragonfly door knocker, the wrought iron butterflies on the balcony, the dovecote in the garden, and of course, he needed to include Poppy and Bella, my two cats. Poppy is a bit plump, and Bella is rather skinny, so you can tell them apart! I sent a few photographs, and Kim came up trumps with a delightful drawing, beautifully framed for me.
A few months on, and I asked Lesley if it would be possible to have the stamp made, as I would really love to create Christmas cards using 'Poppy Cottage' as a personal touch. We hoped that you would love the image as much as we did, and decided to try it out as a small batch on one of the TV shows. I was so touched that you really liked it!
I created a couple of samples for the show, the first one was created by stamping an image from the Poppy Edges stamp set a couple of times, then masking these images before stamping Poppy Cottage itself. I masked the house also, then added a Pan Pastel background.
I added foliage from the Silhouette Grasses stamp set before removing all of the masks. I coloured the images with pencils and added one of the sentiments which I stamped onto sections of card, and edged with a plum coloured ink. I chose the same coloured card to mat the project onto before adhering it to a large card blank.
My second project was a Christmas card, to show the versatility of this lovey stamp. You could use it at any time of the year really, by adding extra foliage, and varying the colours. I have chosen to stick to the true colours of my house for these samples, but you can let your imagination run riot.
I stamped the house once again, and masked the image. I used a snowflake from The Christmas Garden and white embossing over the top two thirds of the background. I covered the background with Distress Ink, and the embossing acted as a resist.I coloured the image with Koh-I-Noor paints, and added a bit of Stickles for some Christmas bling. The sentiment comes from the Let's Get Festive stamp set.
My final project was a heart stopping TV demo, and it could have gone horribly wrong on live TV, but fortunately, it all worked out well. I decided to create a little key ring or handbag charm using shrink plastic. I die cut a large tag, and stamped the image using Archival Ink. I coloured the image using Copic markers and cut a hole at one end. I shrunk the plastic using a heat gun, turning it over regularly to ensure even heating, and flattened it with an acrylic block before it had time to cool.
I drew around the shape onto a piece of greyboard, and covered this with some scrapbook paper using Matte Medium. For the keyring, I stuck the shrink plastic to the greyboard shape with Matte Medium, but for the handbag charm, I let the shrink plastic swing freely.
Even shrunk down you can still see the details so clearly, and these little charms make a fabulous little gift. You could try this idea using the Tagtastic stamp and any of the tall houses that either Kim Moody or Sue Page have designed recently.
I will back later in the month with more ideas to share with you. I hope that you will watch Lesley on this month's TV shows on 3rd September, she has some amazing new stamps to share with you. Sadly I will not be there this month due to family circumstances, but I will be back again in October.
Thanks for stopping by, xx
Thursday, 22 August 2019
Floral Stamping
Hello everyone, it's not often that I get the chance to work with stamps other than those by Chocolate Baroque, but a few weeks ago I made a few samples for the folks at Craft Creations Ltd for a show on Hochanda TV. I fell in love with these pretty stamps and actually asked if I could have a play with them! The beautiful bold designs were so eye catching, and I could see lots of uses for them. I intend to use the images for my cards going forward as I think that they are really useful.
For my first card I created a Distress Oxide background, and stamped some of the words from the Flowers All Around stamp set using black ink. I stamped the large 'You' from the Flowers For You stamp set onto a die cut circle, adding some shading around the edges, and then matted both pieces onto black card. I loved the positive words, and thought this would make a really uplifting card for a friend who needed a boost, or even just to tell someone how beautiful, amazing, special, fabulous etc. they are!
I created two kraft cards next using white embossing. For my first card, I stamped the lovely border from the Flowers For You stamp set across the top and bottom of the card and added the Happy Birthday in the middle. I coloured the flowers with Koh-I-Noor paints as these stand out so well on kraft card. This card was so quick to make, but really effective.
For the next card I stamped, embossed and coloured the main image from the Flowers All Around stamp set as before. I stamped and embossed the leaves onto a larger piece of kraft card and then added Brushos in shades of red, orange and green, spritzing them with water to add that dramatic colour burst effect. The leaves and the sentiment come from the Say It In Flowers stamp set.
Another super quick card next, created with a Distress Oxide background. I stamped the main sentiment using words from Flowers All Around and a vibrant purple ink. I used swirls from Flowers For You to create a streamer effect around the edge, using two different colours of Versafine Clair Ink.
Another fun card to make, I chose linen textured card this time for a different finish. Again I created a Distress Ink background, adding a dotty border using a stamp from Say It In Flowers. I stamped the main image and sentiment on a smaller piece of textured card, and coloured the flowers with Koh-I-Noor paints.
For my final card, I used another image from Say It In Flowers and stamped the image randomly over a piece of smooth white card. I coloured the image with Koh-I-Noor paints, and added a sentiment strip. I edged both pieces with black ink for definition.
Thanks for stopping by, xx
Thursday, 1 August 2019
Too Hot for Christmas?
Hello everyone, I have a few projects to show you today, and
thought that I would start with some of the cards that I made featuring
the delightful A Tomte Christmas
stamp set. I stamped the large gnome and masked him before adding a
background using a torn paper mask and Distress Ink in blue and grey
tones. I added first and second generation stamped trees from the Trees a Crowd stamp set.
I removed the mask and coloured the image with Koh-I-Noor pencils and added some soft pencil shading around the base of the trees to ground them.
For my second card, I used the trio of gnomes, and started by colouring a die cut oval using Distress Ink. I stamped the image onto a spare piece of card using brown ink and I coloured the image with Distress Ink and a water brush, adding pencil shading over the top. I fussy cut the image and attached it to the oval.
I created a little tag and stamped the sentiment, adding some baker's twine. To assemble the card, I used a piece of music paper as a background, added brown card as a matting layer and some pretty red ribbon to finish.
I liked the vintage colours on this card, and made a matching tag using one of the circular acrylic baubles that we had on the show. I used Archival Ink to stamp the image, acrylic paint to colour the image, and again used music paper for the background.
My final project for today also features the acrylic tags. I coloured them with alcohol inks, and stamped on top of them using white acrylic paint. I used images from the Shaded Baubles stamp set and The Christmas Garden. As long as you clean your stamps straight away, you can use paint to stamp with, no problem.
I chose a mixture of bright colours for the tags. These would look great on the tree at Christmas, or as beautiful sun catchers hung in a window.
I added matching twine and a bit of Stickles for a bit more bling.
It has been almost too hot to create Christmas cards at this time of year, but lots of you will be thinking about making your Christmas cards now to get ahead. These stamp designs are brilliant for lots of projects and I will be back later in the month with some quick batch card ideas for you.
Thanks for stopping by,
xx
Subscribe to:
Posts (Atom)