Followers

Showing posts with label Butterfly Daisy Collage. Show all posts

Tuesday, 23 August 2022

A Touch of Pink

Hello everyone, I hope that you are keeping well. I have a project to share with you today showcasing some of the products featured on last month's TV shows on Create and Craft. 

To create my project, I started with one of the fabulous black and white papers designed by Lesley. I attached this to a MDF panel using matte medium. I stamped the large flourish from Butterfly Daisy Collage in two of the corners, and added the Small Graph Paper randomly stamped using a pink Versafine Clair ink. I just used parts of the stamp to give a patchy effect, and used the stamp held in my hand, rather than on a block. I added Distress Ink around the edges with a blending brush.

I stamped and embossed the Freedom Flower twice onto a spare piece of the black and white paper and cut it out. I coloured the image with shimmer paints, before decoupaging the flower and attaching it to the background. I used a grey pencil around some of the petals to give the impression of extra layers, adding shading for more depth.

Thanks for stopping by, Take care, xx


Monday, 1 August 2022

A Pop of Colour

Hello everyone, I hope that you are keeping well. I have a project to share with you showcasing stamps from last month's TV shows on Create and Craft. This was one of the demos that I created on the show, and I really enjoyed putting this project together.

I started my card by colouring a piece of Drawing Cartridge with Distress Oxide Ink, I chose a blue and green ink. I placed it onto a craft mat, and spritzed some water onto the ink, before placing the Drawing Cartridge over the top. I dried the Drawing Cartridge, and then patted it onto the mat again, to pick up some of the left over ink. I dried the Drawing Cartridge once more and continued with the background.

I added some stencilling using orange Distress Oxide Ink. I also stamped the Small Graph Paper stamp using green Versafine Clair ink, simply holding the stamp in my hand, not on a block. This gave me the opportunity to use random parts of the stamp by curving the stamp, so that only a portion of the stamp touched the background. I used a definition from the F is for... stamp set to complete the background.

I stamped and embossed some flowers and a butterfly from the Butterfly Daisy Collage stamp set onto some patterned paper. I coloured the images with Koh-I-Noor pencils and cut them out. I used the large flourish, and stamped the ends on the background, working out roughly where they needed to go by placing my flowers down first without adhering them. I stamped the butterfly antennae where I wanted to place the butterly on the background before I stuck the butterfly to the background. I curved the flower petals with my hands, but you could use a pencil or scissors to do this. I attached them to the card in between the flourish ends, and added some black buttons in the centres. I matted the background onto black card for extra drama to finish.

I will be back later in the month with more projects to share with you, thanks so much for stopping by.

Take care, xx


Wednesday, 28 November 2018

Stamping on Fabric


Hello everyone, I am sharing two projects today using the stamps that we showcased on last month's TV shows on Hochanda. This time, I have created my projects using fabric, showing how you can create a quick card, and a decorative panel.

For my first project, I painted a piece of spotty fabric with yellow and green Hybrid paint, blending the two where they met. I used coloured Archival inks in green and brown tones to stamp all of the images, creating a meadow scene in first and second generation stamping, just as I would when creating a card. I added a couple of Butterflies, and then painted the images with Koh-I-Noor paints and a waterbrush. The Koh-I-Noor paints worked really well on the fabric, and because I am not planning to wash the piece, it does not matter that they are not waterproof.

For the larger panel, I used the large corner stamp from the Butterfly Daisy Collage stamp set, and stamped around the edge of a piece of patterned fabric, overlapping the image as I went along. Again, I used coloured Archival Ink. I used iron on interfacing on the back of both pieces of fabric, fraying the edges of the top panel, and adding rust coloured Archival Ink to the bottom panel. I used a thick piece of greyboard as a base.

I had a piece of the spotty material left over from my first project, and stamped two of the large butterflies from the Butterfly Daisy Collage stamp set onto the fabric, adding shading with the Koh-I-Noor paints. I also stamped some words from the Amazing Mackintosh Words stamp set, and frayed the edges of the little panels.

I created a wrinkle free distress panel using tones of green and yellow Distress Ink on a piece of watercolour card for a background. I stamped a leafy sprig in second generation stamping randomly over the background. To complete the card, I used a small piece of eco printed fabric, with a lovely leaf printed in the centre. 

Thanks for stopping by, xx

Wednesday, 14 November 2018

Painting with Bleach

Hello everyone, I am back with another project to share with you showcasing the stamps that we brought to you on last month's TV shows on Hochanda. I wanted to revisit a technique that I love to use in conjunction with Distress Inks, painting with bleach, it works so well, and these stamps are a great way to show off the technique. I made a larger project a while back using the very same technique, and I will share a couple of photos of that project with you at the end of my post.

I started my project by creating two panels, one large and one smaller, shading them with Distress Inks in a rainbow panel. I started in the middle with yellow, and worked out using orange and red on one side, green, blue and purple on the other side. I made sure to blend the colours smoothly, going back over the joins where necessary with the previous colour. I matted both layers with black card, and turned them so that they were facing the opposite way to each other when I put them together.

I coloured some spare card with Distress Inks, and stamped a couple of flowers and a butterfly from the Butterfly Daisy Collage stamp set onto the card using Archival Jet Black ink. I painted parts of the image with neat household bleach and a fine brush. IMPORTANT: do make sure that you are working in a well ventilated area when you do this. I cut the images out, and stamped a foliage image onto the smaller background a couple of times using black ink. I curled the petals of the flowers and butterfly slightly before adhering them to the background. I added a sentiment from the Loving Sentiments stamp set.

As you will see, I was very much inspired by my previous project! This flag book uses lots of our other stamps, but incorporates stamps from other companies too. Lesley is a huge advocate of mixing and matching our stamp sets together, but encourages you to use your Chocolate Baroque stamps with your other stamps as well.


I used the same techniques throughout this book, Distress Ink backgrounds, stamping with Archival Ink, and painting with bleach. I have added a bit of stencilling here and there for added texture, and a few small embellishments. I hope that you will give this technique a try, it's a lot of fun, and depending on the colour of ink that you use, the results vary.

I will be back later in the month with more inspiration, thanks for stopping by, xx

Saturday, 3 November 2018

Masking Butterflies

Hello everyone, I am sharing two cards with you today created for last month TV shows on Hochanda. If you caught the shows, you will have seen me demoing the first card, and showing the second card as an alternative option for the technique that I used.

To create my card, I drew a circle with a pencil onto a piece of smooth white card using a circle die, but anything the right size will do. I then stamped three butterflies into the card using Versafine Onyx Black Ink, and masked the images using masking tissue. I stamped six daisies from the Butterfly Daisy Collage stamp set around the circle, three close to the butterflies, and masked those as well. I used a foliage stamp from the Thistle Butterfly stamp set to create the background leaves for the wreath, using Shady Lane Versafine Clair ink. Once I had finished, I removed the masks, and coloured the images with pencils. I added a sentiment from the Words to Dazzle and Sparkle stamp set.

My second card was created in much the same way, but I based the colours on my background, which I had found in my stash box. This was simply a wrinkle free Distress Ink background, using Seedless Preserves and Salty Ocean Distress Ink. I stamped the butterflies first, masking them as before, then adding the daisies behind. Finally, I added the same foliage stamp to fill in the background, using Purple Delight Versafine Clair ink. I coloured the images with pencils as before. I added a bit of shading around the edges of both pieces of card with Seedless Preserves Distress Ink, and used a purple card to mat both layers. The sentiment comes from Amazing Mackintosh Words.

To help me plan both cards, I placed my masking tissue images onto my pieces of card first, moving them around to see how they would fit, this helps to visualise what the card will look like. I also stamped my wreath onto a piece of copy paper first, trying out the design, and various colour options for the flowers. I would always advise you to do this if you are unsure about a design, copy paper is very cheap, and you can have several attempts at something, without worrying about your mistakes, before moving onto card.

Another top tip regards colouring in your images. I have used quite a limited colour palette, and have used orange and red in both the flowers and the butterflies in my first example as you can see in the photograph below, to keep some continuity to the images. In the photograph above, although it is not obvious, I have added blue to both the flowers and the butterflies, (along the outer edges of the wings), to again pull everything together. I always choose a toning card to mat the layers in my project, or use ink to edge the panels of card that will coordinate the colours I have used. I hope that this helps you in your own creative process.


I will be back later in the month with more designs to share with you. Thanks for stopping by, xx



Monday, 7 September 2015

Not just for Halloween

Hello everyone, I have a card to share today using this month's Halloween stamps, but I wanted to show how the stamps could be used in a very different way.

I have created a clean and simple graduation card using one of the book images and the starburst on a diamond die cut to represent a mortar board. I added a tassel underneath from the Baroque Eggs stamp set. I coloured the images with pencils. I coloured the centres of the starburst image with a gold Wink of Stella pen for a bit of sparkle. I added a flourish in the corners of the card from the Butterfly Daisy Collage stamp set, and finally stamped a sentiment from the Loving Sentiments stamp set onto a small tag.

The simple black and white colour scheme makes this card suitable for both male and female recipients, and could be adapted to add particular University colours. Thanks for stopping by, xx


Wednesday, 19 August 2015

Bright Butterfly

Hello everyone, it's time for a brand new challenge over on the Chocolate Baroque Challenge Blog this week. I am providing part of the Design Team inspiration for the lovely new colours that you can play around with for the next four weeks as part of the challenge.

I chose to use a technique demonstrated by our lovely leader Lesley recently on the Design Team blog, using greyboard, masking tape and gesso to create a background.  I covered the greyboard with strips of masking tape randomly, using horizontal and vertical strips until the surface was covered completely. I burnished the surface with an old credit card. I then painted the surface with gesso, and left it to dry.

I coloured the surface using Dylusions paints and a baby wipe, blending them where they met, and dried this layer with a heat gun. I then added some purple paint around the edges, just using my finger. I stencilled three flowers onto the surface using white paint, and dried this thoroughly. I then coloured the flowers using pencils. I added some buttons to the cenntres of the flowers.

Using some Olive Wow embossing powder, I stamped and embossed a sentiment onto the background. I used the same embossing powder to emboss the moth onto some scrap card. I then coloured this image with Distress Inks, before cutting it out and gluing it to the background.


Why not pop over to the challenge blog and see the other Design Team inspiration, and read all about the new challenge? If you enter, you stand a chance of winning a £15 prize.

Thanks for stopping by, xx


Wednesday, 6 August 2014

Challenge Blog Freebie

Hi Folks, it's time for another post over on the Chocolate Baroque Challenge Blog and this time it's a post with a difference, as we have a free digital download for you! Lesley has created a beautiful download that you can collect, simply by visiting the blog, so please pop over to take a look.

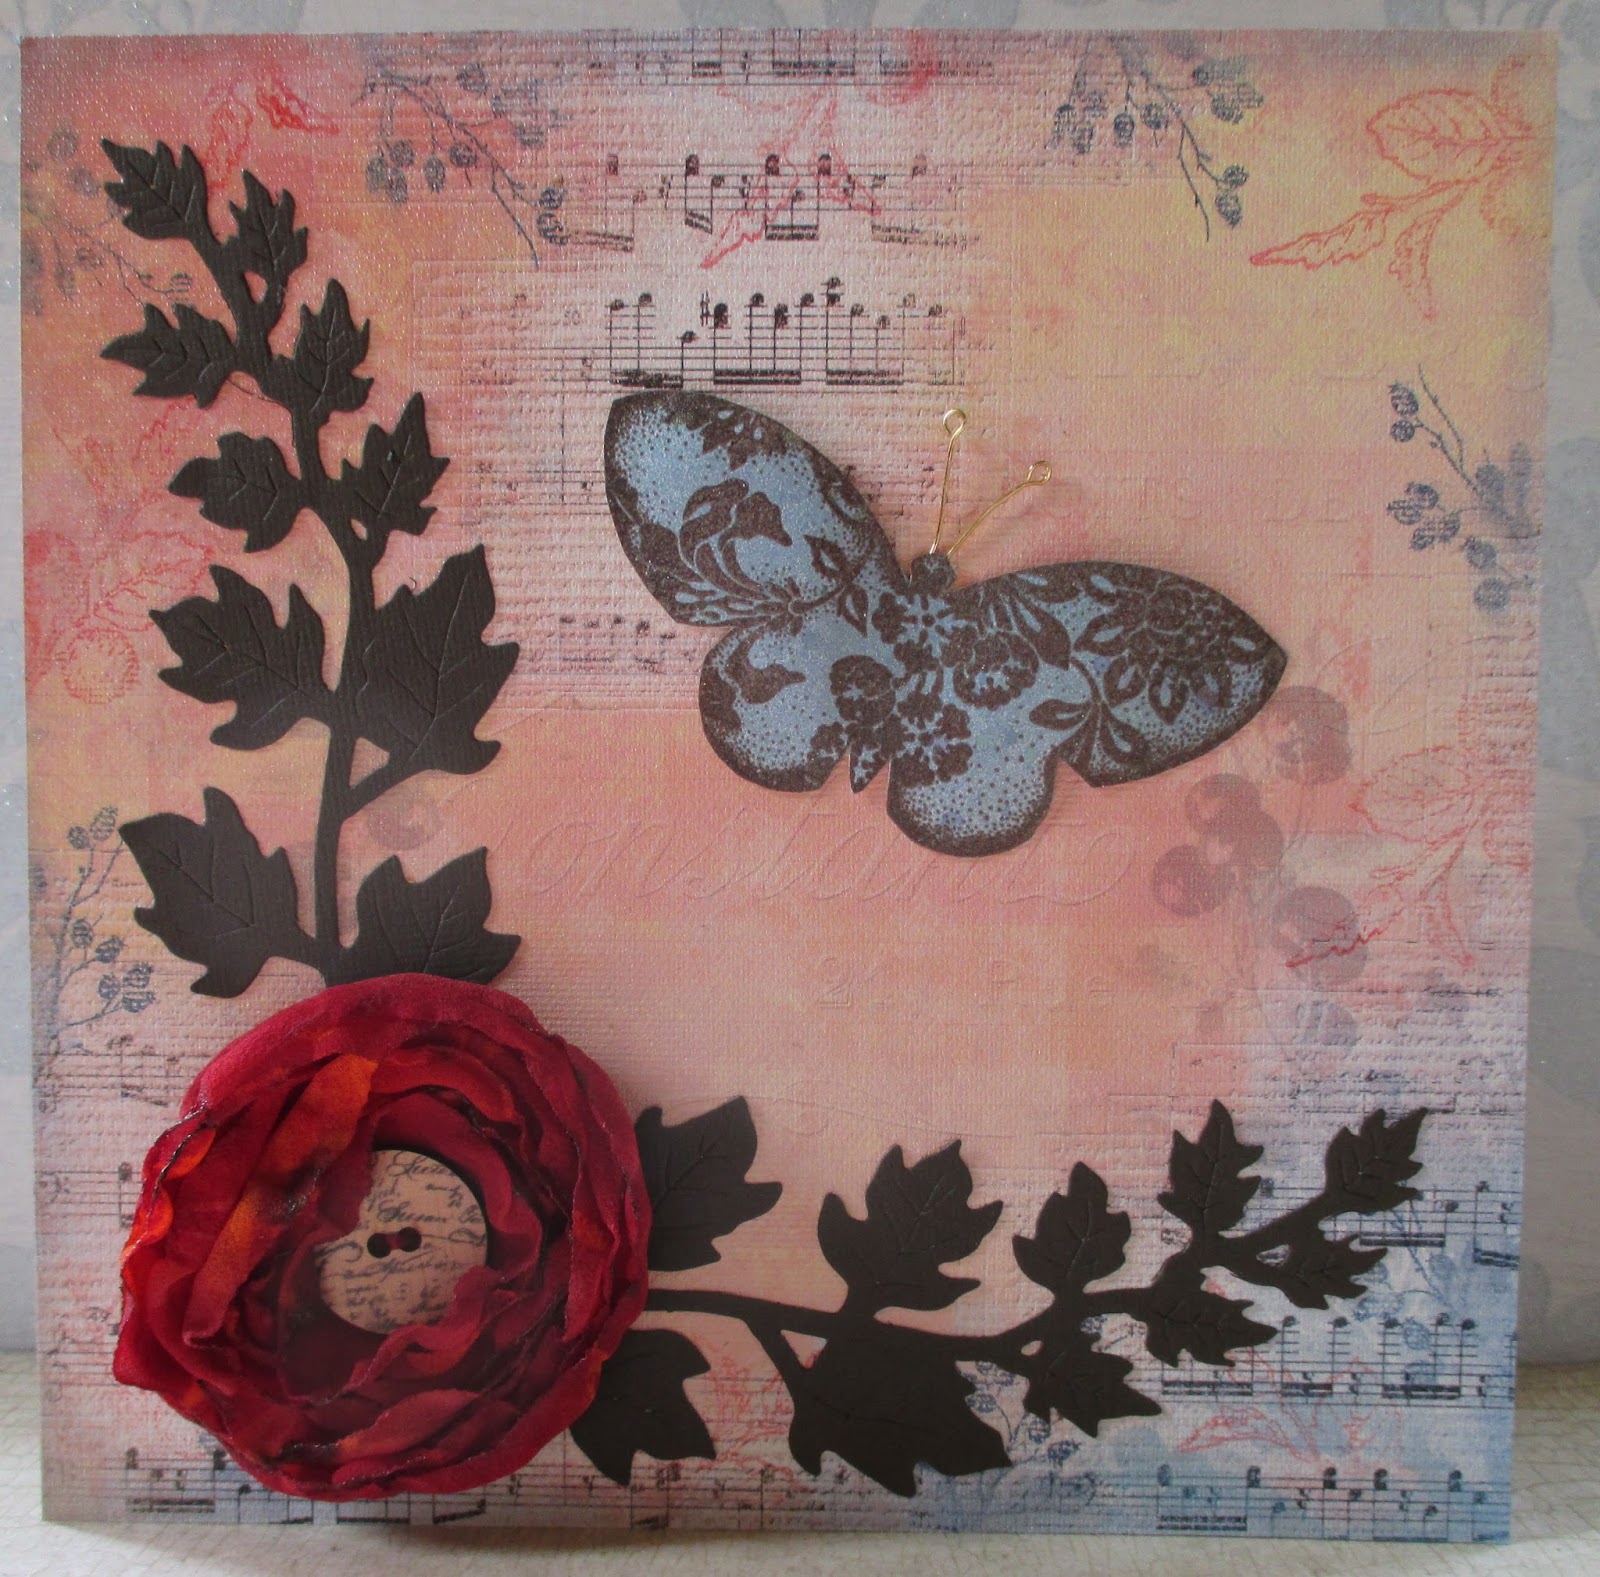
I have created a card using the download for a very special friend, who is celebrating her Birthday today. I printed the download onto canvas, and stamped around the edges, using stamps from the Autumn Fairies stamp set from Chocolate Baroque. I added a chiffon flower that I had lurking in my stash; I have lots of these cut out ready to add to projects whenever I need them. I found a piece of sprayed background paper left over from another project, and stamped a butterfly onto this, using Coffee Archival Ink, and embossed it with clear embossing powder. I added a couple of earring findings for antennae. Finally, I die cut some leaves to place behind the flower.


There is still plenty of time to enter the challenge, so take a look at all of the information while you are there. You can find the link here

Thanks for stopping by, xx


Related Posts Plugin for WordPress, Blogger...