Followers

Showing posts with label Artistic Expressions. Show all posts

Monday, 19 February 2024

It's been a while...

Hello everyone, I hope that you are keeping well. Goodness it's been a long time since I last posted. Life has been busy, and before you know it the weeks and months have rolled past. My Husband and I have both celebrated a significant birthday since I posted last, and we are starting to feel a few creaks in our bones! However, I am determined to keep fit and healthy for my granddaughter, who seems to think that I should be able to keep up with her as she runs around and expects me to join in with all of her crazy games. 

I have been keeping busy with my knitting and crochet, and managed to finish a couple of knitted jumpers for myself, as well as continuing to crochet lots of blankets and other projects, including toys and gifts for Ruby, my granddaughter. 

I have several projects to share with you today from our recent TV shows on Create and Craft, along with several older projects, which some of our more recent viewers may not have seen before.

My first project was created using the February Fairy stamp set, and several of the images from the Wild Meadow stamp set. This is such a useful stamp set for creating fields of flowers. I have used several different colours of Versafine Clair, and first and second generation stamping to create depth in the foliage. I have coloured the images with pencils, and added a tiny bit of glitter glue to the fairy dust.


Sticking with the Wild Meadow stamp set, I decided to create a journal page for my next project. This idea could easily be turned into a card. I took a small piece of polyester, and inked it up with some Distress Ink. I used Fossilized Amber first, and spritzed it with water, then randomly placed it over the journal page. I dried the page, then repeated the process with Salty Ocean Distress Ink. Using Nocturne Versafine Clair Ink, I stamped images from Wild Meadow onto the page to create a scene, and then added a sentiment from Artistic Expressions.

I created an optional panel using a stamp from the Eastern Grasses stamp set. This could be placed here on this page, or on the facing page, which could have the same background colour, and some journaling to complete your double page spread.

I created a super quick card using an oval mask and two different colours of Distress Ink for a background. I then stamped the silhouette fairy from this month's stamp set, a thistle from Wild Meadow and a sentiment from Birthday Words, all using Versafine Clair black ink. You may have seen the gift card set that I shared on the TV shows with lots of the fairy images throughout the year. They were all made the same way as this card.

I made a couple of little 4" x 4" cards using Eastern Grasses and some of the little worker stamps from Tranquility and Serenity. These stamps work so well together. I used an acrylic block to add colour very quickly to the background. I simply coloured the block with Distress Ink, spritzed it with water, and pressed it onto a piece of Drawing Cartridge. Once the Drawing Cartridge was dry, I stamped the images, and coloured them with pencils.

Coming full circle back to Wild Meadow, I made a pretty bookmark using some of the beautiful patterned papers that Lesley designed especially for February. I added some extra colour with Distress Inks, and used coloured Versafine inks once more. I added some script in the background from Words of Gratitude. The little bird from Serenity looks right at home amogst the foliage.

I have a couple of older cards to share, a card using Butterfly Dress and Floral Edges. I have cut out some of the butterflies from the dress to create a flurry of extra butterflies.

The following card was created using the lovely Birdcage Collage stamp:


Well, thanks so much for stopping by, I hope not to leave it so long befoe I post next time. Take care, xx


Saturday, 22 April 2017

Colourful Journal Pages

Hello everyone,  I needed to create an extra project for the Design Team Blog this month, and decided to have a bit of fun. Lesley, during the TV shows that introduced the new Russian themed stamps, had suggested giving the lovely Katya image some hair, and that was what kick-started this whole journal spread off in the first place. I chose to use the really versatile A5 Pink Pig journal containing 270 gsm watercolour paper, as this size of journal allows for a lot of choice in the layout that you can create, without feeling that you have too much space to fill. The watercolour paper is lovely and smooth and will take lots of water.

I started my project by masking the headdress on the Katya stamp, and inking up just the bottom part of the image, using Versafine Sepia Ink, before stamping it onto the journal page. I drew some hair freehand, using a pencil at first, until I was happy with the design, and then inking over it with a permanent brown pen.
I needed to mask the image, and as the masking tissue available on the website is not completely opaque, I was able to lay it over my image, and draw an outline to create my own custom mask.

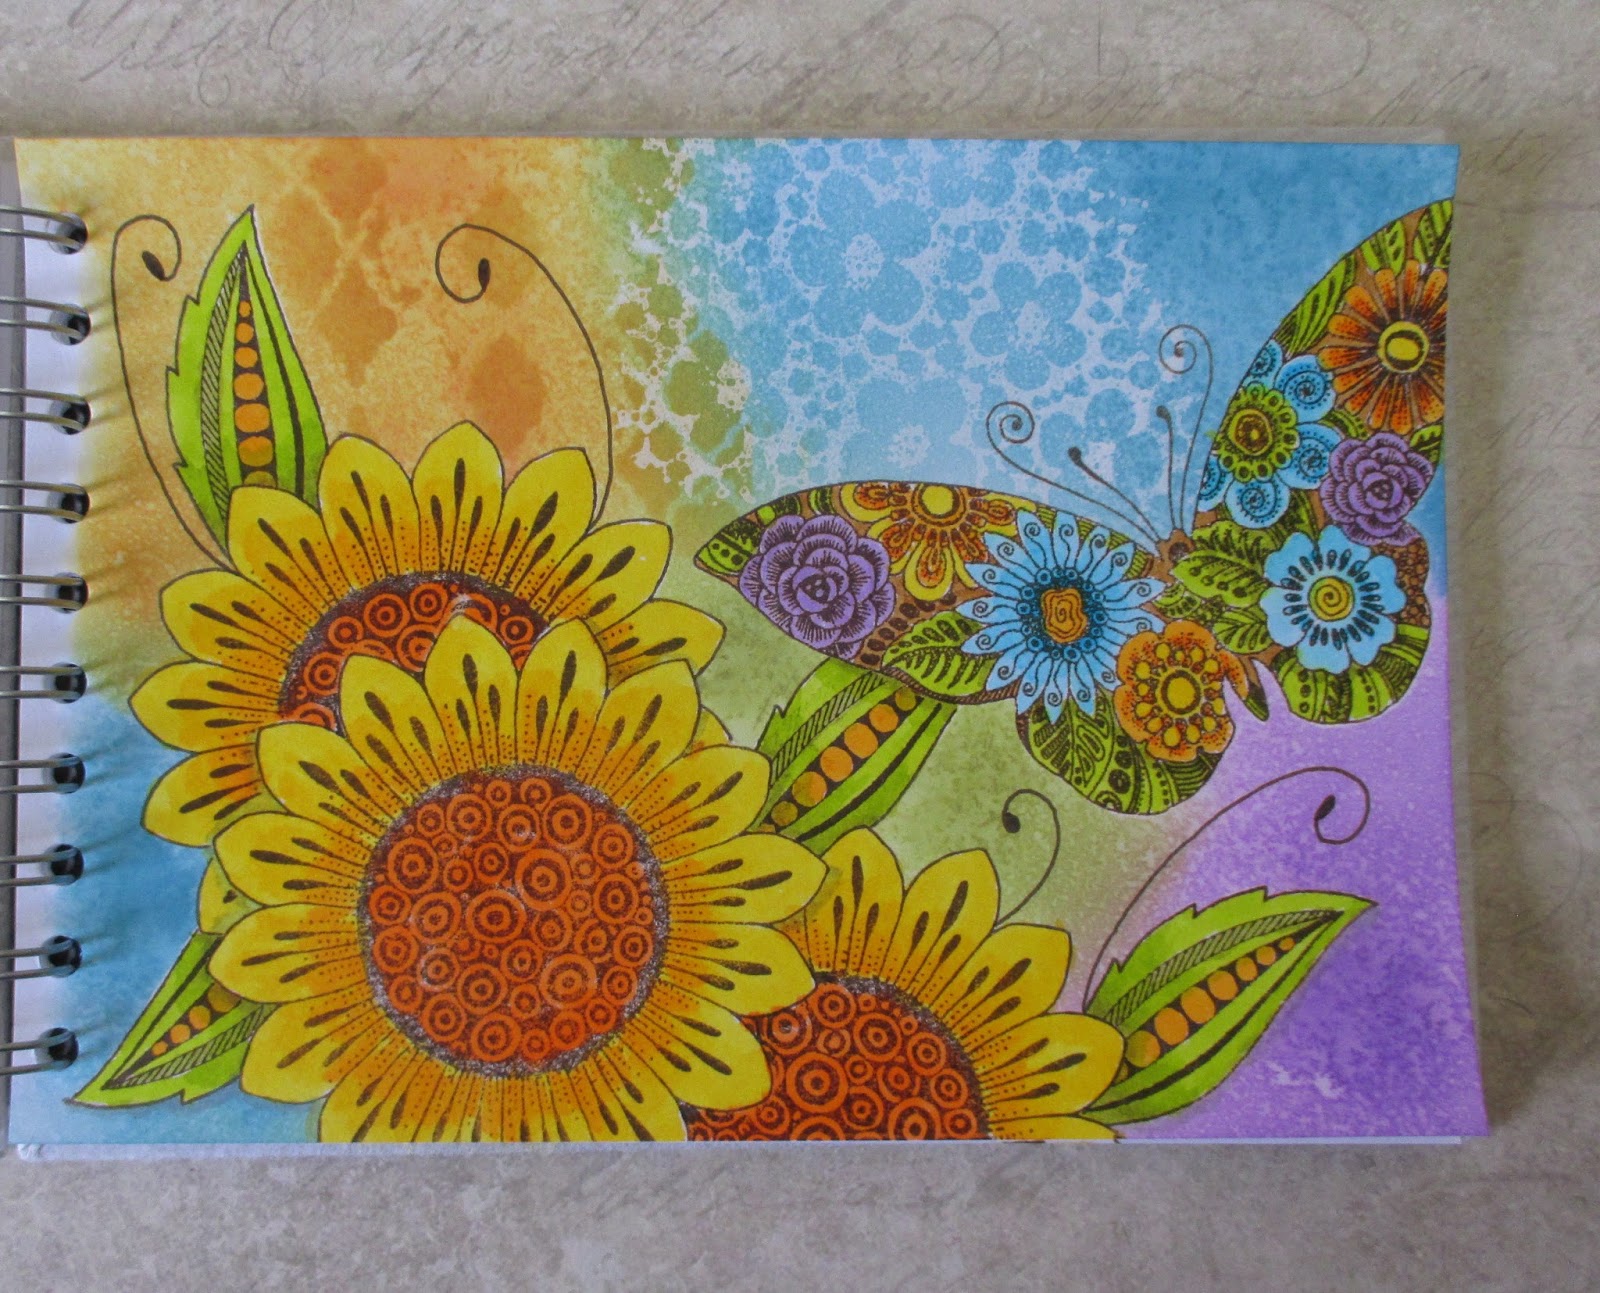
I added several other images to the pages; the Swirl Centre Flowerhead, and some leaves and a butterfly from the Tangled Garden stamp set. I masked all of these images as I went along, so that I could create a layered look to the pages. I wanted a subtle floral image in the background and added a favourite texture stamp from the Texture Fragments stamp set, using Acrylic Wax to stamp the image. I simply put a small amount onto a craft mat, applied it to the stamp with a piece of sponge, and stamped the image onto the background. I heat set the image before moving on to the next stage. I added Distress Ink to colour the background, and the acrylic wax acted as a resist where I had stamped the floral texture image.

I drew a few swirls by hand, using a permanent brown pen as before, and added a sentiment from the Artistic Expressions stamp set. A little bit of stencilling completed the background.

I coloured the images using Zig Clean Colour markers, keeping the colours bright and cheery to match the vibrant background. I decided to give Katya a modern twist with ombre hair, rather than a conventional colour. I added extra shading to her hair with some Stabilo Fineliners in co-ordinating colours.


I hope that you have enjoyed reading about my project, thanks for stopping by, xx


Wednesday, 8 June 2016

Mixed Media Tag

Hello everyone, I have a project to share with you today. I have created a mixed media tag for the Chocolate Baroque Challenge Blog, as part of a short bio about myself. You can read the blog post here.


I have used a Tando long tag, painted with gesso, I added some texture paste through a Dutch Doobadoo Swirls stencil, and allowed it to dry. I spritzed the tag with Decoart media sprays, and then added a bit of water to dilute them slightly. I added some gilding wax to the raised area and around the edge. I then stamped a word from the Artistic Expressions stamp set, using Jet Black Archival ink. I stamped two butterflies from The Rose Tree stamp set onto a piece of scrap card, and painted them using some of the spray and a water brush. I cut the butterflies out, and glued them to the tag, adding black flower stamens for antennae.

 Thanks for stopping by, xx


Saturday, 12 December 2015

Beautiful Background stamps

Hello everyone, I hope that you have been able to catch the TV shows featuring the Beautiful Backgrounds cling mounted stamps on the Craft Channel recently. The samples created by my Team Mates, and demos by Lesley were just amazing. I have a couple of projects to show you myself that were featured on the shows, and I hope that they will give you a little bit of inspiration in using these fabulous stamps.

My first project features the Floral Weave cling mounted stamp, and I have created an underwater scene, using stamps from the Seashore and Seadragon stamp sets.

I created a watery background on a piece of watercolour paper, by painting some Ecoline ink onto the background, and dropping sea salt onto the paper while it was still wet. I left the background to dry before removing the salt. This technique creates patterns that are reminiscent of bubbles in water, and it is such a fun technique, as the results are different every time. I stamped and embossed the background image using a lovely teal embossing powder, it works really well as a seaweed image on this card. I stamped and coloured the seahorse on a separate piece of card, using Faber Castell Aquarelle pencils, before cutting it out and adhering it to the background. I stamped the sentiment, and matted the background onto teal card. I added some little pearls to the flower centres to complete the card.


My second project is a canvas, combining a couple of the background stamps, Baroque Orchids, and Studded Lattice. I have added some flowers created using stamps from the Elegant Iris stamp set, and some die cut leaves.

I started my project by painting the canvas with acrylic paint, blending the colours with a baby wipe, using a mix of purple, orange and yellow. I dried the layers each time, and just kept going until I was happy with the overall look. I then stamped the Studded Lattice image randomly over the canvas using white paint. I did not use an acrylic block for this, as I just wanted to stamp part of the image each time, and I wanted a more random finish.

I covered the Baroque Orchid stamp with Gold Soft Form Relief Paste, and left it to dry overnight. Once the paste was dry, and had become a film, I painted it with a thin layer of white paint. I gently removed some of the excess paint, revealing some of the gold underneath, which gives a kind of faded elegance to the piece. I allowed the paint to dry and then gently peeled the stamp away from the film. For durability, I added a piece of thin card behind the film before attaching it to the canvas.


I stamped the flower image from the Elegant Iris stamp set three times onto a piece of spare card, and coloured the images with pens. I found that the flowers were a bit bright, and so I gave them a wash of thinned down white acrylic paint to soften them a bit. I added some die cut leaves, which I edged with Soft Form Relief Paste, and I also edged the canvas with some of the Relief Paste as well. Finally, I added a sentiment from the Artistic Expressions stamp set.

Thanks for stopping by, xx


Friday, 11 July 2014

Diverse Textures from Chocolate Baroque

Hi Folks, I have some cards to show you today using the Harlequin Fragments/Tangled Fragments multibuy from Chocolate Baroque . I wanted to show how versatile these stamps can be and have created three very different looking cards, using these great new stamps.

My first card was created using the watery background stamp, which I stamped onto a strip of white card, using black ink several times. I then created three pieces of decorated stampbord, using three layers of embossing powder and stamping into them while the last layer was still molten. I brushed a little bit of gold Perfect Pearl powder into the crevices to pick up the detail of the stamp. By stamping my background first, I could work out roughly where on the rubber stamp I needed to press to create the UTEE pieces to achieve a pattern running down the card.

I matted the background onto a piece of toning card, and stuck this onto a larger piece of black card. I added a sentiment taken from the Artistic Affirmations stamp set.

My second card was created using a piece of smooth watercolour paper, which I sprayed with diluted Weathered Wood Distress Ink. I then stamped the dotty stamp, and the stone effect stamp using the same colour over the background. I embossed the single stone spine in the centre using platinum embossing powder. I added some ferns around the edges, taken from the Wild Meadow stamp set using Pear Tart and Sweet Plum Memento Inks.

I stamped and embossed a flower from the Tangled Garden stamp set, plus the leaf fragment using platinum embossing powder, which I then painted with Splash inks. I decoupaged the flower, added the larger leaves to the stem, and used the smaller leaves for a grass effect. Finally, I added a sentiment from the Amazing Birthday clear stamp set to the background.


My third card was created again using watercolour paper for my background. I sprayed the paper with turquoise Dylusions spray, rolling off some of the intense colour for a paler effect. I added a touch of Perfect Pearls turquoise spray at this point. I stamped the large bubbles stamp, and the dotty harlequin stamp with forget-me-not archival ink over the background, and then added some Vintage Photo Distress Ink to the edges to age the colour slightly.

I embossed the butterfly from the Steampunk Buterfly stamp set and some flowers from the Punky Flowers stamp set, using copper embossing powder. I coloured them with splash inks. I added a stamped swirl from the Artistic Expressions stamp plate to resemble leafy tendrils behind the flowers. The sentiment was taken from the Amazing Birthday clear stamp set.


If you love our DT blog then keep your eyes open for something new and colourful coming next week. All will be revealed soon, keep visiting the DT blog to make sure you don’t miss it. Getting excited yet?

Thanks for stopping by, Judith xx


Monday, 30 June 2014

Building Backgrounds

Hi Folks, I have a couple of samples to show you today, using the Harlequin Fragments/Tangled Fragments multibuy stamp set from Chocolate Baroque

I love to make my own backgrounds, and these large stamps are perfect for mixing and matching over sprayed or inked surfaces, or even patterned papers, to create layered backgrounds. For my first card, I have chosen a soft colour scheme, using a printed Julie Nutting tag, and embossed the dotty harlequin stamp using white embossing powder. I have used the large dotty stamp on the main background, stamping my image onto scrap paper first, then onto the card to get a fainter image. This is known as second generation stamping. I stamped three butterflies from the Briar Rose Butterfly stamp set onto beige vellum, using white embossing powder.

The poppy image is from the Flora and Fauna stamp set, which I stamped onto white card and coloured it using Polychromos pencils before cutting it out. Lastly, the sentiment comes from the Mackintosh Sentiments clear stamp set, and I have again embossed this with white embossing powder. I sanded the edges of all of my pieces of card to give a shabby feel to them, before assembling my project and added some cream lace.

I cut my card to 7" x 7" size so that I could use the tag without the top edges showing, I quite like this size, and may make more if I can find a ready source of envelopes. A bit of searching on the Internet, methinks.


My second project was made using a tag that I coloured with leftover inks from my project here as I did not want to waste the remaining ink. I coloured two further tags, and this was one of them. I am trying to create a stash of available backgrounds for future projects, saving me time when I am starting to make a card or tag. I do try to rummage through what I have already made to see if I have something I can use when I am making something. Like me, I'm sure a lot of you have a scrap box full of bits and pieces left over from previous projects.


I stamped the large background stamp using cobalt archival ink, and added white highlights with a signo uniball pen. I used a stamp from the Artistic Expressions stamp set on the background using forget-me-not archival ink, which I also used to edge the tag.

I stamped a peacock feather from the Tangled Peacock stamp set onto pale green vellum three times using navy ink and clear embossing powder. I coloured the reverse of the images with copic markers before cutting them out. A piece of emerald ribbon finishes the tag.


Keep popping over to the Design Team Blog to see what my team mates have made, they have some super samples coming up in July using these stamps. Thanks for stopping by, xx


Saturday, 4 May 2013

Under the Sea

Hi Folks, I have a project showcasing the new Punky Flowers stamp plate from Chocolate Baroque

The stamp plate is a mixture of lovely flowers with coils and cogs, big floral designs, and some Art Deco style flowers thrown in as well. It's a great stamp plate.

I created a background using Dylusions sprays and water, taking some of the colour away with kitchen paper, and layering the colour until I was happy with the effect. I added a texture stamp to add to the watery feel of the background. I stamped the flowers and a seaweed stamp along the bottom of the paper, and bleached the flowers so that I could colour them with pencils. I added a decoupaged mermaid, also coloured with pencils. I have used Inktense pencils for this projects, and they give a lovely vibrant feel to the piece. I added a word from the Artistic Expressions stamp set, it's a great set to use when you want to add a large focal word to a project, and I love the different fonts in the set. I added some silver embossing powder, and blue glitter glass to a couple of the corners, and my card was finished.


I'll be back in a few days with another project to show you, but keep popping over to the Design Team Blog where my Team mates will be posting lots of inspiration for you as well. Thanks for stopping by, xx


Thursday, 24 January 2013

Dancing Poppies


Here's a card I made recently for the Chocolate Baroque Design Team Blog using one of the new clear heart stamps. This one is Poppy Baroque Heart.

I stamped a row of poppies across my background card, using a stamp from the 'Pretty Poppies' stamp set. I used Eclipse masking tape to enable me to make the row of poppies look three dimensional. I then coloured the background with Pan Pastels to create a mottled sky effect.

I used Distress Markers to colour the poppy images. The sentiment comes from the 'Artistic Expressions' stamp set. I stamped the heart onto a spare piece of card, coloured the image with Distress Markers as before, then covered the whole piece with Ultra Thick Embossing Powder.


Poppies are my favourite flower, as many of you know. It was a real pleasure to work with these stamps, and I think I shall be using these a lot more!

Thanks for stopping by, xx


Tuesday, 4 December 2012

Steampunk in Flight


There is a new set of stamps out over at Chocolate Baroque which means that luckily, I have been playing again. Well, working very hard, to produce some samples for the Design Team, I should say. Several of them will be showing over on the Design Team Blog over the next week or so, but I have one to show you today that is just for here.

I created a background using Distress Stains, including one of the metallics, in a soft palette, and then stamped the cog fragment, and the arch fragment over the background, using the toning Distress Inks. I then used a Gold paint dabber, and added some embossing powder, mica flakes and glass glitter in two of the corners.

I stamped some of the roses onto gold metal, and cut them out, puffing them up using a large paper stump. I then stamped some of the tattered wings onto card coloured with Distress Inks, and cut these out. I fixed them together using hinges, and added some coiled wire behind for antennae. Once I stuck the 'butterflies' to the card, I added a trail of tiny clock cogs and more glitter glass behind each one, and stuck little cogs to their antennae.


I coloured some seam binding with Distress Stains to match the overall colour scheme.


It was my Wedding Anniversary last week, and I made a slightly more masculine version for my OH, in a different colour scheme, using a computer-generated text. The font was a free one called 'Steampunk'


I'll be back tomorrow with one of my DT cards, as I'm giving in depth explanations over here each time, rather than bogging down the DT blog. I hope you'll pop back, as I've loved working with these stamps, and I've got lots to show you! Thanks for stopping by, xx


Monday, 27 February 2012

Breath of Spring

Hi folks, I've posted a project over on the Chocolate Baroque Design Team blog today, using the new Artistic Expressions stamps. This set is a personal favourite of mine. It is just so useful.

I had this project in mind as soon as I saw the stamps, but saved it as my last project to make. I started out with a piece of Kraft card, and covered it with book pages from an old French book, using Mod Podge matt. I didn't glue an oval area in the middle though. When the glue was dry, I tore the area that wasn't stuck down away, leaving rough edges. I then coloured the pages with Antique Linen Distress Ink, and Lulu Lavender, and Sweet Plum Memento inkpads.

I used a Crafter's Workshop template, and dry brushed some cream acrylic paint through the holes, and then dry brushed some more paint around the edges of the whole piece. I stamped and embossed the word and large swirl, using Plum Archival ink and clear embossing powder.

I stamped the flower from the 'Breath of Spring' stamp plate into the centre of the piece, and coloured it with Polychromos pencils. I then used Scattered Straw Distress Ink, to colour the edges of the area of Kraft card left showing. I stamped two bees onto white card, coloured them in, and stuck them to Clearly for Art, after cutting them out. This meant that I could mould them into the shape that I wanted.


I hope that you have been popping over to the Design Team blog this week to see what my team mates have been up to, as they have made some stunning projects. Thanks for stopping by, xx

Tuesday, 21 February 2012

Travel Journal Card


Hi folks, I've posted a project over on the Chocolate Baroque Design Team blog today using the new Artistic Expressions stamp plate recently released by Glenda at Chocolate Baroque and some Crafty Individuals stamps that are available on the website too.

The details of how I made the project are on the Design Team blog if you are interested. However, some of the key features I used are as follows:
I used Versamark through a stencil, and then added clear embossing powder, to make an interesting background.
I also used the crackle stamp from the 'Echoes of Italy' stamp plate to cover some black card to make a little old book.
I coloured a sliver book plate with alcohol inks, to make it a different colour.
I used a computer generated title for the book.
I masked off portions of a stamp before inking to only use the sections that I wanted.

My Design Team mates have been producing some great samples too, so keep checking back to the Design Team blog to see what they have been up to. Thanks for stopping by, xx


Saturday, 18 February 2012

New stamps at Chocolate Baroque

Glenda has released a new set of stamps over at Chocolate Baroque called Artistic Expressions. This set is such a great set of stamps, all that you could wish for in a single stamp set, big words, swirls, and a heart with wings!
Even better news, she has a giveaway over on the Design Team blog until Tuesday, so pop over there and leave a comment to be in with a chance to win a set of stamps. Whoever gets this stamp plate will be very happy!

I posted a card over there today, and have several posting over the next week and a half, some of which I'll be showing you over here too. If I had 48 hours in the day, I'd still be making cards and projects with these great stamps, but I'm onto the next lot now! Here's a quick look at my card, but the details are all on the Design Team blog:


On another note, I'm getting my tooth out next Saturday, so I won't have to wait too long.

Thanks for stopping by, xx


Related Posts Plugin for WordPress, Blogger...