Followers

Showing posts with label Tangled Garden. Show all posts

Saturday, 16 June 2018

A Speedy Butterfly!

Hello everyone, it is time for the monthly epic Fifteen Minute blog post over on the Chocolate Baroque Design Team Blog. I am sharing my contribution to this month's post, as well as writing the post, of course!

I have made a butterfly themed card, using some of the feather stamps featured on last month's TV shows on Hochanda, and this idea just popped into my head as a suitable idea for a quick card.

I have created a background using a piece of drawing cartridge, adding lots of water, and brushing Dr P H Martins watercolour inks over the top. These inks come in a range of glorious colours, and I chose two of my favourites for this project. I sprinkled sea salt over the ink while it was wet and dried the background with a heat gun. (If I was not up against a fifteen minute deadline, I would have left the background to dry naturally). Once the background was dry, I brushed the salt away, and I stamped a leaf from the Tangled Garden stamp set, which I then masked, before stamping a large and a small feather twice. I drew some antennae using a fine liner pen, and added a touch of colour to the butterfly that I had created using Seedless Preserves Distress Ink. I blended the same colour of Distress Ink around the edge of the background. I added the main sentiment from the I Shall be Your Wings stamp set. A tiny bit of stickles glue was brushed over the wings to finish.

Do pop over to the Design Team blog to check out the projects made by my team mates, they have made some fabulous inspiration in under fifteen minutes.

Thanks for stopping by, xx

Sunday, 31 December 2017

New Year Wish

Hello everyone, I hope that you all had a lovely Christmas and are enjoying a bit of quiet time over the festive break. This year seems to have gone so fast, and has brought many changes, I even made my first tentative steps onto live TV! Whatever you have done and are looking forward to in the months ahead, I would like to wish you all a very Happy New Year, and a healthy, creative 2018.

I have some cards to share with you today using stamps featured in last month's TV shows on Hochanda. I made a background using Brushos, spritzed with water. I wanted to create a Wintery sky, and so I chose Turquoise, Lilac and Grey for the background. I stamped a large butterfly from the Tangled Garden stamp set using Stazon Jet Black Ink onto a piece of sparkly acetate, and stuck this to a piece of coloured background that I had in my scrap box. By chance, this was a very similar colour to my Brusho background. I fussy cut the butterfly out, omitting the antennae.

I stamped and embossed the sentiment from the Words of Inspiration stamp set, and an image from the Seasonal Fragments stamp set onto the background using Versamark and silver embossing powder. I added a few sparkly gems randomly throughout the fragment images. Just before I stuck the butterfly to the background, I stamped the antennae onto the background, using black ink.

Here are a couple more of my show projects, a pretty gelli plate card using another image from the Tangled garden stamp set:


A necklace and tag using images from the Bold Blooms and Words of Inspiration stamp sets. I have used shrink plastic to create the necklace:

Finally, a card made using Soft Form Relief Paste to create the focal point, adding gilding wax over the top, to pick out the fabulous detail of the stamp:


Thanks for stopping by,

Saturday, 22 April 2017

Colourful Journal Pages

Hello everyone,  I needed to create an extra project for the Design Team Blog this month, and decided to have a bit of fun. Lesley, during the TV shows that introduced the new Russian themed stamps, had suggested giving the lovely Katya image some hair, and that was what kick-started this whole journal spread off in the first place. I chose to use the really versatile A5 Pink Pig journal containing 270 gsm watercolour paper, as this size of journal allows for a lot of choice in the layout that you can create, without feeling that you have too much space to fill. The watercolour paper is lovely and smooth and will take lots of water.

I started my project by masking the headdress on the Katya stamp, and inking up just the bottom part of the image, using Versafine Sepia Ink, before stamping it onto the journal page. I drew some hair freehand, using a pencil at first, until I was happy with the design, and then inking over it with a permanent brown pen.
I needed to mask the image, and as the masking tissue available on the website is not completely opaque, I was able to lay it over my image, and draw an outline to create my own custom mask.

I added several other images to the pages; the Swirl Centre Flowerhead, and some leaves and a butterfly from the Tangled Garden stamp set. I masked all of these images as I went along, so that I could create a layered look to the pages. I wanted a subtle floral image in the background and added a favourite texture stamp from the Texture Fragments stamp set, using Acrylic Wax to stamp the image. I simply put a small amount onto a craft mat, applied it to the stamp with a piece of sponge, and stamped the image onto the background. I heat set the image before moving on to the next stage. I added Distress Ink to colour the background, and the acrylic wax acted as a resist where I had stamped the floral texture image.

I drew a few swirls by hand, using a permanent brown pen as before, and added a sentiment from the Artistic Expressions stamp set. A little bit of stencilling completed the background.

I coloured the images using Zig Clean Colour markers, keeping the colours bright and cheery to match the vibrant background. I decided to give Katya a modern twist with ombre hair, rather than a conventional colour. I added extra shading to her hair with some Stabilo Fineliners in co-ordinating colours.


I hope that you have enjoyed reading about my project, thanks for stopping by, xx


Friday, 17 June 2016

Dots 'n Stripes 'n Swirls!


Hello everyone, I have a colourful project for you today, using two of this month's Baroque Ornament stamps from Chocolate Baroque.

I created a background spritzing magenta and yellow Decoart Media sprays onto a damp piece of watercolour paper, and added some more water to blend them. I blotted the paper with a spare piece of card, to help smooth out the colour, and also to create another piece of coloured card for my project. I edged the background with Picked Raspberry Distress Ink, and added some stencilling using a Colourbox Swirldot stencil with Mermaid Lagoon Distress Ink.

I spritzed some turquoise, pink and yellow spray onto a craft mat, and picking the spray up with some water, created a wash of each colour onto some more watercolour paper. I dried each piece of paper thoroughly with a heat gun. I stamped several of the Dots 'n Stripes Baroque Ornament, the Tangled Baroque Ornament, plus the centre of one of the flowers from the Tangled Garden stamp set, and the clear Tangled Butterfly stamp onto the coloured backgrounds using Versafine Onyx Black ink and clear embossing powder. I cut all of the shapes out, and layered them up onto the background. I added a small amount of colour to the butterfly using Distress markers.

I drew some stems for the flowers using a fine-tipped pen and added Mowed Lawn Distress Marker with a water brush, before adding some doodles to complement the flower designs.

I hope that you like my funky project, and bright colours, and that it might inspire you to get creative with these super stamps. Thanks for stopping by, xx

Wednesday, 30 March 2016

Teal and Purple


Hello everyone, I have lots to share with you today, and am wearing both my Design Team hat and my Challenge Blog hat. Wednesdays can sometimes be a busy day at Chocolate Baroque!

Firstly, I have a collaberative project to share with you, created by myself and Lesley. We live a long way apart from each other, and rarely get the chance to craft together. We thought that we would make a joint project with the aid of Royal Mail on this occasion. So, Lesley sent me a selection of scrumptious backgrounds that she had created, and I made a card with a couple of them. It has been a pleasure working with the jewel tones that Lesley chooses, they are brighter than my go to colours, but a lot of fun.

I chose a pretty purple/teal background from Lesley's selection as my inspiration; these are my favourite colours. I chose a floral stencil, and added some gesso to the background through the stencil first of all, before lightly dabbing some blue and teal Dylusions paint over the top. It is no secret that Lesley loves blue flowers, so I had to add some into my design!

I stamped the Swirl Centre Flowerhead stamp onto another piece of Lesley's background, and also a leafy stamp from the Sketchy Doodle Flower stamp set. I added some watered down teal paint to these images, to tone them in with the background. I cut the images out and stuck them to the background. I added a sentiment from the Birthday Words stamp set. Finally, I matted the background onto some teal card.

I had a lot of fun making this project 'with' Lesley, and hope that it is not too long before we get a chance to craft together face to face.

Now onto the Challenge Blog! It is time for another weekly post over on the blog today, and I have written a tutorial for my card over on the blog. It is a simple CAS card in this month's challenge colours. I have used a stencil to create the background, and then stamped some butterflies across the card, before lightly colouring them with the same inks.


Please hop over to the blog to see the rest of this week's Design Team inspiration. Why not enter the challenge yourself, you could win a £15 prize.

Thanks for stopping by, xx

Monday, 2 November 2015

Zentangle Flower


Hello everyone, I have a project to share using one of the new individual cling mounted flowers currently on offer on the Chocolate Baroque website. There are six different designs and they are approximately 3.5 inches across, all mounted on cling mount, ready for you to start using straight away. These beautiful large flowers are perfect as centrepieces for your cards, and are sure to brighten anyone's day. I have chosen to use the Swirl Centre Flowerhead to create my card, as I love the overall design of this particular flower.

I created a wrinkle free distress background on a piece of watercolour card, using Salty Ocean Distress Ink, and then edged the background with Seedless Preserves Distress Ink. I stamped the flowerhead twice onto a spare piece of watercolour card, using Memento Tuxedo Black Ink. I also stamped a large leaf from the Tangled Garden stamp set twice onto the watercolour card. I coloured the images with Copic markers and added shading with pencils.

I cut the images out, and stuck them to the card, creating two layers on the flower. Once the flower was in place, I added some Glossy Accents to the centre of the flower and left it to dry. I drew some zentangle details on the background using a fine black permanent pen. I added a sentiment from the Amazing Birthday clear stamp set, and matted the background onto some black card to finish.

 This particular flowerhead lends itself to Zentangle so well with the centre swirls, and the petal designs. Fescu is the tall design that I have used with a scroll added for variation, and you could also try incorporating Printemps as a beautiful background idea. Please click on my links to take you to the Tanglepatterns.com website for instructions on how to draw the two Zentangle designs, and a whole host of other ideas.

Thanks for stopping by, xx

Wednesday, 11 March 2015

Big Bold Butterfly

Hello everyone, it's the start of the final week of the current challenge over on the Chocolate Baroque Challenge Blog. There are some fab projects from some of the contestants which we are taking a look at this week, plus a free digital download from Lesley which you can use to create some beautiful cards and projects. The Design Team have made some cards using the download for your inspiration.

I decided to use some of my favourite stamps to create a card using the download. I chose a large flower from the Tangled Garden stamp set which I stamped twice using Archival Jet Black ink, and embossed with clear embossing powder. I also stamped several leaves from the same stamp set. I then stamped the body and one wing from the large butterfly belonging to the Patchwork Butterfly stamp set. I coloured all of the images with watercolour pencils and a waterbrush.

I layered the flower and the butterfly using 3D foam pads. I assembled the card, adding a deep plum matting and some die cut sprays in the same colour behind the leaves. I used some flower stamens for the butterfly antennae.


I hope that you will pop along to the challenge blog to take a look at the rest of the inspiration over there. Grab the freebie and make a project with it, it would be great to see what you come up with. If you use Chocolate Baroque stamps currently available on the website, and enter into the challenge, you could win a £15 prize to spend online at Chocolate Baroque.

Thanks for stopping by, xx


Friday, 11 July 2014

Diverse Textures from Chocolate Baroque

Hi Folks, I have some cards to show you today using the Harlequin Fragments/Tangled Fragments multibuy from Chocolate Baroque . I wanted to show how versatile these stamps can be and have created three very different looking cards, using these great new stamps.

My first card was created using the watery background stamp, which I stamped onto a strip of white card, using black ink several times. I then created three pieces of decorated stampbord, using three layers of embossing powder and stamping into them while the last layer was still molten. I brushed a little bit of gold Perfect Pearl powder into the crevices to pick up the detail of the stamp. By stamping my background first, I could work out roughly where on the rubber stamp I needed to press to create the UTEE pieces to achieve a pattern running down the card.

I matted the background onto a piece of toning card, and stuck this onto a larger piece of black card. I added a sentiment taken from the Artistic Affirmations stamp set.

My second card was created using a piece of smooth watercolour paper, which I sprayed with diluted Weathered Wood Distress Ink. I then stamped the dotty stamp, and the stone effect stamp using the same colour over the background. I embossed the single stone spine in the centre using platinum embossing powder. I added some ferns around the edges, taken from the Wild Meadow stamp set using Pear Tart and Sweet Plum Memento Inks.

I stamped and embossed a flower from the Tangled Garden stamp set, plus the leaf fragment using platinum embossing powder, which I then painted with Splash inks. I decoupaged the flower, added the larger leaves to the stem, and used the smaller leaves for a grass effect. Finally, I added a sentiment from the Amazing Birthday clear stamp set to the background.


My third card was created again using watercolour paper for my background. I sprayed the paper with turquoise Dylusions spray, rolling off some of the intense colour for a paler effect. I added a touch of Perfect Pearls turquoise spray at this point. I stamped the large bubbles stamp, and the dotty harlequin stamp with forget-me-not archival ink over the background, and then added some Vintage Photo Distress Ink to the edges to age the colour slightly.

I embossed the butterfly from the Steampunk Buterfly stamp set and some flowers from the Punky Flowers stamp set, using copper embossing powder. I coloured them with splash inks. I added a stamped swirl from the Artistic Expressions stamp plate to resemble leafy tendrils behind the flowers. The sentiment was taken from the Amazing Birthday clear stamp set.


If you love our DT blog then keep your eyes open for something new and colourful coming next week. All will be revealed soon, keep visiting the DT blog to make sure you don’t miss it. Getting excited yet?

Thanks for stopping by, Judith xx


Tuesday, 20 May 2014

Two colourful Tags

Hi Folks, I have a couple of tags to show you today, using the stamp of the month stamp sets from Chocolate Baroque

I wanted to create a peice of artwork reflecting the fashions of the twenties, when the dresses were often beautiful ombre shades, with fringing and feathers, with lots of decorative elements. I love the elegance of these dresses, and the way that the skirts swing from the hips. So my first tag tries to reflect these style features, using a background of Distress Inks, ranging from pale green to dark blue. I have spritzed the background with a shimmer spray to give the impression of a chiffon overlay.

I stamped a portion of the background with one of the slihouette flower stamps from the Nouveau Lovebirds stamp set, and added some fringing and a large feather. I used a tiny portion of one of the flapper ladies dresses from the Fabulous Flappers stamp set, which I coloured with pencils, and encapsulated it into a Nautical Frame with Dome charm. I have stuck the dome over the image using Glossy accents. These are great little embellishments, as they slightly magnify the image.

My next tag was made using Gelatos on the background. I had this tag lurking in my stash from a while ago, and decided to try and make something with it. I used a Crealie mask, and some stamping with gold embossing using a stamp from the Texture Fragments stamp set over the background. I stamped the flowers taken from both of the A5 stamp sets onto self-adhesive labels , and coloured them with Copic markers, adding some leaves from the Tangled Garden stamp set. Some funky crackle gems and ribbon complete the tag.

Thanks for stopping by, Judith xx


Thursday, 7 March 2013

Mosaic tile in white and blue


Hi Folks, I have a sample to show you using one of the the new big bold backgrounds recently released over at Chocolate Baroque This one is called Flora. I stamped the image using white embossing powder, and then covered the card with a blend of blue inks. I then trimmed the image slightly, before cutting it into one inch squares, and sticking it onto white card. I added a mat of dark blue card.

I stamped a flower from the Tangled Garden stamp set onto a piece of Prima Firefly paper a couple of times, using white embossing powder again. I used a die from Marianne to cut some large swirls, and added a lovely clay button that I had been hoarding in my stash. I based the colours of the project on the button, which is why it fits into the colour scheme so well.


This card may have to become a Mother's Day card, as my Dad ended up having one that I made earlier to give to my Mum. I'm sure that my Mum won't mind, and with the addition of a sentiment, this card will be winging its way in the post today. I'll be back in a few days with another sample to show you using another one of the big backgrounds. They are available as a multibuy, or as individual stamps:


Thanks for stopping by, xx


Wednesday, 14 November 2012

Leafy Zentangle Butterfly

There are some lovely leaves on the Tangled Garden stamp set, just released at Chocolate Baroque and I wanted to make a feature of a few of them in this design. I decided to create a rambling frame, by stamping and masking them around the outside of the background, which I had painted with Ecoline ink. I then linked the leaves with small areas of tangled designs. They are simple twirls and dots, not very complicated at all.

I coloured the leaves with pencils. I then stamped the Butterfly onto a spare piece of card and coloured it with pencils as before. I added some wire and some toning pearls for antennae. I stamped a sentiment taken from the 'Patchwork Butterfly' stamp set onto the background to complete the card.


I love using butterflies in my card making, and I think that this one will become a firm favourite. Thanks for stopping by, xx

Thursday, 8 November 2012

Monochrome Blossom

Here is another sample using the Tangled Garden set of stamps from Chocolate Baroque I've used the large open blossom, and filled the petals with various zentangle patterns, using a Micron pen. I stamped the image three times, to create a layered effect, and coloured the petals with watercolour pens and a blender pen. I've added white highlights.

I drew a freehand addition myself in the form of a swirly stem, and added an aura around the outside. I then coloured this with pens as before. By using the blender pen with watercolour pens, it gives a lovely variation of shade, especially in larger areas.

I used a piece of black card to mat my design, and then placed this onto a cream textured card. I added some flat-backed pearls to finish.


I'll be back soon with another sample, thanks for stopping by, xx
Saturday, 3 November 2012

Zentangle Butterfly

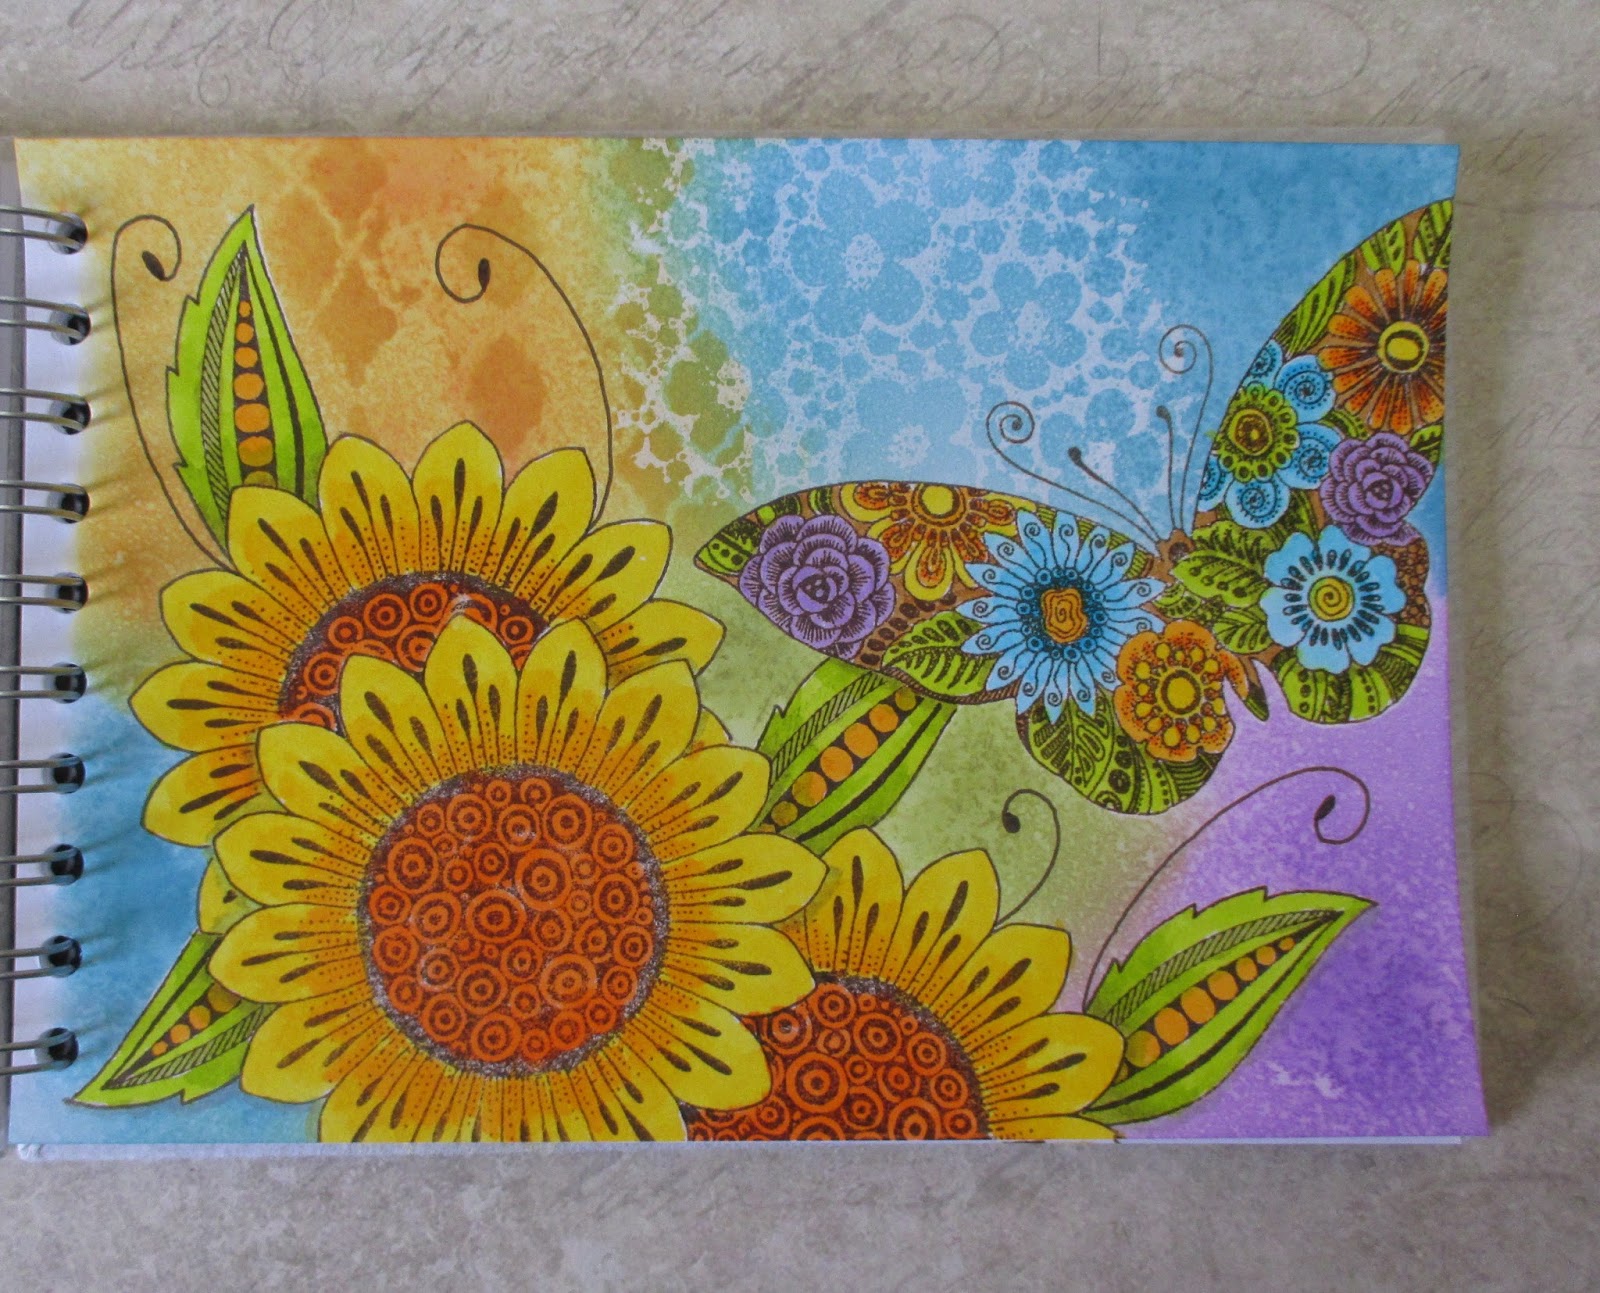
Here's a Design Team sample that is posting on the Chocolate Baroque Design Team Blog today. I have used a large butterfly stamp from the new stamp set 'Tangled Garden', that I mentioned in my previous post.

The full details of how I created the card can be seen on the design team blog page. Basically, I have created a wrinkle free Distress background after masking off the string, and edges of the background. I have then drawn the Zentangle patterns in the white areas, and coloured the designs with watercolour pens using a blender pen.I coloured the butterfly and flower the same way.


I find the process of tangling very relaxing, and have really enjoyed working with these stamps. I'll be back in a few days with another sample. Thanks for stopping by, xx


Friday, 2 November 2012

A piece of ZIA


There are some gorgeous new stamps over at Chocolate Baroque right now and I've been busy making samples with them for the Design Team blog However, here is a project that I made just for fun.

I drew a frame on a piece of watercolour paper, this is a piece of HOT pressed watercolour paper, and is very smooth. It is ideal for this type of work, as the pen flows very easily across the paper. I stamped the large flower onto the paper, and then made a mask using Eclipse paper, which I placed over the flower, once the ink was dry. I stamped the leaf image twice, and removed the mask. I stamped a couple of small dragonflies onto the background, and then filled the remaining area with the Tangle pattern Florz. I used a filler design inside the frame.

I stamped a couple more large flowers, and a butterfly image onto a spare piece of watercolour paper, and filled in some of the areas with tangle patterns. I then coloured the designs in with pencils, and cut them out before assembling the project.


I'll be showing you a few more designs using these lovely stamps over the coming days, so please  keep popping back.


Thanks for stopping by, xx
Related Posts Plugin for WordPress, Blogger...